News

"KOMPOUND" 1-PERSON HAMMOCK

News

"KOMPOUND" 1-PERSON HAMMOCK

by magease magease on Jun 24, 2020
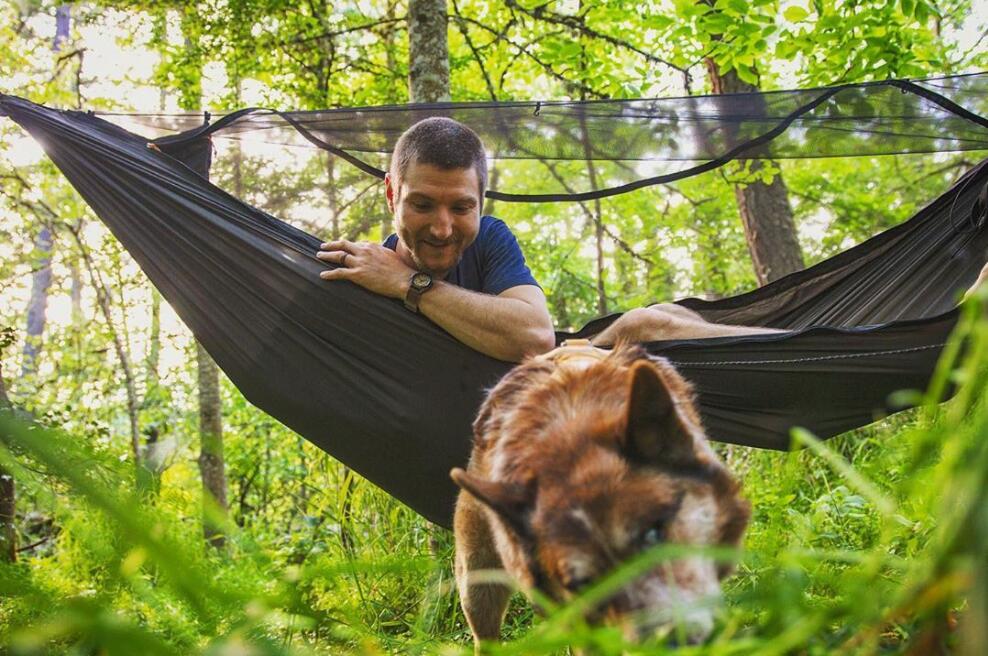
(Can't see the video? Click here to see it on YouTube.)   This single hammock with integrated bug net features a “no-see-um“ mesh and adjustable ridgline, equipped with aluminum carabiner suspension ropes and x2 10’ daisy chained 1” webbing.   The bottom is a super comfy 210t nylon webbing that can hold up to 350 lbs.   Overall size is 8.5ft*4.2ft/2.6m*1.3m, making it roomy for anyone up to 6’6” / 2m.   It packs down into an 11.8”*7.8”*3.9”/30cm*20cm*10cm stuff sack that weights 2 lbs, and can double as a ridgeline gear bag through connectable loops.     Our favorite thing about this hammock is the attached stowable insulation cover that can be stretched out as a cold air barrier in chilly weather. It’s a really creative idea to add insulation as part of the hammock construction, and you feel pretty cozy and protected against the elements while using it.   When not needed, the insulation cover can be fully stowed at your feet in an attached stow pouch.   The bug net is a fully integrated net that features a single side zip with full length double YKK© zippers.   The ridgeline has a tension clip that can be tightened or loosened depending on desired firmness and features four spring clips with hooks on them to hold gear (or the insulation cover) in place all night.     The available NIGHT PROTECTOR Under-quilt is great for colder weather camping and is available in 3-Season and Winter temperature ratings.   The Kompound Hammock from OneTigris is a steal at just $54.99, and through their website you can get a 3-season Night Protector Under-quilt and the Kompound in a set for $101.99.   This is a great option for people who might be interested in starting their hammock camping setup… all for around $100!     SPECIFICATIONS   Material: 210T Nylon Taffeta, YKK® ZippersDimensions: Compressed Size – 11.8”*7.8”*3.9”/30cm*20cm*10cmUnfolded Size – 8.5ft*4.2ft/2.6m*1.3mProduct Weight: 2lb/910gWeight Capacity: 330lb/150kgColor: OD Green   PACKAGE INCLUDES   OneTigris KOMPOUND Hammock *1Daisy Chain Strap *2Stuff Sack *1     Find it here: https://www.onetigris.com/kompound-hammock.html      Credit: TopCampingHammocks.com
ROC PONCHO SLEEPING BAG

News

ROC PONCHO SLEEPING BAG

by magease magease on Jun 24, 2020
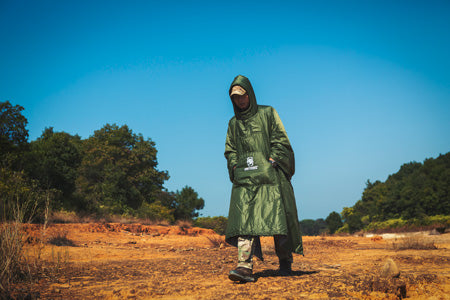
  Just the Facts:   Why Choose OneTigris ROC Poncho Sleeping Bag?   A cloak sleeping bag can be one of the most versatile piece of kit on your gear shelf. This one functions primarily as an insulated winter cloak for the day and windproof sleeping bag for the night, with extra large pockets for toasting your hands and keeping your belongings secure, and a cordstopped hood for extra windy weather. It’s made from the same material as our camping quilts with SEE® polyester filling and can be spread out as a camping blanket or configured into a hammock under-quilt. For campers slightly above average height, it measures at 6.8ft by 5.2ft when spread out, and it’s small and compact when rolled up into its own stuff sack for easy carry.   l 210T plaid dacron shell, 210T polyester pongee lining, and layered SEE® Polyester Filling for extra warmth l Multiple uses as an insulated cloak, sleeping bag, camping blanket and hammock under-quilt l Large utility pockets to keep your phone, hat and other items secure when worn as a cloak l Hood can be fastened via bungee paracord to keep the cold and wind out l Snag-free YKK® zippers with dual zipper pulls for heightened convenience and quality use l Extra wide 31.5” width when used as a sleeping bag with configurable footbox via bungee paracords l Measures at 6.8ft by 5.2ft when spread out as an outdoor quilt l Suitable for 59°F -68°F (15-20°C) temperatures       My Story:   I love a piece of gear that serves more than one use. Especially one that is lightweight and compact that can be used in a variety of situations and in a wide range of weather conditions. This is the kind of thing that finds its way to the front of my closet, and the top of my gear pile whenever I venture out. The ROC Poncho Sleeping bag by OneTigris fits this bill. It has so many uses designed into it that you can’t help but take it with you because you will use it. If you look for gear that you will use no matter what the season or situation you need to check out the ROC Poncho Sleeping Bag.   When I first heard about the ROC I was intrigued. Here was a poncho that could also be used as a sleeping bag. I will be honest the first thing that came to my mind was the woobie from my days in the infantry. To this day it is one of my favorite things every created. I got on OneTigris’ website and started reading about the ROC. Not only did it serve as a poncho for cold weather, a sleeping bag in warmer weather, but it is also set up to be used a sleeping quilt, and my personal favorite usage, as an under quilt for a hammock. Hammock camping happens to be one of my guilty pleasures, so now I was hooked. The versatility of the ROC had me really excited to get my hands on one and check it out.   My first trip out with the ROC was an elk shed hunting trip up into the mountains in early spring. I headed out of town with a buddy and our dogs to spend a weekend hiking the hills and enjoying social distancing the best way, in the great outdoors. It just so happened that this trip also happened to involve another incredible piece of gear from OneTigris, the Iron Wall Tent. When we were packing for the trip in early April I wasn’t sure exactly how to pack so I brought stuff for just about every weather situation. The weather all week was approaching 70°F, but the weekend was looking to be a bit cooler with some cloud coverage. As it turned out the weather did not disappoint, the night before our trip it snowed about 3-4 inches in the higher elevations we were planning to camp. We got to our spot Friday after work. I set up the Iron Wall Tent with a wood stove, collected up some dry wood I could find, laid out my ground cloth, sleeping pad and ROC. I have used a tipi with a wood stove a number of times on past trips and fully expected to be more than comfortable with the warmth no matter how much snow was on the ground around me. The ROC would be perfect to sleep with the additional wood heat. With camp set up we headed out for a couple hours of hiking and glassing before dark.   With no luck that evening we headed back to camp to sit around the campfire, cook some food and settle in for the night. It did not take long sitting by the fire in the cold wind waiting for our food to cook and I was grabbing the ROC poncho. I unzipped it, slipped my head through the hole and tried to figure out exactly how the straps were supposed to be used to give you a sleeve and keep the ROC near your body. This is where I failed. I could not find a comfortable way to use the side straps no matter how I tried. If I put them the way it looked like the pictures showed it being used, they restricted my movement and made it hard to reach forward. If I ran them around the front, now it opened up the sides to make them more substile to the wind. After a few minutes of fumbling without success I gave up, let the straps dangle at my sides and just let the poncho do its thing. Happy to have my upper body and legs covered and protected from the wind while watching my friend inch closer to the fire for warmth I knew this was going to become a favorite of mine.   After dinner we sat around for a little bit discussing the plan for the next day before calling it a night. I wandered back to the Iron Wall tipi, lit the stove and worked on getting it adjusted right before getting my dog set up with her bed and zipping the ROC back up and pulling the synch cords at the bottom to turn it back into a sleeping bag. I was right this bag was the perfect rating to be sleeping in a tent with wood heat. I didn’t want a 0°F bag, although I brought one with me, in a tipi that was somewhere between 70°F and 90°F ambient temperature at any given time. I dozed off into dream land and slept comfortably for the first half the night waking up every hour or two to add more wood to the stove. Somewhere around 2 am the fire in the stove completely went out before I woke to restock it. The temperature in the tent had tipped to around freezing which is what woke me. I was getting a bit of a chill, although I wasn’t freezing myself it was just bordering between being cold and being ok. I was over the convenience of the wood stove and having to keep loading it every so often. So I must admit at this point I took the ROC unzipped it and made it into a quilt, draped it over my dog to give her some warmth and climbed into the 0° sleeping bag I had brought to get through the rest of the night.   When I sleep in the outdoors, I cannot sleep in. I never can understand people that can. I am up with the sun. I wake to the light coming through the tent and the birds chirping every time. I actually enjoy it. It usually means I get an hour or two to myself to just enjoy the peace and beauty of my surroundings uninterrupted by another human. Well this morning I woke as usual but was unwilling to crawl out of my sleeping bag into the cold. I started the fire in my wood stove and lay there for a while just enjoying the heat before I decided to crawl out, put on my clothes and go start a fire in the fire pit so my friend could enjoy some warmth when he had to crawl out of his cold tent. Putting the ROC poncho back on I chopped up some kindling, started a fire and heated some water for coffee. Soon enough my friend joined me woken by the crunching of snow under my feet as I wandered around looking for dry wood. Although he appreciated the fire, he was a bit jealous of the ROC and the extra insulation it provided on this crisp morning. After downing some liquid energy, and food I put the ROC back in the Iron Wall grabbed my pack and headed out for a fun day’s hike hoping to find some elusive sheds.     This was the first experience out with the ROC and it did not disappoint. It was the perfect piece of gear to take on this trip. It kept me comfortable during the nights and provided the extra warmth to take the edge off the crisp weather when up and around camp. The ROC has found its way on a few trips since. One trip hammock camping, where as a reviewer I completely failed and didn’t get a single picture of the ROC being used as an under quilt. And it has also been of a few trips with a good friend and her son.   As soon as I pulled the ROC while camping with the two of them, they immediately starting laying claims to it. Every trip with them has gone the same. I bring the ROC and then get to sit by and watch as one of the two of them always has it in use during the most opportune times. Its usually a pretty comical battle as the two of them “fight” over who gets to use it with the 8-year-old typically winning. At this rate I am going to need to get at least one more so that I may get the opportunity to use one when camping with them.   The ROC is a great piece of gear that will be loved by everyone and will have a place on any and all camping trips that you find yourself on. OneTigris has one of the most versatile items that you never knew you needed, but once you discover it you will be thankful you made the best decision to own.           Find it here: https://www.onetigris.com/roc-poncho-sleeping-bag.html     What Could Be Done Better:   The only thing I would like to see different would be the side straps when used as a poncho. It may just be complete user error, but I would almost prefer some simple snaps or straps another configuration of the straps that still provided for full mobility. Other than that, I have nothing I would want to see any different with the ROC.     Credit: ireviewgear.com         About Johnny LeMaster   Johnny is a life long enthusiast of the outdoors. His passion and background have lead him to experience the outdoors from a multitude of adventures. You will typically find him hunting, fishing, backpacking, or hiking somewhere in the world unspoiled.
"ROCUBOID" SPLICING STOVE

News

"ROCUBOID" SPLICING STOVE

by magease magease on Jun 11, 2020
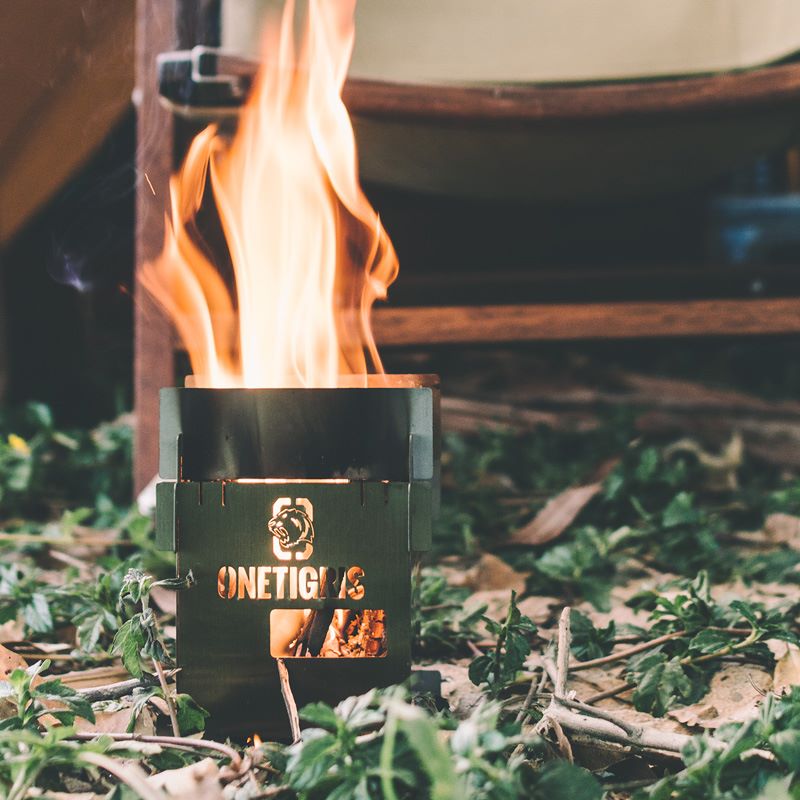
(Video Credit: Colin Russell Scottish wild camper)   Once again a highly versatile piece of kit from ROC for bushcrafters and fellow outdoorsmen to get dirty with. Constructed from premium quality #304 stainless steel, laser cut into perfection, this stove can be set up in multiple ways depending on your creativity and preference, and dismantled for easy carry like a folded treasure map. Note that it’s superior to ones seen on the market that are small, cheap, and rust easily, and this one has a nylon case to keep it protected when not in use. Use the ROCUBOID as a wood, alcohol or fuel tablet stove, windshield, Finnish/Swedish torch, or pair it up with a hanging camping pot turned to an outdoor oven. It’s a simple yet solid design that only takes a minute to set up. Get the ROCUBOID and get creative.     | Premium #304 stainless steel construction of durability and high resistance to corrosion and rust l A plethora of ways to use for setting up as a wood/alcohol/fuel tablet stove, windshield, Swedish torch and so on l Can be used with a hanging camping pot as outdoor oven kit for baking bread and other delicacies l Weighs merely 18oz (511g) and packs up small (6”*6.5”*0.5”) l Can be dismantled into separate pieces and stacked up for easy storage and efficient carry  
"IRON WALL" CHIMNEY TENT

News

"IRON WALL" CHIMNEY TENT

by magease magease on May 21, 2020
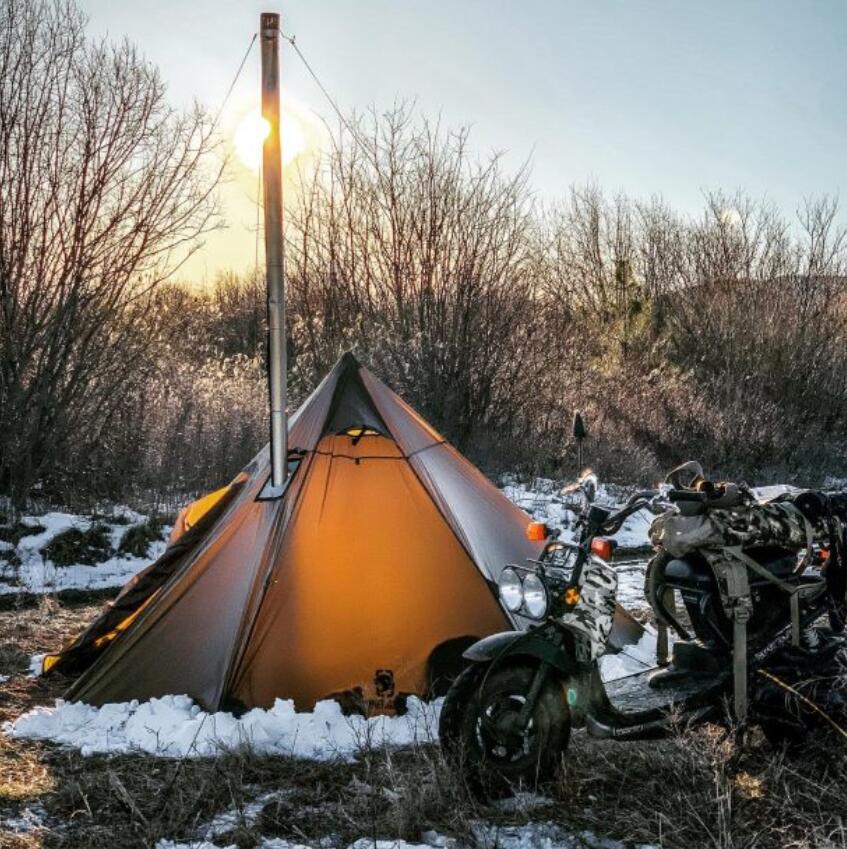
  Just the Facts:   Why Choose the IRON WALL Chimney Tent?   A heptagon-shaped (7-sided) single tent with a chimney opening for the lone roamer who knows how to immerse in nature and enjoy it to the max. Featuring a classic tipi/pyramid shape so that it’s extra lightweight and easy to setup, requiring only a single tent pole without the complicated tent-frame, and offers a solid build via its shape to stand against windy and rainy weather. Want a light and efficient way to camp out in the wild? Teepee tents are the way to do it.   l 20D silicon coated nylon fabric that’s light, durable and highly versatile l 2000mm waterproof rating with quality snag-free YKK® zippers l Double-chamber design with space to sleep one and a front room for a “fireplace” l A top opening (8.6″ by 8.6″) for a burning stove and hot flue pipe (the “chimney”) l OD-green shade for you to merge with the background and disengage completely from the city l Reinforced stress points for an extra solid build with high wind resistance l Two windows at the top for good airflow l Comes with a complete setup kit of a 5.2ft tent pole, 10 tent pegs and 4 guy-lines   Note:   1. This product does NOT come with a burning stove or hot flue pipe.2. Please purchase a stove jack to keep yourself and the campsite safe from fire hazards!3. Set up with tent pole and leave a gap on all sides for airflow to prevent dew from forming on tent walls.   Specifications:   Material: 20D Silicon-coated Nylon Fabric, YKK® Zippers Waterproof Rating: 2000mm Dimensions: Setup – 9.8ft/3m in Diameter, 5.2ft/1.6m in Height Folded – 17.7”(L)*5.5”(W)*5.5”(D)/45cm*14cm*14cm Weight: 54.6oz/1550g Color: OD Green   Package Includes   IRON WALL Chimney Tent *1 Tent Peg *10 Guy-line *4 Tent Pole * 1 Stuff Sack *1       My Story:   I have spent a little time staying in tipis when camping. I love them. The simplicity, ease of set up, lightweight, ability to use a wood stove and roominess are just a few of the features that make them so ideal for camping. They are a great shelter for use year round, and as we are getting into the start of what most consider camping season I want to introduce you to a great lightweight option that you will enjoy during these warmer months and continue to use as the temperatures start to drop again, the OneTigris Iron Wall Chimney Tent. You will find yourself taking this tipi whether car camping or making a trip into the back country carrying your essentials on your back. The OneTigris Iron Wall Tent is the ideal shelter no matter what your adventure brings.   When I received the Iron Wall Chimney Tent I pulled it out of the package in a hurry and went straight to my backyard to set it up. It took no time at all to get set up. At least the outer shell portion of the tent. The sleeping chamber area was fairly straight forward to set up as well but took a little longer. With only one mistake on where to hook the floor elastic cordage I had the shelter put together. I could not wait to get it out for use in the wilds. The Iron Wall has a double chamber design. They have a separate compartment that hangs from the outer tipi shell that is made up of a zippered bug netting area with a nylon floor that is designed to take up one half of the tipi away from the door opening, and out of the way. This leaves the front area with the stove jack opening for usage of a wood stove and storage of gear and extra firewood.   The tipi has a heptagonal shape (7 sides) and a signal center pole design. This makes for a straightforward for set up. With a few minor adjustments of the outer staking after the center pole was placed, the snug sides of the shelter work well to resist the elements. The shape of the tipi makes the shelter more aerodynamic than typical tent and shelter structures. This makes the shelter much sturdier and more comfortable in higher wind applications. The tipi's outer wall is made up of a waterproof 20D Silicon-coated Nylon fabric that gives it excellent waterproofing to keep you dry when nature the weather turns. It was time to test it out and make sure it performs as advertised.   I was able to talk a close friend into going shed hunting with me up in the mountains the following weekend. We made plans to head out as soon as we got off work on Friday to make as full a weekend of searching for the coveted elk sheds as possible. Spring weather was starting to warm everything up and thaw out the higher country. The snow looked like it had cleared enough that the roads would be passible, so we grabbed our Labrador hunting companions, packed up our gear, to include the Iron Wall, and headed out. As we gained altitude the temperatures started dropping and soon we hit the snow line. The night before our trip nature decided it would be funny to drop 3 inches of snow on our camping and shed hunting grounds. This would create more difficulty in picking fresh elk sheds out of the hill sides to say the least. I was excited to camp in the snow and try out the Iron Wall in some less then ideal conditions. I had planned ahead and brought the WinnerWell Fast Fold Titanium Camping stove with me to try out with the Iron Wall. What better weather to see how the 20D silicon coated nylon fabric tipi would work than to try it out in the snow.   I staked out the edges of the tipi, spreading the footprint out, leaving a small amount of slack as I had learned in the back yard. Once the center pole was in place and I started to reset the edge stakes I noticed that the tipi is built to not be “airtight” at the ground. When staked out there is typically a 1-2 inch gap between the ground and the start of the nylon. This was a little concerning. The winds were blowing around 15 to 20 mph, temperatures were below freezing. This gap would not do in these conditions. I started shoveling snow and piling it up around the perimeter to create a seal around the ground. By the time I finished the only breeze that entered the tent was through the two vent windows near the apex of the tipi that allowed ventilation. I decided with the cold weather creating a lack of active bugs and having my dog I would forgo the netted sleeping compartment and instead layed out a ground cloth to put my sleeping pad and dogs’ bed on. With the two of us taking up the back half of the tipi I was able to store our gear, install the wood stove and stockpile firewood to keep us warm and comfortable through the night in the front half with room to spare for easy access.   I spent the first little bit of the night constantly trying to get the wood stove adjusted just right to where I wouldn’t roast or get smoked out by trying to choke the flue too much. I finally found the happy point. With the stove glowing a nice red/purple I slept like a baby for the next few hours until I woke to restoke the stove. The Iron Wall was the ideal shelter for the winter weather. Adequate room for my sidekick and I and a warm place to rest. The aerodynamic shape of the structure kept the wind from affecting the tent. Other than hearing the wind in the trees and hearing my friends tent flapping with the gusts I all but forgot about the cold nasty weather outside our comfortable little space. After a cozy night I had a hard time wanting to leave the tipi the following morning. Honestly, if I had planned correctly and brought my percolator into the tipi to get my coffee fix I might have stayed in there much longer. But there where sheds out there somewhere that needed to be found, coffee and food that needed to be made, and beautiful country to enjoy. So in a nice warm shelter I unzipped my sleeping bag, put on clean cloths, laced up my boots and but on my coat ready to face the freezing temperatures. Having had the luxury of starting my morning warm and toasty I started a fire in the fire pit outside for my buddy to enjoy when he had to drag himself out of his bag into the 20°F weather.     At the end of the day after an incredible hike, finding a 100 foot waterfall at the bottom of a canyon not often visited by people or even known, and sadly no sheds weighing down our packs we headed back to our camp worn out from the miles and elevation gains we had put behind us. I couldn’t be more thankful for how simple the teardown and pack up of the Iron Wall was. I pulled the stakes and rolled the tipi up stuffing it into its stuff sack not being too careful about how it was packed, knowing I would hang it to dry out in my garage after getting home before packing it up for storage. It was a successful trip. Not because of the sheds we dreamt of finding but because I was able to get out and spend some much needed time in nature with a good friend. We got away from the chaos of life and successfully tryout some gear that will be a staple in my camping packing from here out. The Iron Wall lived up to the expectations of a shelter that is lightweight, durable, and can withstand inclement weather that nature threw at it.   This was not the only adventure that I took the Iron Wall on. It just happened to be the one that put the tipi through the most thorough testing to sell me on it. A few weeks later I was able to get out on a small backpack trip along the river. The lightweight, 3-1/3lbs and small pack size made the Iron Wall Tent the shelter of choice for the trip. We were in full spring at this point. The flowers were starting to bloom, the trees were getting their leaves and the bugs were coming out in force. This was the trip I would use the previously unused sleeping chamber that the Iron Wall came with.     I set camp with some friends near the river with a great overview. I chose a spot and set up the Iron Wall for myself. After getting the shell adjusted, I started to set up the sleeping chamber. I loved how simple it was to attach to the shelter. Within a few minutes and one restake of the chamber floor I was ready to set up my sleeping gear. I spent a night free from mosquitos buzzing around my head, in a rather roomy chamber impressed with just how much room there was, the trapezoidal shape gave enough room for a myself, and some gear without feeling claustrophobic. I had enough room on the bulb out portion if I had brought my dog, she would have had a spot as well.   After a few trips with the Iron Wall Tent I feel that I have had the opportunity to throw almost everything that this shelter is designed to handle and then some at it. I am sold on this quality piece of gear. OneTigris hit a home run with it. The tipi is made out of quality nylon making the tipi lightweight and waterproof, the single center pole and heptagonal shape make for a quick set up and resists the elements well. It is simple yet efficient. I can’t wait to take the Iron Wall on many more adventures. This is one piece of gear I am confident I can depend on when I need it to work.       Find it Here: https://www.onetigris.com/iron-wall-chimney-tent.html      What Could Be Done Better:   There are a few items that I would like to see be done a little different. The biggest thing that I wish this product had was a sod skirt. When camping in the high wind I was lucky that here was snow I was able to create a seal and keep the wind out. To truly make this a good 4 season shelter it would be nice to have the little extra protection around the bottom from the elements that a sod skirt provides.   The other item that could be done different is completely nitpicky. The stove jack has a precut hole for the stove pipe. Stove pipes are all a little different sized when they are put together. To accommodate this OneTigris precut a little larger hole in the stove jack. I would prefer to have a blank stove jack that I can then just to the size I need for my specific stove to seal up the hot air loss from this area.   The other thing that I think would help to take the Iron wall over the top would be to have the center pole be adjustable in length. There were a few times were I either did not have the stakes tight enough or I had them too tight. Although it is typical to readjust your stakes after placing the center pole, having the pole be adjustable would make set up just a little bit easier.   Credit: ireviewgear.com      About Johnny LeMaster    Johnny is a life long enthusiast of the outdoors. His passion and background have lead him to experience the outdoors from a multitude of adventures. You will typically find him hunting, fishing, backpacking, or hiking somewhere in the world unspoiled.    (Read original article here)
HAMMOCK CAMPING WITH A DOG

News

HAMMOCK CAMPING WITH A DOG

by magease magease on Apr 22, 2020
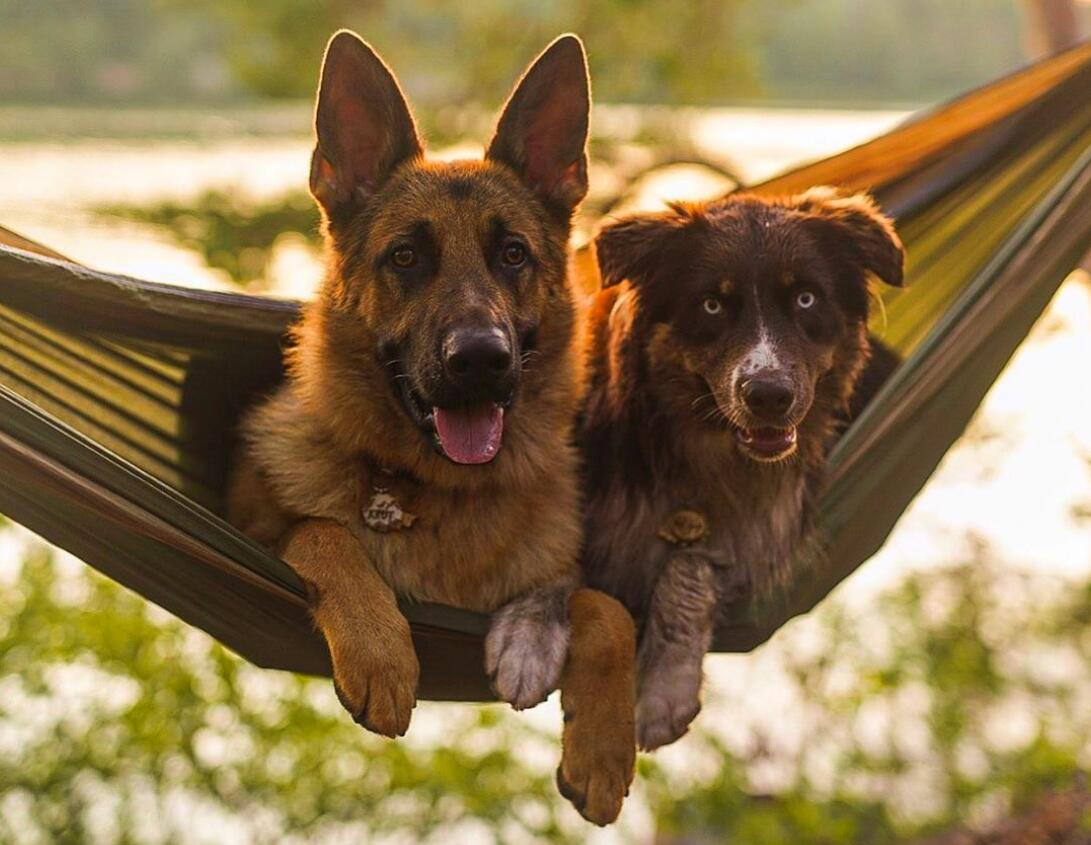
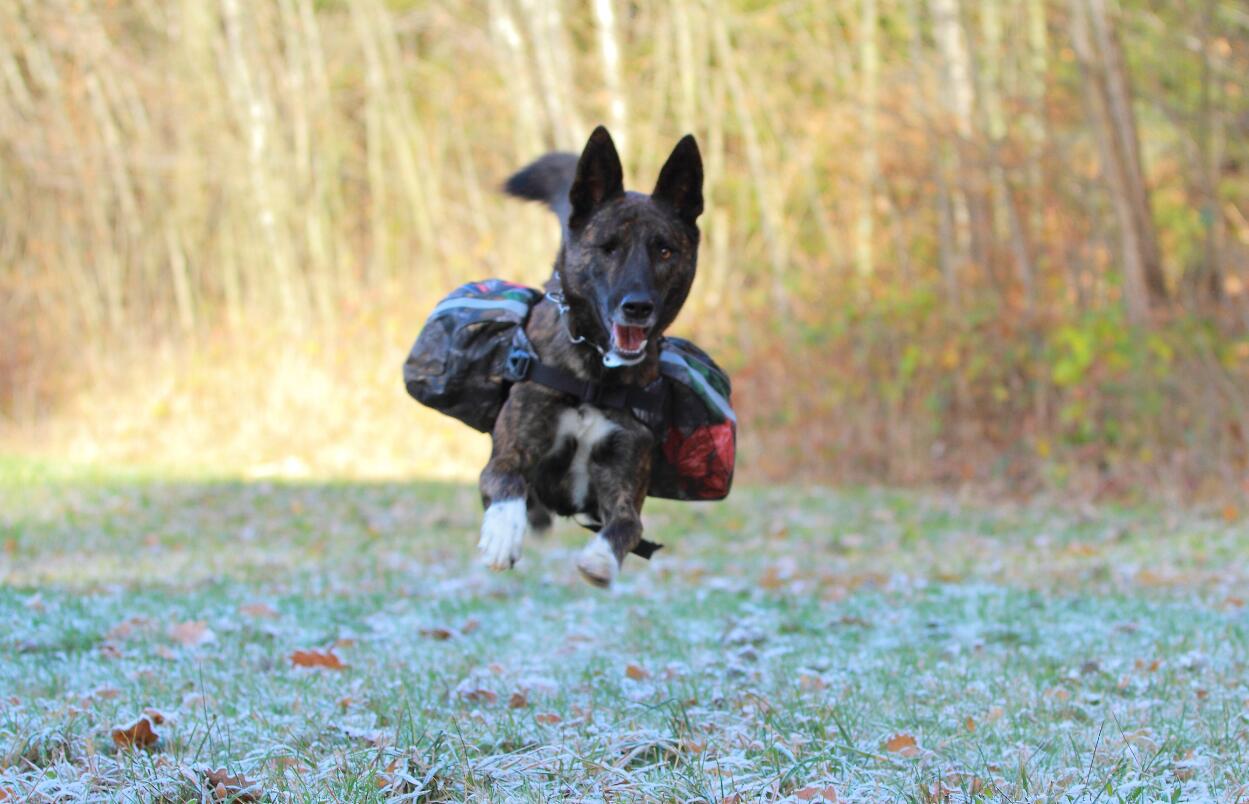
  We all know how blissful a camping experience can be in a hammock, but what about your furry best friends? Just because you don’t have a tent to share doesn’t mean that they need to be left behind! Hammock camping with a dog is entirely possible.   We’re going to cover some best practices to make sure that your four-legged buddy is more than welcome to tag along on your next hammock camping adventure.   First and foremost: Practice, practice, practice.   Dogs can pretty easily be stressed out by new situations. Especially when those new situations involve giant pieces of fabric swallowing you whole in the middle of the woods. Never fear though, if you and your doggo get set up and hang a few dry runs in the park or your backyard, it won’t seem so scary when you go to set up on your big trip!   During practice, unpack your hammock and let your dog sniff around. Let them see that your hammock isn’t that out of the ordinary. Let them watch you set it up, and make sure to involve them if they seem unsure. Puppy treats can help them to realize that hammocks are a good thing!   Once your hammock is set, sit upright and give them some pats before fully reclining out of site. Use your voice to sooth them if they’re at all nervous, and spend some time relaxing with them before you tear down.   Then set your hammock up two or three more times to make it seem routine.     Plan (and Test) Your Sleeping Arrangements.   Because of the WIDE array of dog sizes and temperaments, you should also practice sleeping (or at least napping) with your dog and hammock.   If your dog is small or medium sized and enjoys a snuggle or two, you can try them in the hammock with you. Just be sure to line the interior of your hammock with a quilt or blanket prior to lifting your dog up. Dog nails can tear through the nylon fabric as if it was nothing.   Be especially careful if you have a fancy blow-up sleeping pad they may damage.   Spend at least a few hours in your hammock with your pup in order to gain a little insight into how a night might go.   If your dog is not a fan of sharing your hammock, maybe try to give the hammock over to them completely. Let your dog spend some time in your hammock by themselves. You should know within the first 10 minutes if they are going to hate it, but if they don’t, let them spend a couple of hours just hanging out.   If your dog digs it, you might just have the coolest solution on your hands! Get your dog their own hammock, and they’ll be the talk of the trail. This can be a great solution if your dog is on the large size and seems to enjoy your hammock. Just be sure to hang their hammock as low to the ground as possible to ensure your pet stays safe during the night.   If your dog is not on board with the hammock at all, never fear. They are still more than welcome on your next big hike. There are many lightweight and packable dog beds that can be great addition to your hammock camping gear.     Combine this with a camping blanket to keep your buddy warm. This is especially important for winter hammock camping with a dog. If you need a blanket, you should probably have one for your dog as well.   Dog Hitching System   The last piece of the puzzle is your dog’s leash. It is important to keep your dog leashed during the night so that they don’t stir up the local flora and fauna.   The hitching system can be attached to your hammock’s straps or anchor points, or even to your wrist. This all depends on the temperament of your dog, and you should choose the best option for your pet. Dog Camping Harness or Backpack   Having a tactical dog harness or backpack that was made for the outdoors is also really important. OneTigris (who also makes great camping hammocks) have some REALLY high quality tactical dog harnesses, leashes, and dog camping backpacks.      Conclusion Armed with these simple tricks, you and your dog will get to enjoy all that hammock camping entails. Don’t forget to bring enough food and water for you both, pet waste bags, a dedicated bowl for your dog and a collar ID w/ vaccination. One last very important consideration… be sure to check USFS websites to verify that your dog is allowed on the trail. Many US parks have restrictions about pets and are strictly enforced.     Hammock Camping With a Dog FAQs   Q: Can my dog sleep in my hammock?A: Yep! Well, if they like it that is. Just be sure to line the inside of your hammock with a blanket or sleeping bag to keep dog claws from tearing the fabric. And try it out before setting out on a long trip.   Q: Can my dog come hammock camping with me?A: With the suggestions found in our article "How To Hammock Camp With Your Dog" you should have no problem bringing your dog along.    Credit: TopCampingHammocks.com
WHERE DO YOU GO ADVENTURING?

News

WHERE DO YOU GO ADVENTURING?

by info onetigris on Oct 25, 2019
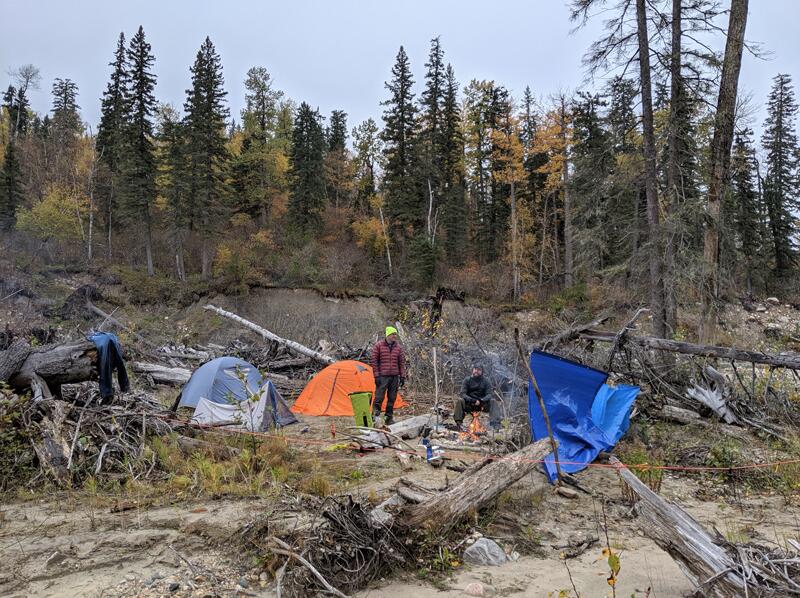
We asked ourselves the question: What's the most important element for campers? The hundred-buck-gear? The weather? Think about the word "outdoorsman". The definition is a human being in the outdoors. Many of us have a backpack, some sneakers, and a weekend to spare.   But we wonder, "Where to?"   This is how we came up with the idea of an adventure map. It doesn't have to be rocky and dangerous to be an adventure, so long as you walk into the wild and find the place that fills up your lungs with fresh air and inspiration. Take a look at some of the adventure spots around the world gathered so far, and see if you can find inspiration to venture out into the wild. Saskatchewan, Canada Justin Holdstock   "It's my favourite place in Saskatchewan to hike and camp. Unlike anywhere else in the province, it has canyons (Saskatchewan is known to be flat)! Being nested in the foothills the Rice River canyon is a one of a kind experience, forcing you to hike in (and out) all of your gear up the rocky river. Fossils, old growth trees, moss beds, black sand river banks, and ancient rocks litter the river. For the hardcore hiker, I couldn't recommend any place more exotic."   Trehörningen, Sweden Charlie Öhman   "This is a beautiful spot along the Sörmlandsleden path. It offers so much, fireplace, shelter, lake bathing and the park maintenance office even supply fire wood. The sun sets on the other side of the small lake which gives opportunity to have a gorgeous evening by the fire."  Newfoundland, Canada Chris Hillier   "Newfoundland, Canada has the lowest population density in Atlantic canada. Which makes most of the wilderness unexplored and pristine. It also has a very unique image, which tests your gear, and your skills." Keno City, Yukon, Canada Daniel   "If you want to know what it’s like traveling to the edge of civilization and then stepping beyond then Keno Yukon is the place you need to go... the unmolested views stretch over the horizon, terrain is boreal to alpine, truly one of the most amazing places you’ll ever visit... just drive a little past the sign post and start walking where the trail ends.. the only company you’ll have are the voices in your head and the native wildlife... probably the most incredible and secluded place I’ve been."   New Brunswick, Canada Tim Feetham    "This is a really great trail that spans from Fundy National Park up to Riverview NB Canada 72 km of beautiful scenery and amazing hiking. Great for anyone looking to do a 3 - 5 day hike."   Galloway Forest, Scotland Colin Russell    "I camp all around the Galloway forest every weekend, rain, hail or snow. It would be great to win one of the prizes to test out in the wilds of Scotland. I just love the great outdoors so any new equipment to help me enjoy what I love doing would be gratefully appreciated and well used, fingers crossed."    Flinders Adventures Ontario, Canada   "It’s on the river near the town I live in. It was one of the first places I camped with my wife and very quiet on a small island. It has everything you need for a fun trip including fresh water."   New Brunswick, Canada Wayne Kullcraven Russell     Hallstadt, Germany Carlos and Jessica "In Rahmen des OneTigris Campspot Contest stelle ich euch einen meiner Lieblingsplatze vor und zeige wie wir dort unser Zelt aufbauen."    Share your favorite camping/adventure spot with the rest of the world and help us to compile not just a location list, but a treasure map that motivates people to head out and enjoy the wild.   MUST READ! 1. Stay safe out there and don't jeopardize your own or others' safety!2. Follow the 7 C’s of camping: Care, Caution, Cleanliness, Common sense, Conservation, Cooperation, and Courtesy.3. All prizes are NOT exchangable and NOT refundable; standard warranty applicable.4. Contestants are limited to one submission per person.5. Submission can be for one or multiple recommended camping/adventure locations.6. Submission language not limited to English; subtitles will be highly helpful though!7. YouTube video submissions have a higher chance of getting votes and winning!8. Six weekly best submissions will be chosen by 1TG staff and announced on 10/15, 10/22, 10/29, 11/05, 11/12, 11/19.9. Three top prize winners voted by the public from best submissions from week 1-6 and announced on 11/29.10. OneTigris reserves all rights of final interpretation of event rules and its decisions.
COLORADO CAMPING SPOTS & PRICES

News

COLORADO CAMPING SPOTS & PRICES

by info onetigris on Aug 21, 2019
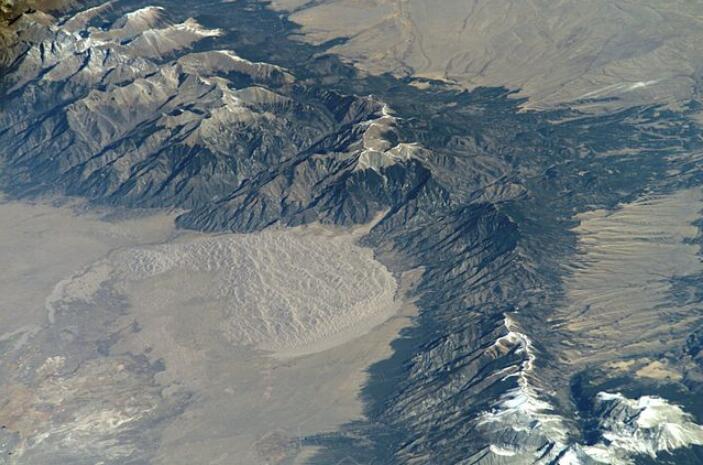
By Outdoor Union With millions of acres of national parks and forests, Colorado has everything you might need for an unforgettable outdoor experience. There are thousands of campsites in the Centennial State, both public and privately-owned. The camping season reaches a peak from early May to late September, but many campgrounds are open throughout the year. Free Tent Camping   The Great Sand Dunes National Park is home to the tallest dunes in North America. They reach up to 750 feet above the ground and extend over an area of 300 square miles. Here you can go hiking, sandboarding, or swimming in Medano Creek during the season.   As in most other states, there are many places in Colorado where you can set up a tent and camp for free. These lands are usually regulated by either the Bureau of Land Management (BLM) or the National Forest Foundation. So when you see a sign that informs you you’re entering a national forest, chances are you’ll find free campsites a few miles down the road.   If you’re looking for a free campsite at the Great Sand Dunes, the Sacred White Shell Mountain is a great choice. It’s on BLM land, about six miles south of the entrance to the park. The road to the site is bumpy and dirty, but the location is very quiet and spacious. It provides a 360-degree view of the dunes, the creek, and the San Luis Valley.   You can stay here for up to two weeks. There are few amenities available, as well. They include free access to toilets and fresh water, but you must have the National Park pass to use them. Although there’s no Wi-Fi here, you can expect very good mobile connectivity. And if you want to buy groceries, the city of Alamosa is about 20 miles away. Also, since this is public land, you should follow the first rule of outdoor etiquette and leave no trace.     State Parks   Park Fees and Reservations   The Colorado Parks and Wildlife is in charge of 42 parks and thousands of campsites across the state. All sites offer basic amenities like access to restrooms, showers, and electricity. Many also have playgrounds for kids, as well as laundry rooms. If you’re looking for a more comfortable accommodation, you can also rent a yurt or a cabin.   Most state parks charge entrance fees for vehicles, while some also charge a small walk-in fee.You can reserve your camping spot throughout the year, both by phone and online. The reservation will cost you $10, as well as an extra $6 for any changes you make afterward. This doesn’t include the camping fees, which are calculated on a per-night basis.   As such, you will pay $10 for a night at a primitive campground, or $18 to stay on a basic site. If you want a campsite with access to electricity, it will cost you $24 per night. And if you want a full hookup, you will have to pay $28 for one night. Also, during the May-September season, some camps may charge you an extra $2 per night.     National Monument   Colorado National Park   High on the Colorado Plateau, the Colorado National Monument Park strives to preserve the wildlife of the American West. Here you’ll find coyotes and bighorn sheep, as well as a number of bird species like golden eagles, jays, ravens, and red-tailed hawks. The park stretches over an area of about 32 square miles.   The National Monument Park charges an entrance fee to all its visitors. It costs $5 to enter on foot, $10 for motorcycles, and $15 for vehicles. The pass you obtain will be valid for a week. If you want to stick around a bit longer, you can also buy an annual pass for $40.   The 80-site Saddlehorn Campground offers accessible restrooms and picnic areas, as well as a bookstore. You can also go on organized field trips and attend ranger talks.       Arkansas River   The Arkansas River begins in the Rocky Mountains above Leadville and continues throughout the southeast part of the state, all the way to the Colorado-Kansas state border. The Arkansas Headwaters Recreation Area is one of the most popular tourist destinations in the country. It is primarily known for kayaking and whitewater rafting, as well as angler fishing for rainbow and brown trout.   Because the location is so popular, there are many public campgrounds where you can stay. They include the Hecla Junction Campground and the Ruby Mountain Campground with 22 campsites each, as well as the Five Points Campground with 20 campsites. All sites come with tent pads, camping tables, and fire grills. They also have access to toilets and running water, while some also have changing areas and boat ramps.     Colorado Springs Camping   About 60 miles south of Denver, Colorado Springs is the largest city in the state. It rises above Fountain Creek and stands near the base of Pikes Peak, on the edge of the Rocky Mountains.   There are about a dozen campgrounds in the area. Apart from the Cheyenne Mountain State Park, most of them are privately owned. All campgrounds have designated RV sites. But because their number is limited, it is best to reserve your place well in advance.   Dispersed Camping   With millions of acres of public land and 13 national forests, there are many great places for dispersed camping across Colorado. Also known as boondocking, this type of free camping is becoming increasingly popular. And although some may frown upon it, dispersed camping is perfectly legal.   This map shows you the exact locations where you can set up your tent or park your RV. Just click on the area you want to visit and you’ll see a full listing of campgrounds that allow boondocking.   Before you opt for dispersed camping, there are a few things to keep in mind. If you choose to camp on a BLM-managed land, you can stay there for no more than two weeks. After that, you need to move to another campsite that’s at least 30 miles away. But if you want to camp in a national forest, your campsite has to be 100 miles away from the nearest road, trail, and water source. Moreover, you should avoid areas with fragile trees, as they may fall down and hit your RV or your tent.     Colorado Springs Area   The Pike National Forest is the prime boondocking location in the Colorado Springs area. It stretches over more than a million acres of land and is surrounded by the wilderness of Mount Evans.   Here you’ll find dozens of areas that are suitable for dispersed camping. There are five in the Cimarron National Grassland and the Comanche National Grassland. The Pikes Peak Ranger District and the Salida Ranger District have 11 dispersed campgrounds each. On top of that, there are another nine locations in the South Park Ranger District, as well as further six in the South Platte Ranger District.   Lake Camping   Twin Lakes Twin Lakes is a very small place at the base of Mount Elbert in Colorado’s Lake County. You can choose to stay at one of almost a hundred state parks and privately owned RV camps.   One of the most popular choices is the White Star Campground. Managed by the US Forest Service, its visitors have access to the famous Continental Divide Trail. The amenities are fairly basic and include drinking water, as well as restrooms. If you want to fish in the lake, there is also a designated angler fishing area on the campground.     Grand Lake   The Town of Grand Lake got its name from the eponymous lake, the largest body of water in all of Colorado. There are about 70 campgrounds in the whole area, both state-operated and privately owned.   During the May-September season, most visitors opt for the state-operated Green Ridge Campground. It offers all the basic amenities, as well as campsites for families. There are plenty of recreational opportunities here. They include hiking, wildlife viewing, fishing, and horseback riding.   The campground doesn’t work outside of the season. Luckily, there are several other campgrounds to choose from. Popular options include the privately owned Elk Creek Camp with 50 sites and the Winding River Resort with almost 150 campsites.   Lake George   Lake George lies at the very heart of Colorado, almost 8,000 feet above the ground. A dam built in 1890 separates it from the South Platte River. The main attractions here include trout fishing and scenic tours of the nearby area. Visitors can also learn about the history of Colorado at the Florissant Fossil Beds National Monument, one of the largest fossil deposits in the world.   Popular campgrounds in the area include the Goosecreek Trailhead Road, the Mueller State Park, and the Badger Flats dispersed camping area.     Turquoise Lake   Turquoise Lake is a large reservoir on the Arkansas River near the city of Leadville. Known for trout fishing, as well as gold and silver mining, the city is also the home of the historic Tabor Grand Opera House. And if you’re looking for something out of the ordinary, locals believe that some infamous ghosts haunt the Delaware Hotel.   There are eight campgrounds at the Turquoise Lake, with about 270 campsites. Popular choices include the Baby Doe Campground and the Molly Brown Campground. Both have vault toilets, drinking water, as well as camping tables on each site. They only work during the season, but some private campgrounds like the Leadville RV Corral are open all year round.     Bear Lake   Bear Lake is one of the more popular destinations in northern Colorado. It is part of the Rocky Mountain National Park sits about 9,500 feet above the ground. The view of the Rocky Mountains and hikes through Colorado meadows are the main attractions here. Visitors can also fish in the lake and experience the local wildlife at the Spanish Peak Wilderness.   The Bear Lake Campground is the go-to choice for campers that visit the area. It has about 45 campsites, each with its own camping table and marked rings where you can light a campfire. Visitors also have access to toilets and drinking water. The campground is only open from May 1 to September 30.   Lake Dillon   Lake Dillon, or the Dillon Reservoir, is one of the largest freshwater reservoirs in the state. It lies between the towns of Dillon, Silverthorne, and Frisco, and serves as the main water supply for the city of Denver. One of the main tourist attractions is the Frisco Adventure Park, where you can go hiking or biking in the summer and skiing and tubing in the winter.   There are five campgrounds in the local area. They are Lowry, Prospector, Heaton Bay, Peak One, and White River. Like most public campgrounds, they all open on Memorial Day weekend and close in late September. They are 15 more sites for dispersed camping. If you want to come here in the winter, you can opt for privately owned RV camps in one of the three neighboring towns.   Crater Lake   Crater Lake is something of an undiscovered gem. When visiting the area, most people opt to go north and see the Indian Peak Wilderness, but few of them visit the lake. There are, in fact, two lakes here: the Upper and Lower Crater Lake. In the summer, this location is perfect for hiking enthusiasts, as well as those just looking for peace and quiet in nature.   There are many campsites on the Crater Lake Trail where you can set up a tent. Keep in mind that there are no amenities available, so make sure to pack anything you might need during your stay here.   RV and Car Camping   Colorado Springs   All campgrounds in the Colorado Springs area have separate RV campsites. The Cheyenne Mountain National Park can accommodate up to 51 RVs at a time and provides full electrical hookup for each of them. What’s more, the park is open throughout the year, which means that you can come here even during the winter.   There are several privately owned RV camps in the area, too. Some of them also have cabins that you can rent and offer all the amenities you may need while staying there, including Wi-Fi internet access and TV rooms. Popular campgrounds include the Garden of the Gods, Lone Duck, Fountain Creek, Goldfield, Falcon Meadow, and the Golden Eagle. Their rates and fees are comparable and range from $35 to $40 per night for a full hookup site.   State Parks   Most state parks have camping spots for RVs and other large vehicles. Their number is usually limited to about 20 or 30 per campsite. To secure your spot on time, it is best to reserve a spot at least a few weeks ahead of your arrival.   To enter a state park with a vehicle, you will need to have a park pass. You can either buy it at the park or purchase it online. The standard annual pass for a single vehicle currently costs $70 and can get you into any state park in Colorado. If you’re 64 or older, you can get it for $60, but you must provide your driver’s license or ID. But if you have two or more vehicles, you will need a pass for each of them. This will cost you $35 per RV, or $30 if you meet the requirements for a senior pass.   Daily passes are also available and cost between $7 and $9 per vehicle.     Breckenridge   Breckenridge is a small town in southern Colorado with a very illustrious history. In mid-19th century people discovered gold in the Breckenridge area on Pikes Peak, which attracted many miners to the town. This sparked a three-year Colorado Gold Rush, which ended in 1861 with the foundation of the Colorado Territory.   A full century later, in 1961, locals built the first ski trails in the town. Today, the Breckenridge Ski Resort is among the most visited ski resorts in this part of the world. It spreads across five mountain peaks and has a total of 31 ski lifts.   But the area is also very active in the summer. With numerous mountain trails, it is great for hiking and mountain biking. In fact, the town hosts many running and biking races in the summer months. The nearby lakes are also a prime destination for fly fishing enthusiasts.   Since this is a very popular location, it’s no surprise that there are almost 200 campgrounds in the town and the neighboring areas. The White River National Forest is home to many spacious campgrounds. They include Peak One, Pine Cove, and Lowry. Like many other public campgrounds, they only work during the season and stay closed in the winter.   If you’re coming to Breckenridge to ski, you can lodge at the Ski Resort. Alternatively, you can opt for dozens of RV camps in the wider neighboring area. The cozy Middlefork RV Resort has 26 campsites, each with a full electrical hookup. If you don’t mind the crowds, you can also stay at the family-owned Sugar Loafin Campground that has about 100 sites. There is also the popular Tiger Run, a luxury RV resort that can accommodate up to 200 RVs at any given time.   Winter Camping Although Colorado attracts most tourists in the summer months, it has plenty attractions to offer in the winter, too. January and February are usually the peak months of the winter season. There’s just enough snow to cover the mountaintops and create breathtaking vistas. What’s more, with fewer visitors and almost empty campgrounds, you won’t have to suffer the crowds and will have all the privacy you need.   It goes without saying that the Breckenridge Ski Resort is the most popular location in the winter. But if you don’t want to go skiing, you can see the winter wildlife of the area at the Rocky Mountain National Park. While at it, you should also visit the Gem Lake. There you can see the Continental Divide, as well as granite walls that are almost two billion years old.   There are more fascinating things to see in Colorado during the winter. Located at the Great Sand Dunes National Park, Zapata Falls is only a minor attraction in the summer compared to the dunes. But when snow covers the area, it easily steals the spotlight. Zapata Falls then tends to freeze over, creating a mindboggling, 25-foot-tall ice sculpture of sorts.   The Sylvan Lake National Park offers numerous winter activities, too. For one, you can take part in a backcountry skiing adventure, but you may need to obtain a permit first. You can also go snowshoeing and ride motor sleds across the white trails. Ice fishing is also a popular winter activity in this part of Colorado. Finally, you can also watch the local wildlife or visit the nearby White River National Forest for even more beautiful sights.   Most privately owned campgrounds in the state remain open during the winter. Unlike them, the public campgrounds at national parks and forests usually close in early October and don’t reopen until the Memorial Day weekend in May.   One of the exceptions is the Swift Puma Campground at the Cheyenne Mountain State Park. This campground is only open during the winter months, from October to mid-April. It has a total of 16 campsites, all with sewerage, running water, and electricity. The Mueller State Park is open all year round and has 134 campsites, 112 of them with full hookups for RVs and cars.   (Read Full Article)
CALIFORNIA CAMPING SPOTS & PRICES

News

CALIFORNIA CAMPING SPOTS & PRICES

by magease magease on Aug 20, 2019
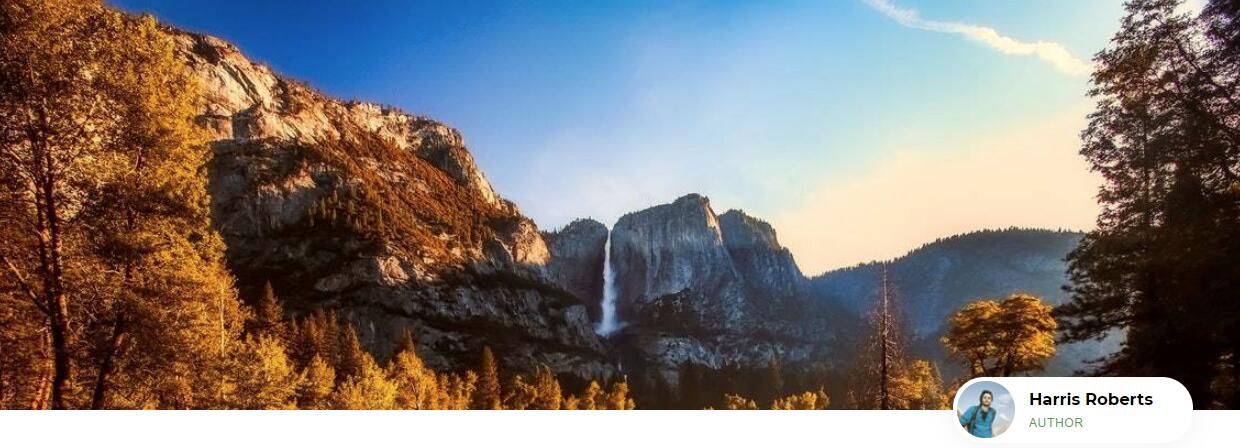
  By Outdoor Union   When it comes to camping, the Golden State has it all. With its long Pacific coastline, stretching from Mexico in the south to Oregon in the north, and mountains, redwood forests and the Mojave Desert lying in between, California’s natural beauty attracts numerous campers every year.       Beach Camping   There are many beautiful beaches in California but not all of them are fit for camping. The beaches where camping is allowed are marked appropriately and designated camping sites exist on them.   Laws and Regulations   As camping is only allowed in designated camping sites, setting up your tent just anywhere will probably attract the attention. California’s homelessness laws are strictly enforced, so the advice is to stick to beach camping sites. Here are some important rules that apply to all beach camping sites in California:   1. Campsites   All camping spots have to be reserved and paid for in advance. The maximum stay at any campsite is 30 days.   2. Waste Management   Campsites have designated disposal areas for all kinds of refuse.   3. Fire   Depending on the campsite, fires may be allowed only in designated fire circles, grills or portable stoves. Fireworks are not allowed.   4. Animals   Dogs are not allowed on the beach. Other non-grazing animals are required to be kept on a leash not longer than six feet.   Beach Camping in Southern California   Sunny Southern California is a perfect place for beach camping. The area is booming with hotels, resorts, and other conventional accommodation, so you will not find camping sites to be too crowded.   In the San Diego County, (Carlsbad) South Carlsbad State Beach Campground, Campland on Mission Bay (San Diego), and (Encinitas) San Elijo State Beach Campground are all good choices for both tent and RV camping lovers.   Los Angeles County offers a possibility of tent camping and tent cabin renting at the Catalina Island Camping site. (Malibu) Leo Carrillo State Park Campground and Dockweiler State Beach RV Park (Los Angeles) are among other beach camping options near LA’s hustle and bustle.   Huntington by the Sea RV Park and the Bolsa Chica State Beach are two RV-only camping sites in the Orange County. Doheny State Beach is tent and RV friendly, and it is a perfect choice for blues lovers as it is the site of the annual Doheny Blues Festival.   Northern California Camping   Redwood   Camping in the shade of the tallest trees in the world is possible only in this part of northern California. Here, the ancient forests are leaning on the Pacific coast promising a unique camping experience.   The Gold Bluffs Beach Campground is the only one in the Redwoods with a direct beach access. Both tents and RV’s are welcome and there are no reservations in advance. The camp is equipped with showers, restrooms, fire pits, and wind shelters.   If you are looking to see some truly big redwood trees, you should head to the banks of the Smith River. This is where the Jedediah Smith Campground is located. Fully equipped with all necessary amenities and a visitor’s center, this camp offers 86 tents and RV spots that are best reserved in advance.   Mountain   The Sierra Nevada range, the jagged volcanic peaks of the Lassen National Park, and Mount Shasta are just a few of many amazing locations where activities like hiking, rock climbing, skiing, and camping are possible.   Coast / Ocean   With a slightly colder weather compared to its southern counterpart, Northern California still offers seemingly endless options for camping near the ocean. The coastline here is anything but boring. Towering cliffs, rocky beaches, and big waves offer a stunning sight. The shade of old-growth trees is only steps away from the heat of sunlit beaches.   The most popular camping sites on the coast of northern California include the Albion River, Anchor Bay, Kirk Creek, and Gualala Point.   Lake   One well known lakeside camping destination in northern California is Lake Tahoe. Situated on the California-Nevada border, the shores of this stunning lake offer some 250 campsites equipped with showers, drinking water, and picnic tables.   Many lakes scattered around the Yosemite National Park provide amazing on-shore camping sites. The wooded shores of Shasta and Trinity lakes in the Shasta-Trinity National Forest offer everything from full hookup RV’s to tent camping in remote sites that are only accessible by foot or kayak.   Yurt Camping   Northern California is such a great destination for yurt camping that even Mongolians are thinking to give it a try. Ranging from glamping sites to more rugged, public yurts in the redwoods of the Santa Cruz Mountains, the unconventional camping experience is guaranteed. Most yurts provide bunk beds, mattresses, electrical light, and outdoor cooking amenities.   However, some of them, like the ones at the Treebones Resort, can be quite fancy. With the swimming pool and a sushi bar, these yurts can make a true camper feel spoiled just for enjoying a flushing toilet once in a while.   Dog-Friendly   All National and State parks and forests in northern California have camping sites where dogs are allowed. There are some rules, of course. Dogs have to be kept on a leash not longer than six feet at all times and are usually not allowed on forest trails, but private campgrounds usually allow dogs.   Southern California Camping   State Parks   State Parks in California are managed by the California Department of Parks and Recreation. Their main purpose is the protection of wildlife and biological diversity. However, the recreational and educational value of these parks is immense.The 280 parks are visited by more than 67 million people every year. Accordingly, many facilities have been made available to the visitors, including more than 15,000 campsites.   Park Fees and Reservations   The official website of California State Parks, www.parks.ca.gov, has all the relevant information about the park fees and camping site reservations.   The fees differ between parks, ranging from $2 to $15 in most cases. They are commonly paid daily, per vehicle. Some parks charge fees for boats or per person. Group fees and other discounts might be available, so make sure you check for those before getting there.   Many campgrounds in California’s State Parks operate on the first come, first served basis. All the information about reserving a campsite can be found on www.ReserveCalifornia.com or by telephone on (800) 444-PARK (7275). Reservations are often necessary up to six months in advance and prices may vary depending on the season.   Memorial Park   Memorial Park in the County of San Mateo is the perfect camping destination for those who appreciate the peace and serenity of the forest. Hikers will be thrilled too. The Memorial Park is proud of its two nature trails, the Mt. Ellen and Tan Oak.   The surroundings are jam-packed with old-growth redwoods, and the park is equipped with more than just basic facilities. The camp store and the visitor center are at camper’s disposal, together with two family camping areas with 158 camping sites.   Dogs are not allowed in the Memorial Park.   Point Lobos   A Pacific coastline riddled with fierce-looking rocks, towering cliffs, and big waves – that’s Point Lobos State Park in a nutshell. Still, there is more than one way to enjoy the amazing ocean views. Hiking trails along the coast offer different perspectives on the beauty of the coastal scenery. The background is filled with pines and rare, Monterey Cypress trees. Camping here is possible in one of many federal, state, county and private camping grounds.   Dogs and other pets are not allowed in the Point Lobos Natural State Reserve but they are in many of the camping grounds.     Jedediah Smith Redwoods   Jedediah Smith Redwoods camping is about the closest you can get to the sense of true wilderness while camping in a mainstream campground. Besides, the 500-year-old trees in this state park are simply humbling.   The Smith River looks extremely clean and inviting. Setting up the tent next to it is the best way to experience camping in this State Park. In total, there are 89 campsites here. Tents and RV’s are allowed, and so are black bears. So, take care of your food and get ready to do some water carrying, as there are no water hookups available.     Julia Pfeiffer Burns State Park   A movie-like landscape with great camping sites. The main attraction of the Julia Pfeiffer Burns State Park is the amazing McWay Falls. But, it doesn’t stop here. Mountains, redwoods, and stunning ocean views are all there, too. There are two, very basic but perfectly located, campsites in this state park.   If you want to enjoy the secluded serenity of this place you should be ready to bring all the supplies you’ll need with you. The car parking is half a mile away and the closest civilization is the Big Sur village (12 miles).     Crystal Cove State Park   Situated north of Laguna Beach and between the ocean and the Pacific Coast Highway, the Crystal Cove State Park covers an area of 3936 acres. Although the park lies close to urban areas, the ridges and canyons which shape the terrain, along with sandy beaches, create an illusion of a different world.   The long beach and the backcountry are great for hiking. The main campground has a capacity of 30 tent camping sites and an equal number of RV sites, without hookups. There are additional camping sites in the backcountry but those are rather rough and require bringing in all the supplies and taking out the refuse.   Pets on a leash are allowed in the camping ground but not on the beach.     Sequoia State Park   The Sequoia state park in the Sierra Nevada Mountains is the home of ancient forests. Some of the tallest trees in the world can be seen here. The giant Sequoia trees are the largest living organisms on our planet– they can grow taller than 300 feet. So, you better watch out for those falling branches and pine cones.   When it comes to camping here, the Sequoia State Park shares three year-round camping sites with the neighboring Kings Canyon. Additional eleven camping sites are available seasonally. Tents and RV’s are welcome, but there are no hookups available.   National Parks   California is the state with most National Parks in the US: nine. From the Death Valley to Yosemite, the geographical, biological, and climate diversity have made California a stunningly beautiful place.   Camping in one of California’s National parks is possible at one of the numerous camping grounds. The reliable information about the rules, directions, and available facilities can be found on the web page of the National Parks Service at www.nps.gov.   Park Fees and Reservations   Although the fees are different from park to park, in most cases, they are paid per vehicle, not per person. How much you will pay depends on whether you enter the park with a non-commercial vehicle, a motorcycle, minibus, or a coach. For those who plan to enter on foot, fees are charged per person.   The annual pass America the Beautiful can get you to all National Parks in the country for just $80 a year (price of 2018).   Reservations are available through www.recreation.gov.     Joshua Tree National Park   A true southern California wilderness. Stunning hills and rocks with a touch of Mojave Desert sprinkled with Joshua Trees. That was the nature’s recipe for the creation of this National Park. If you are looking to avoid the crowds, you should plan your visit between June and September.   There are many camping grounds scattered over the park’s area. Jumbo Rocks, has the most camping spots, 124. Black Rock and Cottonwood are the best equipped, with flush toilets, potable water, and RV dump stations. The fees for a night are $15 at Jumbo Rocks and $20 at Black Rock and Cottonwood. Reservations are necessary, except during the summer off-season.   Yosemite   More than few camping grounds exist in this gigantic National Park. It is almost as difficult to choose a camping spot as it is difficult to see everything the Yosemite National Park has to offer. From glacier-formed terrain to mountains, waterfalls, meadows and giant sequoia, everything here is to be humbled by.   Most campgrounds in the Yosemite have RV designated sites. Quite a few have tap or creek water and toilets. In the Half Dome Village and the Yosemite Valley, showers are available. During summer, even horse camping is possible. Reservations are not easy to get, as this popular destination is usually full year-round.     Redwood National Park   The Redwood is the place to experience Californian wilderness preserved in the state it was hundreds of years ago. The tallest trees in the world tower over the forty miles long coastline and wild rivers flow through the prairies and oak woods.   Camping in the Redwood National Park is a great experience. Both camping and lodging are on offer, as there are hotels within the park. A special, free permit can get you to one of the backcountry camps, but developed camping grounds at Elk Prairie, Jedediah Smith, Mill Creek, or Gold Bluffs are a more certain bet. Reservations are necessary.     Death Valley   It is actually booming with life. At first glance, Death Valley’s looks just like it sounds. But, if you explore this below-sea-level National Park further, you could be surprised. It is a landscape of scorching hot deserts, stunning oasis, and high mountain peaks covered in snow, all wrapped together.   Camping in the Death Valley is possible in one of the nine campgrounds located within the National Park as well as in a few private campgrounds around the park area. Furnace Creek is the best-equipped camping ground and the only one for which reservations are necessary. It is located at -196 feet elevation and offers a true Death Valley experience.     Sequoia & Kings Canyon   Huge trees and canyons, the name says it all. The Sequoia and Kings Canyon National Park is the testing ground for nature’s diversity. Huge mountains give way to low valleys, elevation differs significantly throughout the terrain, and deep canyons lie in the shadow of Sierra Nevada’s giant sequoia trees.   Reservations are possible for certain campgrounds, while others operate on a first come, first served basis. All the reservation information is available at www.recreation.gov.   There are no RV hookups in the park.     Lassen Volcanic National Park   A real volcanic landscape with mud pots, hot springs, and pools of boiling water. Forces that have shaped the Lassen Volcanic National Park did not hold back their creativity. This is a perfect place to see how our planet was formed through ages of volcanic activity.   Eight campgrounds exist in the Lassen Volcanic National Park. Some of these are rather primitive, but others are more developed. Camping cabins around the Manzanita Lake are very popular, and RV access is available, too.     Pinnacles National Park   The landscape that belongs to another world. Only several millions of years of fierce volcanic activity were needed to produce this wonder of nature. The San Andreas Fault cuts through this land of canyons, caves, grasslands, and forests. Hiking for the first time through the talus caves of the Pinnacle National Park is a once in a lifetime experience.   Camping here is possible in tents, group camping sites, and RV designated spots with electric hookups.   Dogs and other pets are allowed in the parking lots, paved roads, and in the camping ground.     Channel Island   Today, the coast of southern California is a bustling and modern area. The urban settlements and tourist attractions are truly overwhelming, but it was not always like this. If you would like to have a taste of how the coastline looked thousands of years ago, you should visit the isolated Channel Islands.   You can camp throughout the year on the five islands of the Channel Islands National Park. There is a campground on each of the islands. To secure your camping spot, you need to make a reservation through www.recreation.gov.   Transportation is another thing. You can arrange for a boat transfer in advance and do your best to enjoy it, because on the islands there is no transportation available. So, get ready to do some gear carrying on foot.   Free Camping   No crowds or reservations here. California is an awesome place for real outdoors lovers. Besides the many protected State Parks and National Parks, there are still some hidden parts of the Golden State waiting to be explored. The best thing about them is that they are free, and that makes it as one of the best camping in California to do and experience.   Most of these sites do not have toilets or potable water, but they are public, beautiful and give you freedom of movement through the wild. All you need to do is be a good-natured camper and take care. After all, this land is your land.   Places like Carrizo Plain, where you can meet and greet the great San Andreas Fault up close and personal, Indian Valley, Inverness Ridge, Rocky Point on the Marine Coast, and Kirby Cove beach are some of the best-kept places, all of them managed by the Bureau of Land Management.       RV Camping   The dirt roads of the Californian backcountry is where those who do not care a lot about RV hookups and even less about fees, will find their perfect camping spots. Driving your way to freedom and escaping the crowds might get some dust on your RV. But if you are a true adventure seeker, Californian back roads have plenty to offer.   The Granite Mountains in the Mojave Desert, Kennedy Meadows in the Sequoia National Forest, Lake Davis dirt roads, and Hat Creek in the Lassen National Forest are just a few of many free RV camping sites in California.   RV Camping in Northern California   RV camping is possible at most public and private camping grounds around northern California. National and State Parks allow RV’s up to a certain length to enter, and different park fees apply. This information and those regarding the availability of RV hookups are definitely worth checking in advance, before setting out on your RV camping trip.   The Humboldt County is the home of the Prairie Creek Redwood State Park. The two of the park’s campgrounds, Fern Canyon and Gold Bluffs Beach, allow smaller RV’s (24 feet). No RV hookups are available.   Bodega Bay is the destination for campers who like to park their RV’s in style. This RV camp can accommodate truly large vehicles. You can enjoy fresh seafood, play golf, and explore the beach while gazing at northern California’s stunning coastline and the Pacific Ocean.   RV Camping in Southern California   With so many things to see and visit in southern California, positioning your RV home at the right location means everything. With 22 million people, statistically, southern California appears as a crowded place. In reality, however, there are many stunning, naturally preserved areas where RV camping is allowed and where you won’t find all that many people.   Near Santa Barbara is the Ocean Mesa at El Capitan. The RV Park is fully equipped with all the facilities, and it can accommodate vehicles up to 50 feet in length. Even TV and Wi-Fi are available. The proximity of the Pacific Ocean, Santa Monica Pier, and downtown Los Angeles make this location perfect for beach lovers and urban explorers.   The Newport Dunes RV Park is located on the Newport Beach, half the way between Los Angeles and San Diego. The park grounds include 382 RV spots, a swimming pool, spa, and a laundry. This is a great spot for boating and surfing. Many restaurants are located nearby and the Catalina Island is not far away.
TEXAS CAMPING SPOTS & PRICES

News

TEXAS CAMPING SPOTS & PRICES

by magease magease on Aug 20, 2019
  By Outdoor Union    The second largest state, Texas has plenty of fascinating locations for a unique camping experience. While there are deserts and sand dunes, there’s much more to the Lone Star State. In fact, it may surprise you to learn that rivers, beaches, and canyons are the main attractions here. On top of that, there are many rare animals you can only see in Texas.   State Park Camping   Park Fees and Reservations   The Texas Parks and Wildlife Department is in charge of more than 100 parks throughout the state. Depending on their size, all parks have one or more campgrounds where visitors can set up a tent or park their RV. All campgrounds have basic amenities like toilets and running water, while many also have shower cabins, picnic tables, and campfire grills. Some also provide free wireless internet access, as well as electricity to power up air-conditioning and TVs in camping vans.   To enter a Texas state park, you will need to pay an entrance fee. But you won’t have to pay the fee if you have a valid Texas State Park Pass. An annual pass will cost you $70 and allows all the passengers in your vehicle to enter any public park in the state. For $25, you can get an extra pass for a family member. The only requirement is that both of you live at the same address. Free passes are also available to seniors, veterans, as well as disabled people.   Of course, if you plan to camp at a state park, you will also have to pay the camping fee. The usual fees start at $10 per night for primitive camping and $15 for equestrian camping. These basic fees don’t cover any amenities, so you will have to bring potable water with you. If you want access to running water, you will have to pay $15 per night. Campsites with electric hookups start at $20. Some campgrounds also have premium offers with cable TV and sewerage for your RV.   Rules   While staying at Texas state parks, you must follow the seven C’s of camping. They include care, caution, cleanliness, common sense, conservation, cooperation, and courtesy.   This is important, as many Texas state parks contain sites and objects of cultural, historic, environmental, or archeological value. As such, you must make sure not to damage them or harm them in any way. If you do, on purpose or by accident, the State of Texas has the right to bring up criminal charges against you.     Big Bend   The Big Bend Ranch State Park is the largest state park in the entire state. It stretches over an area of 311 thousand acres and has a 23-mile front along the Rio Grande. Here you’ll also find Madrid Falls, one of the highest waterfalls in all of Texas. It is thus no surprise that river rafting is the most popular activity in the park. But with almost 250 miles of hiking trails and about 70 miles of dirt roads, there are lots of other things to see and experience.   There are many rare animals here, including the desert bighorn sheep, cougars, bobcats, and western mastiff bats. Rare birds include the zone-tailed hawk, golden eagle, and the peregrine falcon. You will also likely encounter multiple species of woodpeckers and owls, as well as jackrabbits, coyotes, and gray foxes.   Popular camping destinations near the park include the Chisos Basin Campground with 60 sites and the Cottonwood Campground with 24 sites. The Rio Grande Village RV Campground can provide full electrical hookup for up to 25 vehicles. If you don’t reserve your place in advance, a handful of campsites are available on a first come – first served basis.     Beach   If you’ve seen a few old-school westerns, you may think that Texas is just an endless desert. But that’s far from the truth. The Lone Star State is home to some of the most beautiful beaches in the country.   The Padre Island National Seashore is probably the most fascinating. This little island on the shore of the Gulf of Mexico hosts the very rare Kemp’s ridley sea turtle.    Galveston Island is another popular location on the coast of the Gulf of Mexico. Camping fees for this location range from $15 for a basic tent camping experience to $25 for a premium spot on the beach.   Finally, there’s the Sea Rim State Park tucked away in the southeast corner of the state, also on the Gulf shore. It has about a dozen campsites with electricity, as well as options for camping on your boat. The overnight rates range from $10 for tents to $20 for boats.       Free Tent Camping   Beach   The North Beach campground on the Padre Island National Seashore is a great place to park your RV and set up a tent. While the place is rather noisy, it’s all because of the winds and the waves. There are no amenities, but you can fill up water bottles at the nearby Malaquite Campground. If you want to take a shower, you can do so for free at the park, but you’ll have to walk a few miles to get there. You can stay here for up to 14 days. And if you run out of food, the city of Corpus Christi is about 15 miles away.   For a more peaceful experience, you can camp at Magnolia Beach on the Lavaca Bay. The beach is very spacious, thus allowing for extra privacy. You can swim, kayak, or fish in the bay. The area is also home to many bird species, which is why many visitors choose bird-watching as their pastime activity. Like North Beach, this camp doesn’t offer any electrical hookups for RVs, but it does have showers and toilets. If you need to run errands, the nearest city is Port Lavaca.   Whichever destination you choose, make sure not to set up your tent too close to the water. Consider this a safety measure, as the tides here can rise very high.     RV Camping   Free camping in Texas isn’t only available to tent campers and backpackers. Several campgrounds also allow you to camp for free in your RV. But if you opt to do it, you should keep in mind that there are usually no amenities included. As such, you must pack supplies of bottled water, trash bags, and figure out how to maintain personal hygiene during your stay.   If you’re traveling to Texarkana, you can stay at the Jackson Creek campground on the Wright Patman Lake. Each campsite includes a picnic table and a campfire ring. You will also have access to a joint restroom, but there is no potable water on the premises. You can stay here for up to 14 days within a 30-day period.   The Steele Creek Park campground on Lake Whitney in central Texas has 20 free RV campsites. Like the Jackson Creek campground, these are all operated by the US Army Corps of Engineers.   All campgrounds near Lake Meredith allow you to camp for free, too. For RV camping, the Sanford-Yake campgrounds and Fritch Fortress are a good choice. They both offer basic amenities like grills, shade shelters, and camping tables, as well as access to restrooms with drinking water. There are also plans to make another 10 RV campsites with full electric hookups later this year.   Other options include the Coleman RV Park in Brownfield, Yoakum County Park in Denver City, and the Hugo Point County Park in Cove. As a rule, these parks usually limit your free stays to five days, so they are perfect for short breaks during your trip. What’s more, some of them also provide full electrical hookups and wireless internet access.   State Parks   All state parks in Texas have campgrounds that can accommodate RV campers. But unless you’re camping in a free area, you will have to pay for your stay. The prices are calculated on a per-night basis. As a rule, most campgrounds offer three options. You can opt for a basic camping experience with no amenities for about $10-15 per night. If you want access to electricity, it will cost you about $20.       Texas Hill Country   The Texas Hill Country stands at the very end of the American Southwest. It is the meeting point of West Texas, South Texas, and Central Texas. This region is best known for its numerous caverns, as well as being home to the US-native desert palm tree.   There are dozens of campgrounds in the area, all equipped to accommodate RV campers. Popular options include the following state parks: Blanco, Guadalupe River, and Lake Brownwood. The US Army Corps of Engineers has several campgrounds. They include the Cedar Breaks Park, Jim Hogg Park, Cranes Mill Park, as well as the Potters Creek Park. There are another 30 campsites at the Lost Maples State Natural Area.   Only two private options are available in the area. The Canyon of the Eagles Resort charges $45 per night for RV camping. If you choose to stay at the Mountain Breeze Camp, it will cost you $20 a night per person and an extra $10 for water and electric hookup.     Concan   The town of Concan in the Hill Country is a perfect destination for outdoor enthusiasts. Here you can hike at the Lost Maples State Natural Area, go biking at the Garner State Park, or swim and kayak in the Frio River.   You can opt to park your RV on one of the many campgrounds at these state parks. If you’re looking for a privately owned RV park, the Parkview Riverside RV Camp is the only game in town. The camp provides a breathtaking view of the Garner State Park and the Frio River. Here you’ll get all the premium amenities you’d expect, like electric hookups, cable TV, and Wi-Fi internet access. The camp is open all year round and charges fairly standard rates for privately owned RV resorts.     Gulf Coast   The Texas Gulf Coast is very popular among tourists looking for a relaxing camping experience near the beach. There are many national parks along the coast, all with their own RV-ready campgrounds. They include the Brazos Bend State Park, Goose Island State Park, Lake Corpus Christi State Park, and the Mustang Island State Park. You can choose between a basic RV site and one with a fully electric and water hookup.   Other popular options include the Coleto Creek Park, Whites Park, and the Padre Balli Park. They are all operated by local authorities and can provide premium amenities to RV campers.   Primitive Camping in Texas   There are many primitive camping locations in Texas. Pretty much all national and state parks have primitive camping sites a few hundred feet away from official campgrounds.   You will usually find these primitive campsites on the sides of dirt roads. For example, there are several sites at the Guadalupe River, Big Bend, and the Big Thicket National Parks and Preserves. You’ll also find plenty of them in the Rio Grande Wild and Scenic River area. Moreover, you can set up camp in any national forest and grassland throughout the state.   (Read Full Article)
BLACK ORCA® BACKWOODS BUNGALOW UL SHELTER REVIEW #1

News

BLACK ORCA® BACKWOODS BUNGALOW UL SHELTER REVIEW #1

by info onetigris on Jun 20, 2019
Hi All, Here are a couple links to YouTube videos I did on the Backwoods Bungalow. The first link is the overnighter I did to try it out. The second link is a video review I did of the tent. >>> Go to YouTube >>> Go to YouTube Overall, I really enjoyed this shelter and will continue to use it for upcoming trips. It just feels really cozy and versatile, which I love.   The points that I noticed where the tent could be improved are:   1) The side vents ought to be redesigned so that they provide more protection in the event of heavy rain. You could maintain the mesh if you had a hood shaped cover with something to prop it open. Here's a picture of something like this that I found online. 2) The loop and toggle system for holding the mesh door up needs to be a little longer. I struggled a bit to close them. Even another inch of material would be enough.   That's all I have for now. Other than those two minor things, I really enjoyed the design and function of this tent! Great work to everyone at OneTigris and all the people in the design collaboration. I think this was a great concept and I hope it does really well for you!   Let me know if you need anything else!   Darian   Credit: @PikeOutside, 1TG
HOW TO SURVIVE A FOREST FIRE

News

HOW TO SURVIVE A FOREST FIRE

by info onetigris on Jan 05, 2019
Extensive studies and research have proven that wildfires are occurring five times more often in the recent decades; such forest fires also burn six times the land area when compared to past occurrences and also tend to last much longer. According to scientific researches, climate change and global warming are the two main culprits to be blamed for the sudden increase in frequency and intensity of wildfires. Any responsible hiker must prioritize fire safety during hiking, no matter the season. What Causes a Forest Wildfire? Forest fires can erupt due to natural causes like friction due to the rubbing of trees or lightning that further causes combustion of debris. It can also happen due to human actions like smoking and cooking the forest. A larger percentage of forest fires happen due to human neglect Forest fires are based upon something known as the fire triangle. A forest fire needs heat, oxygen, and fuel to spread. Destroying the supply of any one of these elements will help extinguish the forest fire. Forest fires can be classified into three main categories based the part of the forest in which they occur. Ground fires occur at the ground level, beneath the branches Surface fires can be about 1.3 meters high Crown fires generally spread through treetops. These are very dangerous. They might be fuelled by surface fire. Controlling the Wildfire Ground fires are usually controlled by digging trenches Surface fires can be effectively managed via firebreaks A crown fire is probably the hardest to extinguish. You might need fire retardant chemicals as well as the help of professional firefighters. For convenience, fire safety while hiking can be divided into four main phases. 1.  Before You Hit the Trail  Always asses the wildfire threat level of a hiking destination as well as the fire restrictions in place at the site. Campfires carry a high-risk factor and hence might be banned at several campsites. Always consult the official before setting up campfires in a vegetated area. Stoves that use natural fuels like wood and twigs carry greater risk if causing fire eruptions in forests. Therefore it is better to opt for liquid, canister stoves. If you are visiting a high-risk zone, make sure you prepare and keep a wildfire kit handy Make sure you keep nonperishable food, bottled water, face masks and fire extinguishers in your emergency wildfire survival kit Choose a backpack that is made from a nonsynthetic, fire resistant material while visiting high-risk zones. Avoid taking pets or children to high-risk zones Avoid smoking in campsites Carry a detailed map of the campsite with accurate information of water sources; canyons cleared land, etc. Make sure you carry the top 10 hiking essential with you, in case of emergency. These include navigation (map and compass),sun protection (sunglasses and sunscreen), insulation (extra clothing), illumination (headlamp/flashlight), first aid supplies, waterproof matches or lighter, repair kit and tools, extra food, extra water, whistle, and mirror, camera Make sure you camp next to a clearing or water source while camping in high-risk zones Keep the camping group small in high-risk zones Wear non-synthetic clothes that will keep you safe in case a wildfire breaks out When buying lanterns for your hiking trip, select electric lanterns over gas powered ones. 2. There’s a Wildfire, What Now?  Despite all precautions, you find yourself in the midst of a slowly yet surely growing wildfire. Here is a list of things you can do to save yourself, should something like this happen. Do not take any chances. The fire outbreak might look small and manageable at first, but high winds can cause the embers to spread rapidly. So rather than trying to control the fire, call the emergency helpline numbers and evacuate the campsite as soon as possible. Always be on the lookout for any visual signs of smoke, red glow or smell of smoke. Always travel upwind, i.e., against the direction the wind and downhill in case of a wildfire outbreak. Never move through canyons, passes or congested routes. These tend to direct heat towards you. Never try to outrun a wildfire; it might just be the last race of your life Avoid staying in areas with dry vegetation Try to find natural or man-made fire breakers like cleared land, road , stream or fire lines made by authorities. 3. Worst Case Scenario: What if get caught in a wildfire? Should all the stars be aligned against you on that fateful day, you watch your nightmares turn real and find yourself surrounded by a wildfire; here are a few things that might save your life. Try not to breath in the smoke. It will lead to suffocation If possible, cover your mouth with a wet cloth Make sure your clothes are at all times dry If you have found a safe zone, stay there till the wildfire is over. Do not panic and try to exit the forest until the fire is extinguished Make sure you protect your body with non-synthetic clothing that does not catch fire easily. Stay away from synthetic materials Lie face down with your feet towards the fire Immediately call for help Try to stay calm, panicking will not help you The main cause of deaths during a wildfire is the inhalation of smoke and gases. Cover your body and make sure you do not inhale the hot gases Dig a hole and plant your face inside it to avoid inhaling the gases. Stay clear of overhead branches Move towards an area that has already been burnt and abandoned by the fire. 4. After you survive the Wildfire Let’s say you have done the impossible and survived the wildfire, now what? While planning an escape route, make sure only to include places that have already been burnt down. Once the fire has moved past where you are standing, carefully assess the situation and find an escape route. If the place you are at is free of vegetation, then stay there until help comes. Seek professional help immediately after reaching the nearby town You might have unnoticed burns, or you could have inhaled the smoke, both of which needs to be adequately assessed by a doctor Victims of traumatic experiences such as getting caught in a wildfire tent to suffer from anxiety disorders like PTSD If you or anyone you know who has recently survived a wildfire is experiencing symptoms such as insomnia, depression, and anxiety, make sure to consult a psychiatrist. Being a Responsible Hiker If you are an ardent backpacker or hiker, you might be a seeker of adventure. Hiking is a sure shot way to better your health. But we must always keep in mind that it is also important to be responsible and restraint from acts that might put your life and others at risk. A large percent of wildfires erupt entirely due to human neglect. Actions, like cooking carelessly or smoking at campsites, have all been identified as causes of wildfires in the past. All it takes is a spark to build a wildfire. We must also keep in mind the great losses of wildlife and vegetation we endure as a result of forest fires. Credit: Riderstrail
FROM A FILE TO A KNIFE

News

FROM A FILE TO A KNIFE

by info onetigris on Jan 05, 2019
From a File to a Knife - For Dummies Like Me My apologies first: This is not a tutorial on forging or even on decent knife-making. Nope, this is just for the guys like me that wants to tinker, make something useful and feel happy about it. Unlike real knife forging, what I do is to take away metal from a strip of steel until it looks like a knife and until it can cut reasonably well. The trouble I used to have is to find metal that will stay sharp and is reasonable to work with. We all know a file is hard – really hard. So it will stay sharp very long but it WILL break when abused and it is a real pain to work with because it eats abrasives when you try to shape it.   What to do, what to do?   Allow me to walk you through some tips that work for me: Start with an old file, a broken file or just go buy a cheap file at the hardware-shop. Below is a piece of a file that was left after an experiment, I’ll use this to illustrate the first and probably most important step: heating. Before throwing it in the oven it is a good idea to clean it with a wire-brush to remove old metal shavings or rust. With the metal somewhat more shiny, we can get the oven ready. What oven? That one in the kitchen - be it grill or hot-air. You really do not need more than that old Defy next to the kitchen zink.   What we want is a temperature of 204 degrees Celcius (give or take) or 400 degrees in Fahrenheit. Pre-heat the oven and set it for 2 hours.   After this you will notice the metal has changed color from grey to a golden caramel color. It is a good idea to do this before shaping the file because this treatment will make the metal slightly less hard, less brittle (it is more difficult to break or crack) and allround tougher. Plus it will be a lot easier to grind and shape. It still might not be a good idea to try and file because it might ruin your file, but feel free to try.   Does it need to be cooled in oil or water? Nooo…just let it rest at room temperature till you can handle it by hand. As reference here is a comparison between a normal file and the heated one – notice the color change?   What happens when you heat it too much? Well if you get to the point where it becomes blue or purple, you have created scrap-metal. Without a forge you have no way of repairing what has now become a useless metal piece so be careful when grinding – take it slow! Just for fun and good science I heated it for you guys to show you the nice color you DO NOT WANT TO SEE on your knife. Now you have a piece of metal to play with. How you shape your knife really is up to you and what you have as tools in your shed. I advise a 125mm (5”) angle-grinder, a bench vice or clamps to hold the metal in place, a Dremel is very handy, a wetstone of sorts and/or sandpaper with a 600 grain.   It is handy to fold the sanding paper on a rectangular piece of wood of around 100mm (4”) by 50mm (2”) and say 25mm (1”) thick and use this to sharpen your knife. Feel free to use a finer grid paper, but in reality you are good with 600-grid. I find one of those flappy-discs handy to smooth the sides (bevel) of the blade. I’m not going to tell you how to use your tools or what shape to make the blade into, just go with what you feel and enjoy the process.   Again please take it slow with the grinder because you do not want to heat things too much. (watch out for the pointy bits where the metal is thin because that seems to heat up much- much faster than you might think. When is your knife sharp?   This question is what bugged me for some time and I experimented quite a lot so here’s my non-scientific and non pro tip; After you have shaped your bevel into something that looks like a cutting edge and you are ready to sharpen your knife. Start with one side and smooth it on your wetstone or sanding paper. Stay on that one side until you are happy that it is smooth and it has a straight and flat edge. A tip is to start with strokes length-wise along the side – this will ensure you have a flat surface. When you are comfortable with keeping a steady hand you may try the more usual side to side movement we are all familiar with and have seen in countless clips.   When this one side is done, flip the blade over and get going until the cutting edge starts to feel like business…Go ahead and test it with your finger, we all do it! Does it feel sharp? Awesome! Does it cut a piece of meat or whatever? Great! But can it be sharper? Can it cut paper, can it shave your arm-hair? Well?   Back to that wetstone/paper. After some time you might test it again with your thumb and @#$%! it is not as sharp as it was!!! Well…well done! What has happened is that the cutting edge has made a small fold. Have a look at the picture. This is an exaggerated view of what happened with your blade – THIS IS A GOOD THING!   Flip your blade to the other side and very lightly run that part over your wetstone. (Yea "stropping" is done with leather or porcelain or the polishing wheel of your Dremel but a simple light stroke on the stone really will work the trick.)   This will give you a blade as sharp as it will get.   Remember this is NOT a stainless-steel blade so it WILL rust and stain, but it really do make a very robust and handy tool so treat it as such and be proud of what you made.
HOW TO BRAID PARACORDS ON GEAR

News

HOW TO BRAID PARACORDS ON GEAR

by info onetigris on Nov 18, 2018
A buddy asked me how I braid the handles of my bags and why, so I decided to do a little tutorial. Not a video, because it is a pain to stop-rewind-play to get that ONE detail you missed. I took pics of the important steps that will get you going on your braiding way and help you untangle some of the tricks to it.   Oh why I braid? Apart from it looking good, I feel it makes for and easier carrying bag with a wider strap and softer feel. So let us pretend this orange strap in the photos is the handle of your bag. How would you start? Well let us decide what paracord to use first and then get an idea how much of it we will use. I use 550 Paracord type 3 – the 550 is how much weight it can handle in pounds. This cord is +/- 4mm thick and easy to work with. How much will you use? There are formulas but so many variables so let me just say that 5m is enough. I usually take a bit more than I may use and just cut off what I do not use – paracord really is cheap enough … (And for handles it is also easy enough to join two lengths of off-cut should you need a bit extra cord.)   In pic 3 you can see I joined two lengths of different color cord, I recommend you use one length and let my “joint” be the middle of your length of cord. For the tutorial it is easier to have two colors to show where the ropes go… Start with the cord under and over your strap (this “strap” can really be anything you want to wrap in cord). The braid I’ll use is the Cobra-weave, probably the most common of paracord braiding “knots” and the most recognizable. You can see I have the black cord “under” and the gray cord “over” the strap. From here on a little sentence I repeat: “Over, under the strap and through the eye.” (Yea sounds kinda kindergarden, but it WORKS!) Pic 5 is the “over” part of your sentence. Pic 6 is the “under the strap and through the eye” part. Now here is another little “trick”: See the “bulge” the black cord does in pic 7 on the left side of the strap? That is you next sentence and a handy reference should you become “lost” along the way.   This is your “over, across and under” sentence. (If you manage to bungle your weaving, just untie the cord till you have this little bulge again and then repeat the sentence…)   Pic 8 “Over, across and under.” Under the black cord that is.   Pic 9 “Over, under and through the loop”.   That is black cord over the gray cord, under the strap and through the loop of the gray cord on the opposite side. Tada! Your first pass… Now pull it nice and tight to give you what you see in Pic 10   You will notice the “bulge” is now on the right hand side of the strap. (Yup this will go on like this – left right, left right so it is easy to follow…) So after repeating this a zillion times you end up with a bit of a weave – Pic 11.   By now you have sworn a bit at the cord getting tangled while weaving so here is another tip: You will notice the gray cord always follow the one path of “over across and under” so I just bunch it up to keep it compact and easy to handle. The black cord is the one you get to thread and pull through every time to you need to keep that cord tidy…   With only 5m of cord this is not much of a deal, but if you are adventurous and start on some project that use 30m of cord you are in for a wild time.   So let us pretend this is the end of the strap. See each pass have been pulled nice and tight and bunched up kinda neat. After inspecting your work and relaxing your fingers it is time to cut the ends. You will always end with one end being longer than the other – this is normal. You will notice sometimes the inner core of the cord pops out a bit – this is also normal and you can just trim it a bit with scissors or a knife. I found that where you join two cords it was not always very neat and came up with a way to hide this joint: SHRINK-WRAP! (The kind you use to insulate electrical joints.) Cut a piece of 10 to 15mm and slip it over one end of the cord. Do it NOW or you WILL forget this till after you made the joint – you have been warned.Now it is TIME…to burn your fingers that is. Melt the two ends of the cord with your lighter. It is better not to allow it to ignite the cord but I did it just for “effect”. Do not be afraid that things will cool down too fast – you really do have enough time to do this. Join the two melted ends (try to keep it neat and straight) if you are brave enough you might roll the joint between your fingers to get it flat and in shape (It really does not burn that much). Slip your piece of shrink-wrap over the joint (the piece I used was a bit too short, but you get the idea.) Reach for that lighter again. A word of caution: you do not want to melt or ignite this shrink-wrap so keep the flame some distance away – the heat will let the wrap shrink around the joint. There is the joint nicely wrapped. While it is hot you can give it a bit of and arch by pulling at it. I just hook my finger in the loop and pull, but be careful because the wrapped part would retain some heat and it might burn a bit… and then you have your wrapped handle done! Keep the loop at the end compact – it is a good place to hang a carabiner shackle or key-ring.Here you can see why a bit longer wrapping would have covered the piece of cord that got melted. Source: PacoWarabi (YouTube) Credit: Sandspoor, OneTigris LiFE Ambassador
HAMMOCK CAMPING IN THE FRANKONIAN BACKCOUNTRY

News

HAMMOCK CAMPING IN THE FRANKONIAN BACKCOUNTRY

by info onetigris on Sep 22, 2018
In theory, a hammock under-quilt allows for better insulation because it hangs a few centimeters below your hammock, not compressed by your bodyweight. The under-quilt also covers both sides of the hammock, providing extra insulation and protection from cold wind. As if by fate, my friend Sebastian called one day and asked if I wanted to join him on a 2 day hiking trip, and I needed to test the OneTigris 3-season Hammock Under-quilt. On the first day of the trip, we hiked until the afternoon in great weather. We wanted to find a good campsite soon because it is much more comfortable to set up a hammock in daytime or it’s easy to miss the perfect pair of trees. Eventually we found a matching spot on a light slope to set up both our hammocks and also to provide cover to hide from officials. Sadly speaking, wild camping is not allowed in Germany and the penalties are costly. The new camo tarp and my coyote brown hammock really helped me to stay hidden. Between the thick vegetation and especially under low light conditions the setup can hardly be noticed from 50 meters away. The setup of the tarp and new hammock under-quilt went smoothly. I was careful to make sure there wasn’t too much tension on the under-quilt. When it was time to sleep, I got in my hammock and the first thing I noticed after about one minute was that my back was warmer than usual. During the next 30 minutes, it got even more comfy in the hammock and I wasn’t cold at all. I slept really well and Sebastian woke up before I did to film me while I slept like a baby. So you can say I am a big fan of hammock under-quilts now! Until next time, Carlos and Leo   Tip from Carlos: One thing people ask me all the time about hammock camping where to put their backpack and their shoes. My suggestion is to tie your backpack to the next tree and use a rain jacket to protect it from rain. I always put some sticks in the ground right next to my hammock and hang my shoes there. This keeps the shoes dry and within easy reach. Credit: Carlos, Germany
A GOOD FRIEND, THE ENGLISH COUNTRYSIDE & MY ONETIGRIS GEAR

News

A GOOD FRIEND, THE ENGLISH COUNTRYSIDE & MY ONETIGRIS GEAR

by info onetigris on Sep 22, 2018
It was late July 2017, after a successful but tiring day of hiking myself and my good friend decided to set up camp in a secluded woodland. We soon had the fire lit and had a few beers to celebrate finding such an idyllic area to spend the evening.      Eventually we staggered to our respective hammocks and I fell into a blissful sleep…that was until about 2am, I awoke to a BLOOD CURDDLING SCREAM coming from beneath my friend’s tarp! With it being pitch black and myself still being slightly tipsy I struggled to escape my sleeping bags embrace and fell out of my hammock landing on a heap on the floor! With my friend still screaming I eventually escaped my temporary captivity and preformed the most impressive commando roll even Steven Seagal would’ve nodded in appreciation. As I came out of this feat of superhuman athletic ability I saw my OneTigris first aid pouch and grabbed it so that I may assist my buddy with whatever trauma he may find himself in (still screaming). I cross the 10 meters between us in one leap and stick my head under his tarp, what do I see?   No blood, no wild animals…just him, head torch on still in his sleeping bag swatting at the thousands of ants that were covering him and his gear! I’ve never seen such fear in a man’s eyes! I of course immediately started laughing, eventually I helped him escape this torture and helped him shake out the ants and set up in a different location!   Luckily the only injuries suffered were some bruises from my fall and my friend’s pride! Although my OneTigris first aid pouch wasn’t needed it was there when I thought my friend was close to death and is a constant companion for all my adventures!   Thanks, OneTigris! Credit: James Richards, Survival Dads
TIPS FOR PICKING THE MOST RELIABLE CAMPING MATTRESS

News

TIPS FOR PICKING THE MOST RELIABLE CAMPING MATTRESS

by info onetigris on Aug 24, 2018
Camping can be a time of joy and relaxation, but with one condition: you take the right type of gear! You should also calibrate it according to your trip style because you don’t want to be carrying an unnecessarily heavy backpack up a steep trail!   But I was a beginner camper and adventurer once and I know how easy it is to overpack. With this in mind, I think it’s best to guide you towards choosing one of the most important pieces of equipment you’ll ever need in a tent: the camping mattress.   Consider the Make (aka Construction)   You’ll find countless designs on the market, but at the base of them all, there are only three main categories of mattresses (or pads).   The Closed Cell StructureThis one’s basically a sheet of foam with air trapped in each cell to provide some cushioning. It is lightweight, and you can simply hook it up to your backpack, but it is rather bulky if you want to put it inside. It’s also not much of a comfort-maker and it won’t keep the coldness of the ground from creeping into your sleeping bag during the night.I like to use this type of a pad for some extra cushioning and insulation on top of an air mattress. Also, it’s nice to have something to sit on during the day. The Self-Inflating DesignAnother foam design, but with open cell structure this time, self-inflating pads can be rather comfortable. Besides the fact that they are bulky and don’t compress too much, I find them perfect for sleeping in a tent or under the stars (depending on your preferences). Air PadsFinally, these are the luxurious models of camping pads since they provide both good comfort and insulation. The downside is that it’s rather difficult to inflate them (if you don’t want to carry a pump around).So, if you want to make sure you’re getting the best camping air mattress, it should be a model from this category.   Compactness   As I already mentioned, size is an important factor when you have to carry all your tools in a backpack. Therefore, you should first check if your pad folds out or if it can be compressed into a small bag and only afterward think about comfort.   If the pad has a protective cover that’s waterproof, you can simply plate the pad on top of the backpack and secure it using some paracord or a strap. However, if it’s too big, it may become a hindrance as you move through trees or hike on tight trails.   Weight & Size   If it’s designed for camping, a pad will never be too heavy. But, any experienced hiker and camper know that even 100g over your weight limit can become difficult to stomach when you’re tired and still have a few miles to hike.   So, before you decide on taking a new pad, make sure you know your limits. If not, better stick with the weight you know you can manage!   In terms of size, most pads are designed for one or two people. However, if you’re going as a couple or a family, everyone should be carrying their own pad (assuming the kids are old enough to hike and carry their own backpack).   Resistance   There is no way to predict the accidents that may happen on a hiking or camping trip, but you can avoid some of them by thinking ahead. For instance, an air pad may get punctured which means you won’t be able to use the entire surface for your comfort (the air is distributed in several chambers).   On the other hand, both the self-inflating design and the closed-cell one are a lot more resistant to punctures.  This information is important for you to make the right decision when choosing the best pad.   Credit: Will
3 SEASON SCREEN TENT REVIEW

News

3 SEASON SCREEN TENT REVIEW

by info onetigris on Aug 18, 2018
I enjoyed this mesh tent so much. It is very lightweight, and sets up really fast. I really like the tensioning system for the tent pegs. I put a OneTigris tarp over top and set it up like a Whelen tent that allowed cool breezes to flow from the creek all night long.  I had my headlamp on all night long and I never got bit by a single bug lol. I would love to have a ground cloth to fit the bottom. It would be so freaking awesome if you guys could come up with something like that for a Whelen setup. They look like the old Baker's tents anyway, but I'm getting off the subject lol. I loved it and I'm looking forward to more summertime trips. Oh yeah and I didn't wake up all sticky like other tents.  The only thing I can think of is a zipper in the front in addition to the ones on the side. Maybe a ground sheet and a little bag sewn in for odds and ends out of your pocket while you're sleeping. It is a perfect tent for hot weather and without the tarp got a beautiful view of the sky.  Credit: @jayson parker, 1TG
WATER-RESISTANT CAMPING BAGS REVIEW

News

WATER-RESISTANT CAMPING BAGS REVIEW

by info onetigris on Jul 09, 2018
More pictures on my Facebook review. These OneTigris bags are amazing! They are lightweight, water resistant. I have tested them by submerging them and only a little hole at the top of the zipper let's water in. Other than that they're almost completely waterproof. They come clean very easily. If you get them in mud. Bag #2 would be awesome if you can add a strap to the bag. It is now my emergency kit for my jeep. I keep a emergency backpack inside just in case I need to grab it. The bag is so amazing it holds almost everything that I need for survival. I would recommend these bags to anybody and they're a great price. If you have any questions, comments, or concerns please ask and I will do my best to answer. Make sure you remember the rule of three's 3 minutes without air, 3 hours without shelter, 3 days without water, and 3 weeks without food.  Credit: @jayson parker, 1TG
CAMOTREE WATERPROOF TARP REVIEW

News

CAMOTREE WATERPROOF TARP REVIEW

by info onetigris on Jun 06, 2018
The Ideal Hammocking TarpA few wet nights walking the South Downs Way gave me the ideal opportunity to test The OneTigris tarp.You may not have heard of OneTigris but I’m sure you will be hearing a lot more of them in the future. I have had a few small OneTigris items and always found them to be high-quality pieces of kit.Camo Waterproof Tarp I was looking at the OneTigris website and saw this tarp. It is not a square or a rectangle but a hexagon which means that it can have a 4m. ridgeline which tapers down. This means that the tarp can cover the head and foot of your hammock with the minimum amount of material.My first impressions when the tarp arrived was that it was a very lightweight (just over 510g.) but the 15D ripstop nylon fabric with dual silicone coating looked strong.It comes with a carrying bag, 6 red guy lines with reflective speckles (3mm x 4m), 6 black guyline adjusters and 6 red aluminium Y-stakes. The Y stakes are small and have a hole in the top through which I threaded thin paracord to make them easier to pull out of the ground.The ridgeline has three tabs as well as two tabs at each end. This is more than most tarps and makes it more versatile. There is a seam running the length of the ridgeline and it is not taped or seam sealed which made me wonder how waterproof it would be. I noticed later, on the website, that OneTigris recommends using seam seal. I did not have time to do this before my trip.The camo reminded me of Auscam and the colours are quite light.My walk was going to be quite discreet so I exchanged the reflective cord for green paracord. I took the Y stakes as I knew they would be almost completely hidden in the ground and I could further hide them with leaf litter.On my first night, I encountered a badger on my way to my chosen bivi site. I set up in the rain. Set up was easy and I was soon undercover. As I lay in my hammock I really appreciated the 4m length which completely covered me, giving total protection from the rain. I was slightly worried that I had not had time to use seam seal. Would I stay dry throughout the night?I needn’t have worried. After a good nights sleep, I woke up completely dry, as was all my kit.The second night, also raining, I evaluated the effectiveness of the camo. I think the best camo for northern temperate woodland in summer is the no longer issued DPM – in the dry at least. When it wets out it gets very dark and becomes less effective. The multi-cam designs, including the British MTP are always a compromise. I was really surprised at how well the OneTigris camo performed, particularly against the leaf litter and with light filtering through the canopy. The colour hardly changed when the fabric got wet and in fact improved. Again I remained completely dry.Conclusions: Because of its innovative design this is the best tarp for use with a hammock I have used or seen on offer anywhere else. The tarp performed brilliantly but I will seam seal it just to give myself the confidence that it will perform perfectly when exposed to prolonged heavy rain over several days. The tarp is hemmed with a tough, black material which strengthens the tarp but is not camo. I will let you know how it fares over time. But for the moment I can thoroughly recommend this tarp. Look at all the other good stuff they have on the website https://www.onetigris.com/ Credit: @Ravachol, 1TG
"RAIN FLY" CAMPING TARP REVIEW (VIDEO)

News

"RAIN FLY" CAMPING TARP REVIEW (VIDEO)

by info onetigris on Jun 06, 2018
Credit: @UglyTent, 1TG  OneTigris SLEDGEHAMMER Sling Pack  Credit: @UglyTent, 1TG