News

CALIFORNIA CAMPING SPOTS & PRICES

News

CALIFORNIA CAMPING SPOTS & PRICES

by magease magease on Aug 20, 2019
  By Outdoor Union   When it comes to camping, the Golden State has it all. With its long Pacific coastline, stretching from Mexico in the south to Oregon in the north, and mountains, redwood forests and the Mojave Desert lying in between, California’s natural beauty attracts numerous campers every year.       Beach Camping   There are many beautiful beaches in California but not all of them are fit for camping. The beaches where camping is allowed are marked appropriately and designated camping sites exist on them.   Laws and Regulations   As camping is only allowed in designated camping sites, setting up your tent just anywhere will probably attract the attention. California’s homelessness laws are strictly enforced, so the advice is to stick to beach camping sites. Here are some important rules that apply to all beach camping sites in California:   1. Campsites   All camping spots have to be reserved and paid for in advance. The maximum stay at any campsite is 30 days.   2. Waste Management   Campsites have designated disposal areas for all kinds of refuse.   3. Fire   Depending on the campsite, fires may be allowed only in designated fire circles, grills or portable stoves. Fireworks are not allowed.   4. Animals   Dogs are not allowed on the beach. Other non-grazing animals are required to be kept on a leash not longer than six feet.   Beach Camping in Southern California   Sunny Southern California is a perfect place for beach camping. The area is booming with hotels, resorts, and other conventional accommodation, so you will not find camping sites to be too crowded.   In the San Diego County, (Carlsbad) South Carlsbad State Beach Campground, Campland on Mission Bay (San Diego), and (Encinitas) San Elijo State Beach Campground are all good choices for both tent and RV camping lovers.   Los Angeles County offers a possibility of tent camping and tent cabin renting at the Catalina Island Camping site. (Malibu) Leo Carrillo State Park Campground and Dockweiler State Beach RV Park (Los Angeles) are among other beach camping options near LA’s hustle and bustle.   Huntington by the Sea RV Park and the Bolsa Chica State Beach are two RV-only camping sites in the Orange County. Doheny State Beach is tent and RV friendly, and it is a perfect choice for blues lovers as it is the site of the annual Doheny Blues Festival.   Northern California Camping   Redwood   Camping in the shade of the tallest trees in the world is possible only in this part of northern California. Here, the ancient forests are leaning on the Pacific coast promising a unique camping experience.   The Gold Bluffs Beach Campground is the only one in the Redwoods with a direct beach access. Both tents and RV’s are welcome and there are no reservations in advance. The camp is equipped with showers, restrooms, fire pits, and wind shelters.   If you are looking to see some truly big redwood trees, you should head to the banks of the Smith River. This is where the Jedediah Smith Campground is located. Fully equipped with all necessary amenities and a visitor’s center, this camp offers 86 tents and RV spots that are best reserved in advance.   Mountain   The Sierra Nevada range, the jagged volcanic peaks of the Lassen National Park, and Mount Shasta are just a few of many amazing locations where activities like hiking, rock climbing, skiing, and camping are possible.   Coast / Ocean   With a slightly colder weather compared to its southern counterpart, Northern California still offers seemingly endless options for camping near the ocean. The coastline here is anything but boring. Towering cliffs, rocky beaches, and big waves offer a stunning sight. The shade of old-growth trees is only steps away from the heat of sunlit beaches.   The most popular camping sites on the coast of northern California include the Albion River, Anchor Bay, Kirk Creek, and Gualala Point.   Lake   One well known lakeside camping destination in northern California is Lake Tahoe. Situated on the California-Nevada border, the shores of this stunning lake offer some 250 campsites equipped with showers, drinking water, and picnic tables.   Many lakes scattered around the Yosemite National Park provide amazing on-shore camping sites. The wooded shores of Shasta and Trinity lakes in the Shasta-Trinity National Forest offer everything from full hookup RV’s to tent camping in remote sites that are only accessible by foot or kayak.   Yurt Camping   Northern California is such a great destination for yurt camping that even Mongolians are thinking to give it a try. Ranging from glamping sites to more rugged, public yurts in the redwoods of the Santa Cruz Mountains, the unconventional camping experience is guaranteed. Most yurts provide bunk beds, mattresses, electrical light, and outdoor cooking amenities.   However, some of them, like the ones at the Treebones Resort, can be quite fancy. With the swimming pool and a sushi bar, these yurts can make a true camper feel spoiled just for enjoying a flushing toilet once in a while.   Dog-Friendly   All National and State parks and forests in northern California have camping sites where dogs are allowed. There are some rules, of course. Dogs have to be kept on a leash not longer than six feet at all times and are usually not allowed on forest trails, but private campgrounds usually allow dogs.   Southern California Camping   State Parks   State Parks in California are managed by the California Department of Parks and Recreation. Their main purpose is the protection of wildlife and biological diversity. However, the recreational and educational value of these parks is immense.The 280 parks are visited by more than 67 million people every year. Accordingly, many facilities have been made available to the visitors, including more than 15,000 campsites.   Park Fees and Reservations   The official website of California State Parks, www.parks.ca.gov, has all the relevant information about the park fees and camping site reservations.   The fees differ between parks, ranging from $2 to $15 in most cases. They are commonly paid daily, per vehicle. Some parks charge fees for boats or per person. Group fees and other discounts might be available, so make sure you check for those before getting there.   Many campgrounds in California’s State Parks operate on the first come, first served basis. All the information about reserving a campsite can be found on www.ReserveCalifornia.com or by telephone on (800) 444-PARK (7275). Reservations are often necessary up to six months in advance and prices may vary depending on the season.   Memorial Park   Memorial Park in the County of San Mateo is the perfect camping destination for those who appreciate the peace and serenity of the forest. Hikers will be thrilled too. The Memorial Park is proud of its two nature trails, the Mt. Ellen and Tan Oak.   The surroundings are jam-packed with old-growth redwoods, and the park is equipped with more than just basic facilities. The camp store and the visitor center are at camper’s disposal, together with two family camping areas with 158 camping sites.   Dogs are not allowed in the Memorial Park.   Point Lobos   A Pacific coastline riddled with fierce-looking rocks, towering cliffs, and big waves – that’s Point Lobos State Park in a nutshell. Still, there is more than one way to enjoy the amazing ocean views. Hiking trails along the coast offer different perspectives on the beauty of the coastal scenery. The background is filled with pines and rare, Monterey Cypress trees. Camping here is possible in one of many federal, state, county and private camping grounds.   Dogs and other pets are not allowed in the Point Lobos Natural State Reserve but they are in many of the camping grounds.     Jedediah Smith Redwoods   Jedediah Smith Redwoods camping is about the closest you can get to the sense of true wilderness while camping in a mainstream campground. Besides, the 500-year-old trees in this state park are simply humbling.   The Smith River looks extremely clean and inviting. Setting up the tent next to it is the best way to experience camping in this State Park. In total, there are 89 campsites here. Tents and RV’s are allowed, and so are black bears. So, take care of your food and get ready to do some water carrying, as there are no water hookups available.     Julia Pfeiffer Burns State Park   A movie-like landscape with great camping sites. The main attraction of the Julia Pfeiffer Burns State Park is the amazing McWay Falls. But, it doesn’t stop here. Mountains, redwoods, and stunning ocean views are all there, too. There are two, very basic but perfectly located, campsites in this state park.   If you want to enjoy the secluded serenity of this place you should be ready to bring all the supplies you’ll need with you. The car parking is half a mile away and the closest civilization is the Big Sur village (12 miles).     Crystal Cove State Park   Situated north of Laguna Beach and between the ocean and the Pacific Coast Highway, the Crystal Cove State Park covers an area of 3936 acres. Although the park lies close to urban areas, the ridges and canyons which shape the terrain, along with sandy beaches, create an illusion of a different world.   The long beach and the backcountry are great for hiking. The main campground has a capacity of 30 tent camping sites and an equal number of RV sites, without hookups. There are additional camping sites in the backcountry but those are rather rough and require bringing in all the supplies and taking out the refuse.   Pets on a leash are allowed in the camping ground but not on the beach.     Sequoia State Park   The Sequoia state park in the Sierra Nevada Mountains is the home of ancient forests. Some of the tallest trees in the world can be seen here. The giant Sequoia trees are the largest living organisms on our planet– they can grow taller than 300 feet. So, you better watch out for those falling branches and pine cones.   When it comes to camping here, the Sequoia State Park shares three year-round camping sites with the neighboring Kings Canyon. Additional eleven camping sites are available seasonally. Tents and RV’s are welcome, but there are no hookups available.   National Parks   California is the state with most National Parks in the US: nine. From the Death Valley to Yosemite, the geographical, biological, and climate diversity have made California a stunningly beautiful place.   Camping in one of California’s National parks is possible at one of the numerous camping grounds. The reliable information about the rules, directions, and available facilities can be found on the web page of the National Parks Service at www.nps.gov.   Park Fees and Reservations   Although the fees are different from park to park, in most cases, they are paid per vehicle, not per person. How much you will pay depends on whether you enter the park with a non-commercial vehicle, a motorcycle, minibus, or a coach. For those who plan to enter on foot, fees are charged per person.   The annual pass America the Beautiful can get you to all National Parks in the country for just $80 a year (price of 2018).   Reservations are available through www.recreation.gov.     Joshua Tree National Park   A true southern California wilderness. Stunning hills and rocks with a touch of Mojave Desert sprinkled with Joshua Trees. That was the nature’s recipe for the creation of this National Park. If you are looking to avoid the crowds, you should plan your visit between June and September.   There are many camping grounds scattered over the park’s area. Jumbo Rocks, has the most camping spots, 124. Black Rock and Cottonwood are the best equipped, with flush toilets, potable water, and RV dump stations. The fees for a night are $15 at Jumbo Rocks and $20 at Black Rock and Cottonwood. Reservations are necessary, except during the summer off-season.   Yosemite   More than few camping grounds exist in this gigantic National Park. It is almost as difficult to choose a camping spot as it is difficult to see everything the Yosemite National Park has to offer. From glacier-formed terrain to mountains, waterfalls, meadows and giant sequoia, everything here is to be humbled by.   Most campgrounds in the Yosemite have RV designated sites. Quite a few have tap or creek water and toilets. In the Half Dome Village and the Yosemite Valley, showers are available. During summer, even horse camping is possible. Reservations are not easy to get, as this popular destination is usually full year-round.     Redwood National Park   The Redwood is the place to experience Californian wilderness preserved in the state it was hundreds of years ago. The tallest trees in the world tower over the forty miles long coastline and wild rivers flow through the prairies and oak woods.   Camping in the Redwood National Park is a great experience. Both camping and lodging are on offer, as there are hotels within the park. A special, free permit can get you to one of the backcountry camps, but developed camping grounds at Elk Prairie, Jedediah Smith, Mill Creek, or Gold Bluffs are a more certain bet. Reservations are necessary.     Death Valley   It is actually booming with life. At first glance, Death Valley’s looks just like it sounds. But, if you explore this below-sea-level National Park further, you could be surprised. It is a landscape of scorching hot deserts, stunning oasis, and high mountain peaks covered in snow, all wrapped together.   Camping in the Death Valley is possible in one of the nine campgrounds located within the National Park as well as in a few private campgrounds around the park area. Furnace Creek is the best-equipped camping ground and the only one for which reservations are necessary. It is located at -196 feet elevation and offers a true Death Valley experience.     Sequoia & Kings Canyon   Huge trees and canyons, the name says it all. The Sequoia and Kings Canyon National Park is the testing ground for nature’s diversity. Huge mountains give way to low valleys, elevation differs significantly throughout the terrain, and deep canyons lie in the shadow of Sierra Nevada’s giant sequoia trees.   Reservations are possible for certain campgrounds, while others operate on a first come, first served basis. All the reservation information is available at www.recreation.gov.   There are no RV hookups in the park.     Lassen Volcanic National Park   A real volcanic landscape with mud pots, hot springs, and pools of boiling water. Forces that have shaped the Lassen Volcanic National Park did not hold back their creativity. This is a perfect place to see how our planet was formed through ages of volcanic activity.   Eight campgrounds exist in the Lassen Volcanic National Park. Some of these are rather primitive, but others are more developed. Camping cabins around the Manzanita Lake are very popular, and RV access is available, too.     Pinnacles National Park   The landscape that belongs to another world. Only several millions of years of fierce volcanic activity were needed to produce this wonder of nature. The San Andreas Fault cuts through this land of canyons, caves, grasslands, and forests. Hiking for the first time through the talus caves of the Pinnacle National Park is a once in a lifetime experience.   Camping here is possible in tents, group camping sites, and RV designated spots with electric hookups.   Dogs and other pets are allowed in the parking lots, paved roads, and in the camping ground.     Channel Island   Today, the coast of southern California is a bustling and modern area. The urban settlements and tourist attractions are truly overwhelming, but it was not always like this. If you would like to have a taste of how the coastline looked thousands of years ago, you should visit the isolated Channel Islands.   You can camp throughout the year on the five islands of the Channel Islands National Park. There is a campground on each of the islands. To secure your camping spot, you need to make a reservation through www.recreation.gov.   Transportation is another thing. You can arrange for a boat transfer in advance and do your best to enjoy it, because on the islands there is no transportation available. So, get ready to do some gear carrying on foot.   Free Camping   No crowds or reservations here. California is an awesome place for real outdoors lovers. Besides the many protected State Parks and National Parks, there are still some hidden parts of the Golden State waiting to be explored. The best thing about them is that they are free, and that makes it as one of the best camping in California to do and experience.   Most of these sites do not have toilets or potable water, but they are public, beautiful and give you freedom of movement through the wild. All you need to do is be a good-natured camper and take care. After all, this land is your land.   Places like Carrizo Plain, where you can meet and greet the great San Andreas Fault up close and personal, Indian Valley, Inverness Ridge, Rocky Point on the Marine Coast, and Kirby Cove beach are some of the best-kept places, all of them managed by the Bureau of Land Management.       RV Camping   The dirt roads of the Californian backcountry is where those who do not care a lot about RV hookups and even less about fees, will find their perfect camping spots. Driving your way to freedom and escaping the crowds might get some dust on your RV. But if you are a true adventure seeker, Californian back roads have plenty to offer.   The Granite Mountains in the Mojave Desert, Kennedy Meadows in the Sequoia National Forest, Lake Davis dirt roads, and Hat Creek in the Lassen National Forest are just a few of many free RV camping sites in California.   RV Camping in Northern California   RV camping is possible at most public and private camping grounds around northern California. National and State Parks allow RV’s up to a certain length to enter, and different park fees apply. This information and those regarding the availability of RV hookups are definitely worth checking in advance, before setting out on your RV camping trip.   The Humboldt County is the home of the Prairie Creek Redwood State Park. The two of the park’s campgrounds, Fern Canyon and Gold Bluffs Beach, allow smaller RV’s (24 feet). No RV hookups are available.   Bodega Bay is the destination for campers who like to park their RV’s in style. This RV camp can accommodate truly large vehicles. You can enjoy fresh seafood, play golf, and explore the beach while gazing at northern California’s stunning coastline and the Pacific Ocean.   RV Camping in Southern California   With so many things to see and visit in southern California, positioning your RV home at the right location means everything. With 22 million people, statistically, southern California appears as a crowded place. In reality, however, there are many stunning, naturally preserved areas where RV camping is allowed and where you won’t find all that many people.   Near Santa Barbara is the Ocean Mesa at El Capitan. The RV Park is fully equipped with all the facilities, and it can accommodate vehicles up to 50 feet in length. Even TV and Wi-Fi are available. The proximity of the Pacific Ocean, Santa Monica Pier, and downtown Los Angeles make this location perfect for beach lovers and urban explorers.   The Newport Dunes RV Park is located on the Newport Beach, half the way between Los Angeles and San Diego. The park grounds include 382 RV spots, a swimming pool, spa, and a laundry. This is a great spot for boating and surfing. Many restaurants are located nearby and the Catalina Island is not far away.
TEXAS CAMPING SPOTS & PRICES

News

TEXAS CAMPING SPOTS & PRICES

by magease magease on Aug 20, 2019
  By Outdoor Union    The second largest state, Texas has plenty of fascinating locations for a unique camping experience. While there are deserts and sand dunes, there’s much more to the Lone Star State. In fact, it may surprise you to learn that rivers, beaches, and canyons are the main attractions here. On top of that, there are many rare animals you can only see in Texas.   State Park Camping   Park Fees and Reservations   The Texas Parks and Wildlife Department is in charge of more than 100 parks throughout the state. Depending on their size, all parks have one or more campgrounds where visitors can set up a tent or park their RV. All campgrounds have basic amenities like toilets and running water, while many also have shower cabins, picnic tables, and campfire grills. Some also provide free wireless internet access, as well as electricity to power up air-conditioning and TVs in camping vans.   To enter a Texas state park, you will need to pay an entrance fee. But you won’t have to pay the fee if you have a valid Texas State Park Pass. An annual pass will cost you $70 and allows all the passengers in your vehicle to enter any public park in the state. For $25, you can get an extra pass for a family member. The only requirement is that both of you live at the same address. Free passes are also available to seniors, veterans, as well as disabled people.   Of course, if you plan to camp at a state park, you will also have to pay the camping fee. The usual fees start at $10 per night for primitive camping and $15 for equestrian camping. These basic fees don’t cover any amenities, so you will have to bring potable water with you. If you want access to running water, you will have to pay $15 per night. Campsites with electric hookups start at $20. Some campgrounds also have premium offers with cable TV and sewerage for your RV.   Rules   While staying at Texas state parks, you must follow the seven C’s of camping. They include care, caution, cleanliness, common sense, conservation, cooperation, and courtesy.   This is important, as many Texas state parks contain sites and objects of cultural, historic, environmental, or archeological value. As such, you must make sure not to damage them or harm them in any way. If you do, on purpose or by accident, the State of Texas has the right to bring up criminal charges against you.     Big Bend   The Big Bend Ranch State Park is the largest state park in the entire state. It stretches over an area of 311 thousand acres and has a 23-mile front along the Rio Grande. Here you’ll also find Madrid Falls, one of the highest waterfalls in all of Texas. It is thus no surprise that river rafting is the most popular activity in the park. But with almost 250 miles of hiking trails and about 70 miles of dirt roads, there are lots of other things to see and experience.   There are many rare animals here, including the desert bighorn sheep, cougars, bobcats, and western mastiff bats. Rare birds include the zone-tailed hawk, golden eagle, and the peregrine falcon. You will also likely encounter multiple species of woodpeckers and owls, as well as jackrabbits, coyotes, and gray foxes.   Popular camping destinations near the park include the Chisos Basin Campground with 60 sites and the Cottonwood Campground with 24 sites. The Rio Grande Village RV Campground can provide full electrical hookup for up to 25 vehicles. If you don’t reserve your place in advance, a handful of campsites are available on a first come – first served basis.     Beach   If you’ve seen a few old-school westerns, you may think that Texas is just an endless desert. But that’s far from the truth. The Lone Star State is home to some of the most beautiful beaches in the country.   The Padre Island National Seashore is probably the most fascinating. This little island on the shore of the Gulf of Mexico hosts the very rare Kemp’s ridley sea turtle.    Galveston Island is another popular location on the coast of the Gulf of Mexico. Camping fees for this location range from $15 for a basic tent camping experience to $25 for a premium spot on the beach.   Finally, there’s the Sea Rim State Park tucked away in the southeast corner of the state, also on the Gulf shore. It has about a dozen campsites with electricity, as well as options for camping on your boat. The overnight rates range from $10 for tents to $20 for boats.       Free Tent Camping   Beach   The North Beach campground on the Padre Island National Seashore is a great place to park your RV and set up a tent. While the place is rather noisy, it’s all because of the winds and the waves. There are no amenities, but you can fill up water bottles at the nearby Malaquite Campground. If you want to take a shower, you can do so for free at the park, but you’ll have to walk a few miles to get there. You can stay here for up to 14 days. And if you run out of food, the city of Corpus Christi is about 15 miles away.   For a more peaceful experience, you can camp at Magnolia Beach on the Lavaca Bay. The beach is very spacious, thus allowing for extra privacy. You can swim, kayak, or fish in the bay. The area is also home to many bird species, which is why many visitors choose bird-watching as their pastime activity. Like North Beach, this camp doesn’t offer any electrical hookups for RVs, but it does have showers and toilets. If you need to run errands, the nearest city is Port Lavaca.   Whichever destination you choose, make sure not to set up your tent too close to the water. Consider this a safety measure, as the tides here can rise very high.     RV Camping   Free camping in Texas isn’t only available to tent campers and backpackers. Several campgrounds also allow you to camp for free in your RV. But if you opt to do it, you should keep in mind that there are usually no amenities included. As such, you must pack supplies of bottled water, trash bags, and figure out how to maintain personal hygiene during your stay.   If you’re traveling to Texarkana, you can stay at the Jackson Creek campground on the Wright Patman Lake. Each campsite includes a picnic table and a campfire ring. You will also have access to a joint restroom, but there is no potable water on the premises. You can stay here for up to 14 days within a 30-day period.   The Steele Creek Park campground on Lake Whitney in central Texas has 20 free RV campsites. Like the Jackson Creek campground, these are all operated by the US Army Corps of Engineers.   All campgrounds near Lake Meredith allow you to camp for free, too. For RV camping, the Sanford-Yake campgrounds and Fritch Fortress are a good choice. They both offer basic amenities like grills, shade shelters, and camping tables, as well as access to restrooms with drinking water. There are also plans to make another 10 RV campsites with full electric hookups later this year.   Other options include the Coleman RV Park in Brownfield, Yoakum County Park in Denver City, and the Hugo Point County Park in Cove. As a rule, these parks usually limit your free stays to five days, so they are perfect for short breaks during your trip. What’s more, some of them also provide full electrical hookups and wireless internet access.   State Parks   All state parks in Texas have campgrounds that can accommodate RV campers. But unless you’re camping in a free area, you will have to pay for your stay. The prices are calculated on a per-night basis. As a rule, most campgrounds offer three options. You can opt for a basic camping experience with no amenities for about $10-15 per night. If you want access to electricity, it will cost you about $20.       Texas Hill Country   The Texas Hill Country stands at the very end of the American Southwest. It is the meeting point of West Texas, South Texas, and Central Texas. This region is best known for its numerous caverns, as well as being home to the US-native desert palm tree.   There are dozens of campgrounds in the area, all equipped to accommodate RV campers. Popular options include the following state parks: Blanco, Guadalupe River, and Lake Brownwood. The US Army Corps of Engineers has several campgrounds. They include the Cedar Breaks Park, Jim Hogg Park, Cranes Mill Park, as well as the Potters Creek Park. There are another 30 campsites at the Lost Maples State Natural Area.   Only two private options are available in the area. The Canyon of the Eagles Resort charges $45 per night for RV camping. If you choose to stay at the Mountain Breeze Camp, it will cost you $20 a night per person and an extra $10 for water and electric hookup.     Concan   The town of Concan in the Hill Country is a perfect destination for outdoor enthusiasts. Here you can hike at the Lost Maples State Natural Area, go biking at the Garner State Park, or swim and kayak in the Frio River.   You can opt to park your RV on one of the many campgrounds at these state parks. If you’re looking for a privately owned RV park, the Parkview Riverside RV Camp is the only game in town. The camp provides a breathtaking view of the Garner State Park and the Frio River. Here you’ll get all the premium amenities you’d expect, like electric hookups, cable TV, and Wi-Fi internet access. The camp is open all year round and charges fairly standard rates for privately owned RV resorts.     Gulf Coast   The Texas Gulf Coast is very popular among tourists looking for a relaxing camping experience near the beach. There are many national parks along the coast, all with their own RV-ready campgrounds. They include the Brazos Bend State Park, Goose Island State Park, Lake Corpus Christi State Park, and the Mustang Island State Park. You can choose between a basic RV site and one with a fully electric and water hookup.   Other popular options include the Coleto Creek Park, Whites Park, and the Padre Balli Park. They are all operated by local authorities and can provide premium amenities to RV campers.   Primitive Camping in Texas   There are many primitive camping locations in Texas. Pretty much all national and state parks have primitive camping sites a few hundred feet away from official campgrounds.   You will usually find these primitive campsites on the sides of dirt roads. For example, there are several sites at the Guadalupe River, Big Bend, and the Big Thicket National Parks and Preserves. You’ll also find plenty of them in the Rio Grande Wild and Scenic River area. Moreover, you can set up camp in any national forest and grassland throughout the state.   (Read Full Article)
BLACK ORCA® BACKWOODS BUNGALOW UL SHELTER REVIEW #1

News

BLACK ORCA® BACKWOODS BUNGALOW UL SHELTER REVIEW #1

by info onetigris on Jun 20, 2019
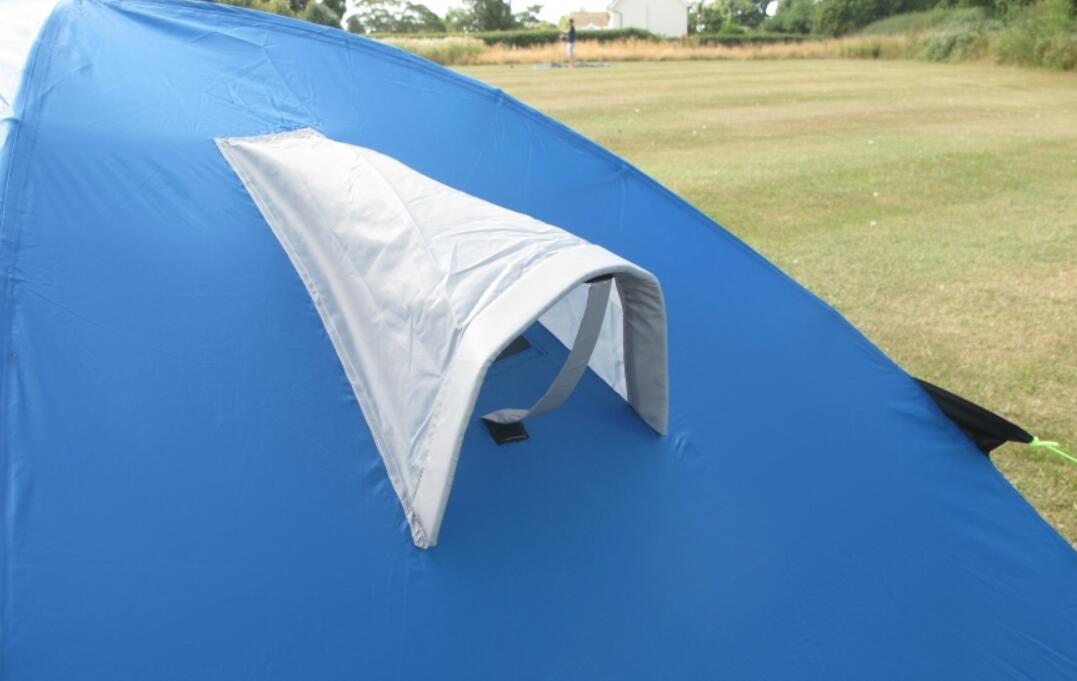
Hi All, Here are a couple links to YouTube videos I did on the Backwoods Bungalow. The first link is the overnighter I did to try it out. The second link is a video review I did of the tent. >>> Go to YouTube >>> Go to YouTube Overall, I really enjoyed this shelter and will continue to use it for upcoming trips. It just feels really cozy and versatile, which I love.   The points that I noticed where the tent could be improved are:   1) The side vents ought to be redesigned so that they provide more protection in the event of heavy rain. You could maintain the mesh if you had a hood shaped cover with something to prop it open. Here's a picture of something like this that I found online. 2) The loop and toggle system for holding the mesh door up needs to be a little longer. I struggled a bit to close them. Even another inch of material would be enough.   That's all I have for now. Other than those two minor things, I really enjoyed the design and function of this tent! Great work to everyone at OneTigris and all the people in the design collaboration. I think this was a great concept and I hope it does really well for you!   Let me know if you need anything else!   Darian   Credit: @PikeOutside, 1TG
HOW TO SURVIVE A FOREST FIRE

News

HOW TO SURVIVE A FOREST FIRE

by info onetigris on Jan 05, 2019
Extensive studies and research have proven that wildfires are occurring five times more often in the recent decades; such forest fires also burn six times the land area when compared to past occurrences and also tend to last much longer. According to scientific researches, climate change and global warming are the two main culprits to be blamed for the sudden increase in frequency and intensity of wildfires. Any responsible hiker must prioritize fire safety during hiking, no matter the season. What Causes a Forest Wildfire? Forest fires can erupt due to natural causes like friction due to the rubbing of trees or lightning that further causes combustion of debris. It can also happen due to human actions like smoking and cooking the forest. A larger percentage of forest fires happen due to human neglect Forest fires are based upon something known as the fire triangle. A forest fire needs heat, oxygen, and fuel to spread. Destroying the supply of any one of these elements will help extinguish the forest fire. Forest fires can be classified into three main categories based the part of the forest in which they occur. Ground fires occur at the ground level, beneath the branches Surface fires can be about 1.3 meters high Crown fires generally spread through treetops. These are very dangerous. They might be fuelled by surface fire. Controlling the Wildfire Ground fires are usually controlled by digging trenches Surface fires can be effectively managed via firebreaks A crown fire is probably the hardest to extinguish. You might need fire retardant chemicals as well as the help of professional firefighters. For convenience, fire safety while hiking can be divided into four main phases. 1.  Before You Hit the Trail  Always asses the wildfire threat level of a hiking destination as well as the fire restrictions in place at the site. Campfires carry a high-risk factor and hence might be banned at several campsites. Always consult the official before setting up campfires in a vegetated area. Stoves that use natural fuels like wood and twigs carry greater risk if causing fire eruptions in forests. Therefore it is better to opt for liquid, canister stoves. If you are visiting a high-risk zone, make sure you prepare and keep a wildfire kit handy Make sure you keep nonperishable food, bottled water, face masks and fire extinguishers in your emergency wildfire survival kit Choose a backpack that is made from a nonsynthetic, fire resistant material while visiting high-risk zones. Avoid taking pets or children to high-risk zones Avoid smoking in campsites Carry a detailed map of the campsite with accurate information of water sources; canyons cleared land, etc. Make sure you carry the top 10 hiking essential with you, in case of emergency. These include navigation (map and compass),sun protection (sunglasses and sunscreen), insulation (extra clothing), illumination (headlamp/flashlight), first aid supplies, waterproof matches or lighter, repair kit and tools, extra food, extra water, whistle, and mirror, camera Make sure you camp next to a clearing or water source while camping in high-risk zones Keep the camping group small in high-risk zones Wear non-synthetic clothes that will keep you safe in case a wildfire breaks out When buying lanterns for your hiking trip, select electric lanterns over gas powered ones. 2. There’s a Wildfire, What Now?  Despite all precautions, you find yourself in the midst of a slowly yet surely growing wildfire. Here is a list of things you can do to save yourself, should something like this happen. Do not take any chances. The fire outbreak might look small and manageable at first, but high winds can cause the embers to spread rapidly. So rather than trying to control the fire, call the emergency helpline numbers and evacuate the campsite as soon as possible. Always be on the lookout for any visual signs of smoke, red glow or smell of smoke. Always travel upwind, i.e., against the direction the wind and downhill in case of a wildfire outbreak. Never move through canyons, passes or congested routes. These tend to direct heat towards you. Never try to outrun a wildfire; it might just be the last race of your life Avoid staying in areas with dry vegetation Try to find natural or man-made fire breakers like cleared land, road , stream or fire lines made by authorities. 3. Worst Case Scenario: What if get caught in a wildfire? Should all the stars be aligned against you on that fateful day, you watch your nightmares turn real and find yourself surrounded by a wildfire; here are a few things that might save your life. Try not to breath in the smoke. It will lead to suffocation If possible, cover your mouth with a wet cloth Make sure your clothes are at all times dry If you have found a safe zone, stay there till the wildfire is over. Do not panic and try to exit the forest until the fire is extinguished Make sure you protect your body with non-synthetic clothing that does not catch fire easily. Stay away from synthetic materials Lie face down with your feet towards the fire Immediately call for help Try to stay calm, panicking will not help you The main cause of deaths during a wildfire is the inhalation of smoke and gases. Cover your body and make sure you do not inhale the hot gases Dig a hole and plant your face inside it to avoid inhaling the gases. Stay clear of overhead branches Move towards an area that has already been burnt and abandoned by the fire. 4. After you survive the Wildfire Let’s say you have done the impossible and survived the wildfire, now what? While planning an escape route, make sure only to include places that have already been burnt down. Once the fire has moved past where you are standing, carefully assess the situation and find an escape route. If the place you are at is free of vegetation, then stay there until help comes. Seek professional help immediately after reaching the nearby town You might have unnoticed burns, or you could have inhaled the smoke, both of which needs to be adequately assessed by a doctor Victims of traumatic experiences such as getting caught in a wildfire tent to suffer from anxiety disorders like PTSD If you or anyone you know who has recently survived a wildfire is experiencing symptoms such as insomnia, depression, and anxiety, make sure to consult a psychiatrist. Being a Responsible Hiker If you are an ardent backpacker or hiker, you might be a seeker of adventure. Hiking is a sure shot way to better your health. But we must always keep in mind that it is also important to be responsible and restraint from acts that might put your life and others at risk. A large percent of wildfires erupt entirely due to human neglect. Actions, like cooking carelessly or smoking at campsites, have all been identified as causes of wildfires in the past. All it takes is a spark to build a wildfire. We must also keep in mind the great losses of wildlife and vegetation we endure as a result of forest fires. Credit: Riderstrail
FROM A FILE TO A KNIFE

News

FROM A FILE TO A KNIFE

by info onetigris on Jan 05, 2019
From a File to a Knife - For Dummies Like Me My apologies first: This is not a tutorial on forging or even on decent knife-making. Nope, this is just for the guys like me that wants to tinker, make something useful and feel happy about it. Unlike real knife forging, what I do is to take away metal from a strip of steel until it looks like a knife and until it can cut reasonably well. The trouble I used to have is to find metal that will stay sharp and is reasonable to work with. We all know a file is hard – really hard. So it will stay sharp very long but it WILL break when abused and it is a real pain to work with because it eats abrasives when you try to shape it.   What to do, what to do?   Allow me to walk you through some tips that work for me: Start with an old file, a broken file or just go buy a cheap file at the hardware-shop. Below is a piece of a file that was left after an experiment, I’ll use this to illustrate the first and probably most important step: heating. Before throwing it in the oven it is a good idea to clean it with a wire-brush to remove old metal shavings or rust. With the metal somewhat more shiny, we can get the oven ready. What oven? That one in the kitchen - be it grill or hot-air. You really do not need more than that old Defy next to the kitchen zink.   What we want is a temperature of 204 degrees Celcius (give or take) or 400 degrees in Fahrenheit. Pre-heat the oven and set it for 2 hours.   After this you will notice the metal has changed color from grey to a golden caramel color. It is a good idea to do this before shaping the file because this treatment will make the metal slightly less hard, less brittle (it is more difficult to break or crack) and allround tougher. Plus it will be a lot easier to grind and shape. It still might not be a good idea to try and file because it might ruin your file, but feel free to try.   Does it need to be cooled in oil or water? Nooo…just let it rest at room temperature till you can handle it by hand. As reference here is a comparison between a normal file and the heated one – notice the color change?   What happens when you heat it too much? Well if you get to the point where it becomes blue or purple, you have created scrap-metal. Without a forge you have no way of repairing what has now become a useless metal piece so be careful when grinding – take it slow! Just for fun and good science I heated it for you guys to show you the nice color you DO NOT WANT TO SEE on your knife. Now you have a piece of metal to play with. How you shape your knife really is up to you and what you have as tools in your shed. I advise a 125mm (5”) angle-grinder, a bench vice or clamps to hold the metal in place, a Dremel is very handy, a wetstone of sorts and/or sandpaper with a 600 grain.   It is handy to fold the sanding paper on a rectangular piece of wood of around 100mm (4”) by 50mm (2”) and say 25mm (1”) thick and use this to sharpen your knife. Feel free to use a finer grid paper, but in reality you are good with 600-grid. I find one of those flappy-discs handy to smooth the sides (bevel) of the blade. I’m not going to tell you how to use your tools or what shape to make the blade into, just go with what you feel and enjoy the process.   Again please take it slow with the grinder because you do not want to heat things too much. (watch out for the pointy bits where the metal is thin because that seems to heat up much- much faster than you might think. When is your knife sharp?   This question is what bugged me for some time and I experimented quite a lot so here’s my non-scientific and non pro tip; After you have shaped your bevel into something that looks like a cutting edge and you are ready to sharpen your knife. Start with one side and smooth it on your wetstone or sanding paper. Stay on that one side until you are happy that it is smooth and it has a straight and flat edge. A tip is to start with strokes length-wise along the side – this will ensure you have a flat surface. When you are comfortable with keeping a steady hand you may try the more usual side to side movement we are all familiar with and have seen in countless clips.   When this one side is done, flip the blade over and get going until the cutting edge starts to feel like business…Go ahead and test it with your finger, we all do it! Does it feel sharp? Awesome! Does it cut a piece of meat or whatever? Great! But can it be sharper? Can it cut paper, can it shave your arm-hair? Well?   Back to that wetstone/paper. After some time you might test it again with your thumb and @#$%! it is not as sharp as it was!!! Well…well done! What has happened is that the cutting edge has made a small fold. Have a look at the picture. This is an exaggerated view of what happened with your blade – THIS IS A GOOD THING!   Flip your blade to the other side and very lightly run that part over your wetstone. (Yea "stropping" is done with leather or porcelain or the polishing wheel of your Dremel but a simple light stroke on the stone really will work the trick.)   This will give you a blade as sharp as it will get.   Remember this is NOT a stainless-steel blade so it WILL rust and stain, but it really do make a very robust and handy tool so treat it as such and be proud of what you made.
HOW TO BRAID PARACORDS ON GEAR

News

HOW TO BRAID PARACORDS ON GEAR

by info onetigris on Nov 18, 2018
A buddy asked me how I braid the handles of my bags and why, so I decided to do a little tutorial. Not a video, because it is a pain to stop-rewind-play to get that ONE detail you missed. I took pics of the important steps that will get you going on your braiding way and help you untangle some of the tricks to it.   Oh why I braid? Apart from it looking good, I feel it makes for and easier carrying bag with a wider strap and softer feel. So let us pretend this orange strap in the photos is the handle of your bag. How would you start? Well let us decide what paracord to use first and then get an idea how much of it we will use. I use 550 Paracord type 3 – the 550 is how much weight it can handle in pounds. This cord is +/- 4mm thick and easy to work with. How much will you use? There are formulas but so many variables so let me just say that 5m is enough. I usually take a bit more than I may use and just cut off what I do not use – paracord really is cheap enough … (And for handles it is also easy enough to join two lengths of off-cut should you need a bit extra cord.)   In pic 3 you can see I joined two lengths of different color cord, I recommend you use one length and let my “joint” be the middle of your length of cord. For the tutorial it is easier to have two colors to show where the ropes go… Start with the cord under and over your strap (this “strap” can really be anything you want to wrap in cord). The braid I’ll use is the Cobra-weave, probably the most common of paracord braiding “knots” and the most recognizable. You can see I have the black cord “under” and the gray cord “over” the strap. From here on a little sentence I repeat: “Over, under the strap and through the eye.” (Yea sounds kinda kindergarden, but it WORKS!) Pic 5 is the “over” part of your sentence. Pic 6 is the “under the strap and through the eye” part. Now here is another little “trick”: See the “bulge” the black cord does in pic 7 on the left side of the strap? That is you next sentence and a handy reference should you become “lost” along the way.   This is your “over, across and under” sentence. (If you manage to bungle your weaving, just untie the cord till you have this little bulge again and then repeat the sentence…)   Pic 8 “Over, across and under.” Under the black cord that is.   Pic 9 “Over, under and through the loop”.   That is black cord over the gray cord, under the strap and through the loop of the gray cord on the opposite side. Tada! Your first pass… Now pull it nice and tight to give you what you see in Pic 10   You will notice the “bulge” is now on the right hand side of the strap. (Yup this will go on like this – left right, left right so it is easy to follow…) So after repeating this a zillion times you end up with a bit of a weave – Pic 11.   By now you have sworn a bit at the cord getting tangled while weaving so here is another tip: You will notice the gray cord always follow the one path of “over across and under” so I just bunch it up to keep it compact and easy to handle. The black cord is the one you get to thread and pull through every time to you need to keep that cord tidy…   With only 5m of cord this is not much of a deal, but if you are adventurous and start on some project that use 30m of cord you are in for a wild time.   So let us pretend this is the end of the strap. See each pass have been pulled nice and tight and bunched up kinda neat. After inspecting your work and relaxing your fingers it is time to cut the ends. You will always end with one end being longer than the other – this is normal. You will notice sometimes the inner core of the cord pops out a bit – this is also normal and you can just trim it a bit with scissors or a knife. I found that where you join two cords it was not always very neat and came up with a way to hide this joint: SHRINK-WRAP! (The kind you use to insulate electrical joints.) Cut a piece of 10 to 15mm and slip it over one end of the cord. Do it NOW or you WILL forget this till after you made the joint – you have been warned.Now it is TIME…to burn your fingers that is. Melt the two ends of the cord with your lighter. It is better not to allow it to ignite the cord but I did it just for “effect”. Do not be afraid that things will cool down too fast – you really do have enough time to do this. Join the two melted ends (try to keep it neat and straight) if you are brave enough you might roll the joint between your fingers to get it flat and in shape (It really does not burn that much). Slip your piece of shrink-wrap over the joint (the piece I used was a bit too short, but you get the idea.) Reach for that lighter again. A word of caution: you do not want to melt or ignite this shrink-wrap so keep the flame some distance away – the heat will let the wrap shrink around the joint. There is the joint nicely wrapped. While it is hot you can give it a bit of and arch by pulling at it. I just hook my finger in the loop and pull, but be careful because the wrapped part would retain some heat and it might burn a bit… and then you have your wrapped handle done! Keep the loop at the end compact – it is a good place to hang a carabiner shackle or key-ring.Here you can see why a bit longer wrapping would have covered the piece of cord that got melted. Source: PacoWarabi (YouTube) Credit: Sandspoor, OneTigris LiFE Ambassador
HAMMOCK CAMPING IN THE FRANKONIAN BACKCOUNTRY

News

HAMMOCK CAMPING IN THE FRANKONIAN BACKCOUNTRY

by info onetigris on Sep 22, 2018
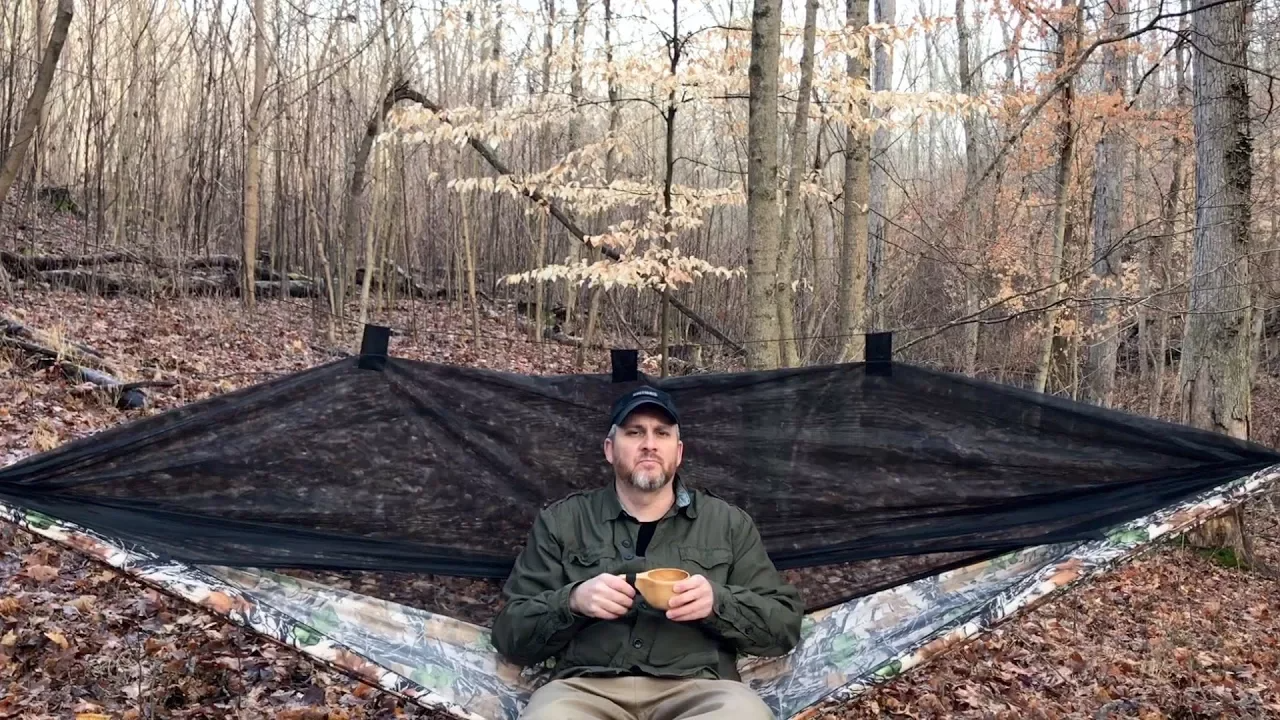
In theory, a hammock under-quilt allows for better insulation because it hangs a few centimeters below your hammock, not compressed by your bodyweight. The under-quilt also covers both sides of the hammock, providing extra insulation and protection from cold wind. As if by fate, my friend Sebastian called one day and asked if I wanted to join him on a 2 day hiking trip, and I needed to test the OneTigris 3-season Hammock Under-quilt. On the first day of the trip, we hiked until the afternoon in great weather. We wanted to find a good campsite soon because it is much more comfortable to set up a hammock in daytime or it’s easy to miss the perfect pair of trees. Eventually we found a matching spot on a light slope to set up both our hammocks and also to provide cover to hide from officials. Sadly speaking, wild camping is not allowed in Germany and the penalties are costly. The new camo tarp and my coyote brown hammock really helped me to stay hidden. Between the thick vegetation and especially under low light conditions the setup can hardly be noticed from 50 meters away. The setup of the tarp and new hammock under-quilt went smoothly. I was careful to make sure there wasn’t too much tension on the under-quilt. When it was time to sleep, I got in my hammock and the first thing I noticed after about one minute was that my back was warmer than usual. During the next 30 minutes, it got even more comfy in the hammock and I wasn’t cold at all. I slept really well and Sebastian woke up before I did to film me while I slept like a baby. So you can say I am a big fan of hammock under-quilts now! Until next time, Carlos and Leo   Tip from Carlos: One thing people ask me all the time about hammock camping where to put their backpack and their shoes. My suggestion is to tie your backpack to the next tree and use a rain jacket to protect it from rain. I always put some sticks in the ground right next to my hammock and hang my shoes there. This keeps the shoes dry and within easy reach. Credit: Carlos, Germany
A GOOD FRIEND, THE ENGLISH COUNTRYSIDE & MY ONETIGRIS GEAR

News

A GOOD FRIEND, THE ENGLISH COUNTRYSIDE & MY ONETIGRIS GEAR

by info onetigris on Sep 22, 2018
It was late July 2017, after a successful but tiring day of hiking myself and my good friend decided to set up camp in a secluded woodland. We soon had the fire lit and had a few beers to celebrate finding such an idyllic area to spend the evening.      Eventually we staggered to our respective hammocks and I fell into a blissful sleep…that was until about 2am, I awoke to a BLOOD CURDDLING SCREAM coming from beneath my friend’s tarp! With it being pitch black and myself still being slightly tipsy I struggled to escape my sleeping bags embrace and fell out of my hammock landing on a heap on the floor! With my friend still screaming I eventually escaped my temporary captivity and preformed the most impressive commando roll even Steven Seagal would’ve nodded in appreciation. As I came out of this feat of superhuman athletic ability I saw my OneTigris first aid pouch and grabbed it so that I may assist my buddy with whatever trauma he may find himself in (still screaming). I cross the 10 meters between us in one leap and stick my head under his tarp, what do I see?   No blood, no wild animals…just him, head torch on still in his sleeping bag swatting at the thousands of ants that were covering him and his gear! I’ve never seen such fear in a man’s eyes! I of course immediately started laughing, eventually I helped him escape this torture and helped him shake out the ants and set up in a different location!   Luckily the only injuries suffered were some bruises from my fall and my friend’s pride! Although my OneTigris first aid pouch wasn’t needed it was there when I thought my friend was close to death and is a constant companion for all my adventures!   Thanks, OneTigris! Credit: James Richards, Survival Dads
TIPS FOR PICKING THE MOST RELIABLE CAMPING MATTRESS

News

TIPS FOR PICKING THE MOST RELIABLE CAMPING MATTRESS

by info onetigris on Aug 24, 2018
Camping can be a time of joy and relaxation, but with one condition: you take the right type of gear! You should also calibrate it according to your trip style because you don’t want to be carrying an unnecessarily heavy backpack up a steep trail!   But I was a beginner camper and adventurer once and I know how easy it is to overpack. With this in mind, I think it’s best to guide you towards choosing one of the most important pieces of equipment you’ll ever need in a tent: the camping mattress.   Consider the Make (aka Construction)   You’ll find countless designs on the market, but at the base of them all, there are only three main categories of mattresses (or pads).   The Closed Cell StructureThis one’s basically a sheet of foam with air trapped in each cell to provide some cushioning. It is lightweight, and you can simply hook it up to your backpack, but it is rather bulky if you want to put it inside. It’s also not much of a comfort-maker and it won’t keep the coldness of the ground from creeping into your sleeping bag during the night.I like to use this type of a pad for some extra cushioning and insulation on top of an air mattress. Also, it’s nice to have something to sit on during the day. The Self-Inflating DesignAnother foam design, but with open cell structure this time, self-inflating pads can be rather comfortable. Besides the fact that they are bulky and don’t compress too much, I find them perfect for sleeping in a tent or under the stars (depending on your preferences). Air PadsFinally, these are the luxurious models of camping pads since they provide both good comfort and insulation. The downside is that it’s rather difficult to inflate them (if you don’t want to carry a pump around).So, if you want to make sure you’re getting the best camping air mattress, it should be a model from this category.   Compactness   As I already mentioned, size is an important factor when you have to carry all your tools in a backpack. Therefore, you should first check if your pad folds out or if it can be compressed into a small bag and only afterward think about comfort.   If the pad has a protective cover that’s waterproof, you can simply plate the pad on top of the backpack and secure it using some paracord or a strap. However, if it’s too big, it may become a hindrance as you move through trees or hike on tight trails.   Weight & Size   If it’s designed for camping, a pad will never be too heavy. But, any experienced hiker and camper know that even 100g over your weight limit can become difficult to stomach when you’re tired and still have a few miles to hike.   So, before you decide on taking a new pad, make sure you know your limits. If not, better stick with the weight you know you can manage!   In terms of size, most pads are designed for one or two people. However, if you’re going as a couple or a family, everyone should be carrying their own pad (assuming the kids are old enough to hike and carry their own backpack).   Resistance   There is no way to predict the accidents that may happen on a hiking or camping trip, but you can avoid some of them by thinking ahead. For instance, an air pad may get punctured which means you won’t be able to use the entire surface for your comfort (the air is distributed in several chambers).   On the other hand, both the self-inflating design and the closed-cell one are a lot more resistant to punctures.  This information is important for you to make the right decision when choosing the best pad.   Credit: Will
3 SEASON SCREEN TENT REVIEW

News

3 SEASON SCREEN TENT REVIEW

by info onetigris on Aug 18, 2018
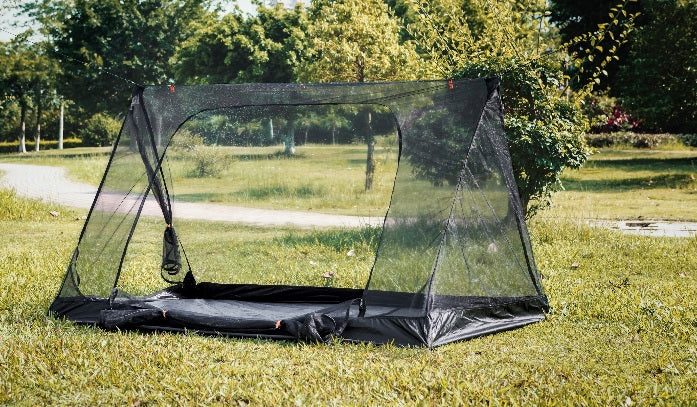
I enjoyed this mesh tent so much. It is very lightweight, and sets up really fast. I really like the tensioning system for the tent pegs. I put a OneTigris tarp over top and set it up like a Whelen tent that allowed cool breezes to flow from the creek all night long.  I had my headlamp on all night long and I never got bit by a single bug lol. I would love to have a ground cloth to fit the bottom. It would be so freaking awesome if you guys could come up with something like that for a Whelen setup. They look like the old Baker's tents anyway, but I'm getting off the subject lol. I loved it and I'm looking forward to more summertime trips. Oh yeah and I didn't wake up all sticky like other tents.  The only thing I can think of is a zipper in the front in addition to the ones on the side. Maybe a ground sheet and a little bag sewn in for odds and ends out of your pocket while you're sleeping. It is a perfect tent for hot weather and without the tarp got a beautiful view of the sky.  Credit: @jayson parker, 1TG
WATER-RESISTANT CAMPING BAGS REVIEW

News

WATER-RESISTANT CAMPING BAGS REVIEW

by info onetigris on Jul 09, 2018
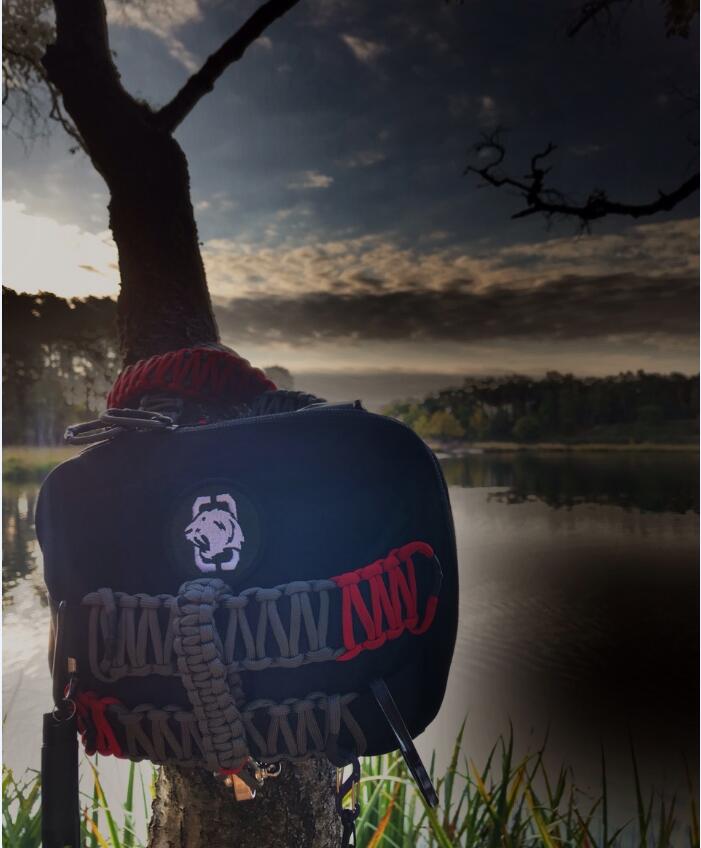
More pictures on my Facebook review. These OneTigris bags are amazing! They are lightweight, water resistant. I have tested them by submerging them and only a little hole at the top of the zipper let's water in. Other than that they're almost completely waterproof. They come clean very easily. If you get them in mud. Bag #2 would be awesome if you can add a strap to the bag. It is now my emergency kit for my jeep. I keep a emergency backpack inside just in case I need to grab it. The bag is so amazing it holds almost everything that I need for survival. I would recommend these bags to anybody and they're a great price. If you have any questions, comments, or concerns please ask and I will do my best to answer. Make sure you remember the rule of three's 3 minutes without air, 3 hours without shelter, 3 days without water, and 3 weeks without food.  Credit: @jayson parker, 1TG
CAMOTREE WATERPROOF TARP REVIEW

News

CAMOTREE WATERPROOF TARP REVIEW

by info onetigris on Jun 06, 2018
The Ideal Hammocking TarpA few wet nights walking the South Downs Way gave me the ideal opportunity to test The OneTigris tarp.You may not have heard of OneTigris but I’m sure you will be hearing a lot more of them in the future. I have had a few small OneTigris items and always found them to be high-quality pieces of kit.Camo Waterproof Tarp I was looking at the OneTigris website and saw this tarp. It is not a square or a rectangle but a hexagon which means that it can have a 4m. ridgeline which tapers down. This means that the tarp can cover the head and foot of your hammock with the minimum amount of material.My first impressions when the tarp arrived was that it was a very lightweight (just over 510g.) but the 15D ripstop nylon fabric with dual silicone coating looked strong.It comes with a carrying bag, 6 red guy lines with reflective speckles (3mm x 4m), 6 black guyline adjusters and 6 red aluminium Y-stakes. The Y stakes are small and have a hole in the top through which I threaded thin paracord to make them easier to pull out of the ground.The ridgeline has three tabs as well as two tabs at each end. This is more than most tarps and makes it more versatile. There is a seam running the length of the ridgeline and it is not taped or seam sealed which made me wonder how waterproof it would be. I noticed later, on the website, that OneTigris recommends using seam seal. I did not have time to do this before my trip.The camo reminded me of Auscam and the colours are quite light.My walk was going to be quite discreet so I exchanged the reflective cord for green paracord. I took the Y stakes as I knew they would be almost completely hidden in the ground and I could further hide them with leaf litter.On my first night, I encountered a badger on my way to my chosen bivi site. I set up in the rain. Set up was easy and I was soon undercover. As I lay in my hammock I really appreciated the 4m length which completely covered me, giving total protection from the rain. I was slightly worried that I had not had time to use seam seal. Would I stay dry throughout the night?I needn’t have worried. After a good nights sleep, I woke up completely dry, as was all my kit.The second night, also raining, I evaluated the effectiveness of the camo. I think the best camo for northern temperate woodland in summer is the no longer issued DPM – in the dry at least. When it wets out it gets very dark and becomes less effective. The multi-cam designs, including the British MTP are always a compromise. I was really surprised at how well the OneTigris camo performed, particularly against the leaf litter and with light filtering through the canopy. The colour hardly changed when the fabric got wet and in fact improved. Again I remained completely dry.Conclusions: Because of its innovative design this is the best tarp for use with a hammock I have used or seen on offer anywhere else. The tarp performed brilliantly but I will seam seal it just to give myself the confidence that it will perform perfectly when exposed to prolonged heavy rain over several days. The tarp is hemmed with a tough, black material which strengthens the tarp but is not camo. I will let you know how it fares over time. But for the moment I can thoroughly recommend this tarp. Look at all the other good stuff they have on the website https://www.onetigris.com/ Credit: @Ravachol, 1TG
"RAIN FLY" CAMPING TARP REVIEW (VIDEO)

News

"RAIN FLY" CAMPING TARP REVIEW (VIDEO)

by info onetigris on Jun 06, 2018
Credit: @UglyTent, 1TG  OneTigris SLEDGEHAMMER Sling Pack  Credit: @UglyTent, 1TG
"DUSK KEEPER" HAMMOCK WITH MOSQUITO NET REVIEW (VIDEO)

News

"DUSK KEEPER" HAMMOCK WITH MOSQUITO NET REVIEW (VIDEO)

by info onetigris on Jun 06, 2018
Credit: @UglyTent, 1TG
35 EASY DUTCH OVEN CAMPING RECIPES

News

35 EASY DUTCH OVEN CAMPING RECIPES

by info onetigris on Apr 19, 2018
If you are a camping enthusiast, but are getting tired of having to eat the normal camp food, then you need to be well acquainted with the Dutch oven. Carrying along your Dutch oven for your next camping trip will ensure that you get to enjoy gourmet food even though you are far away from your kitchen. Dutch ovens are ideal for camping because the pots evenly distribute heat, which means you will not end up burning your favorite dishes. The following are a variety of Dutch oven recipes that you can easily prepare while camping. 1.   Dutch oven Pull Aparts (Bacon and Cheddar Cheese) Imagine having bacon while camping! Sounds like a dream come true for most bacon lovers/camping enthusiasts. With a Dutch oven, making bacon-infused meals is a breeze. For instance, you can make pull apart of bacon and cheddar cheese using a Dutch oven. This recipe is easy to prepare and it is very scrumptious. Cooking the bacon may take some time to prepare (1). However, you can cook it ahead of time before you leave home, slice it, and then preserve in the refrigerator. After getting everything in the Dutch oven, you will need to let the dough rise (2). 2.   Bacon and Cheese Egg Pie Prepared in a Dutch oven When you want a hearty and savory breakfast, a Dutch Oven Quiche made from bacon and cheese can be just the trick. This is an easy recipe, which you can make even easier by prepping in the house before you leave for your camping trip. For instance, it is advisable to cook the bacon at home, cut it up into small pieces, and then place them in an appropriate container (3). You should do the same thing for the bell pepper. Furthermore, beating the eggs and mixing it with the sour cream and storing them appropriately will also save you some prep time when you are making the meal (4). 3.   Dutch oven Cinnamon Rolls Wrapped in Bacon This is probably the simplest recipe you can make over a Dutch oven while camping. There is hardly any prep required, which makes it convenient when trying to cook in a camp zone (5, 6). The recipe takes approximately 35 minutes in total to cook. 4.   Dutch oven Campfire Biscuits The Dutch oven campfire biscuits are a great meal for breakfast while camping. They provide the required energy for the day ahead (7) especially when accompanied with gravy. They are also easy to prepare.  5.   Dutch oven Cinnamon Rolls with Blueberries When doing the baking of the rolls, one should make the frosting. (8) 6.   Dutch oven Burritos This recipe can feed 8 people, making it the ideal breakfast meal for the campgrounds (9). They are a perfect idea, especially when preparing for a crowd. 7.   Cheesecake Dutch oven Recipe This is a simple recipe to prepare and can be eaten even by people who are not so much into sweet foods. The Dutch oven cheese case is scrumptious and surprisingly easy to make when using premade crust in an aluminum foil pie tin (10, 11). Please note that you will need to use two Dutch ovens for this recipe. 8.   Dutch oven Grecian Chicken. This dish too can be prepared ahead of time much like the other dishes too and the chicken stored in a cooler until you are ready to cook (12, 13). The only real work in this recipe is perhaps just the stuffing of some lemons and garlic into the chicken and seasoning. 9.   Dutch Oven Chicken Enchilada Pie Cook the chicken ahead of time, with the onions, squash, green peppers, and spices. Add the drained corn and black beans and head that up. Put all that in a container and store in the cooler (14, 15). 10. Dutch oven Herbed Chicken and Pasta This is a good meal when out camping or when undergoing outdoor activities. It brings the feeling of a real meal breaking from the normal junk food normally taken during such activities (16). 11. Dutch oven Pizza for Breakfast. You can prepare the garlic, the sauce, the mushrooms, and onions early on and then put them in an appropriate container. The eggs can also be beaten, spiced, and put in a Ziploc bag for easy storage (17, 18). 12. Dutch oven Enchilada Casserole The Dutch oven enchilada casserole is easy to cook and is a marvelous dish to enjoy while camping (19). 13. Dutch Oven Cinnamon Rolls in Gooey Caramel It only takes 30 minutes to prepare this meal. One of the most important meals of the day is a good, nutritious breakfast and one can never go wrong with cinnamon rolls (20). For this meal, it is advisable to do some prior preparation at home in order to reduce the time of preparation in the campsite. 14. Dutch oven Beef Stroganoff This is an easy and quick meal to make. It dates back to traditional Russia (21). The following recipe makes about 8-10 servings. 15. Jalapeno Dutch oven Crusty Bread This may take some time to prepare but it is sure worth the time (22). 16. Dutch oven Shrimp Jambalaya For this Jambalaya, at least 10 gray coals on the bottom and 20 on the top are recommended to keep it around 350 degrees. It is a down south classic and is perfect for fall or spring camping (23, 24). 17. Dutch oven Lemon-Blueberry Biscuits If you prefer not to bring all your supplies to the campsite, just ease up the work by creating the biscuit mixture ahead of time and storing it in the cooler within the Ziploc bag (25). 18. Dutch Oven Monkey Bread with Cinnamon This recipe is simple enough to do at the campsite and therefore ahead of time preparation is not necessary (26). 19. Dutch Oven Chocolate-topped Peanut Butter Bacon These peanut butter bacon bars are easy to make and only use seven ingredients (27,28). 20. Dutch oven Pigs in a Blanket This recipe requires chopped mini-smoked sausage links although one could also use crumbled sausage. You can prepare ahead of time by cooking and chopping the sausages then mixing the egg mixture (29). You can also prepare pancakes ahead of time and freeze them. It usually works best with 12 coals around the bottom and 18 coals around the top of the Dutch oven. 21. Pizza Pie in a Dutch oven Methods have developed to overcome challenges such as preventing the sauce from combining with the dough and producing a crust that can be frozen and reheated without becoming rigid (30). 22. Dutch oven Pork Chops Easy preparation is a major factor for a camping recipe and this meal makes cooking when camping a walk in the park. Adding croutons to the recipe gives it the flavor alongside with the creaminess added by the mushroom sour cream (31). 23. Dutch oven Barbecue Pulled Chicken Sandwiches The advantage of this meal is that all you do is prepare the ingredients and let the oven do all the other work for 90 minutes (32). 24. Dutch Oven Ravioli For those who are fond of Italian dishes, you are definitely sure to love this recipe, which apart from being unbelievably easy to make, provides an excellent, hearty meal loaded with carbohydrates (33). 25. Dutch Oven-baked Salmon This Dutch oven salmon bake takes just less than a half an hour. There is barely any clean up after making it. One can spice this recipe up by adding a little lemon pepper or lemon juice (35). 26. Dutch oven Brownie You can get all your batter ready at home and keep it chilled in a cooler (36). 27. Dutch oven Super Sloppy Joes These are always a good choice for a quick, delicious meal, whether for lunch or for dinner. This recipe is a scrumptious Dutch oven sloppy Joe, which can use practically any source of heat (37). What one needs is just browned meat and vegetable added to the rest of the ingredients and simmered for about an hour, which can do beforehand (38). 28. Dutch oven Southwestern Fiesta Chicken This is a great meal for camping. The best timing being when it is cool. One of its advantages during camping is that it involves pouring in canned ingredients which will save you time and be easy during your camp (39). 29. Dutch oven Stuffed Bell Pepper Soup This stuffed bell pepper soup is also a great recipe for a home for doing lots of preparation work and just throwing in all the ingredients in after the hamburger is cooked (40, 41). 30. Dutch Oven Potato-stuffed Sausage Stuffed sausages and potato boats are very easy to make, especially when you use the mashed potatoes, which are already prepared (42). You can still make your own mashed potatoes but for camping, it is best to just keep things simple (43). 31. Dutch oven Stuffed French Toast Rolls This is a good breakfast meal whose only real preparation work is getting everything together in the night before and keeping the Dutch oven and the bag of toppings in the cooler overnight to let things set (44, 45). 32. Dutch oven Triple Berry Camp Cobbler The topping accompanies this cobbler by which quick and easy to prepare. Some cold buttermilk biscuits cut up and brown sugar would do, laid on top of the fruit mix (46). The ease of this cobbler recipe comes in its use of refrigerated biscuit dough. 33. Dutch over Potatoes with Cheese This dish serves as a very good side dish for almost any meal. It is simple and fun to make when camping although it is full of everything not so healthy (47). You can do some preparations at home to reduce the work when camping by cooking and crumbling the bacon and chopping the potatoes and onions before heading out for camping (48). 34. Dutch Oven Mountain Man Breakfast This is a great meal to start you off in the morning. It consists of sausages, hash browns, and eggs. There is a serving of 6-8 plates (49). 35. Dutch oven Sausage and Hash Browns The sausage and hash brown breakfast bars provide you with the chance of cutting up the veggies and even pre-cooking the sausage and bacon if you would like (50). Find the ingredients & methods at Jen Reviews!
23 WAYS HIKING MAKES YOU HEALTHIER

News

23 WAYS HIKING MAKES YOU HEALTHIER

by info onetigris on Mar 17, 2018
Yes, it is absolutely one of the best and the strongest cardiovascular activity which offers you with tons of health benefits for your body including strengthening and muscle toning, improve endurance and boosting your overall stamina. Even opting for a short day hike can boost up your energy levels and this, in turn, will help you get more sleep during night hours. Hiking in the Mother Nature will also help to lower the chances that you over-think negative experiences as well as emotions. When checked with the medical experts to rate the sleep-promoting activities, hiking banged the first place, leaving behind many other popular sports like callisthenics, squash, downhill skiing, basketball and so on. You can also reduce your stress levels with active hiking in nature, breathing the fresh air. This is the only way to unplug you from the wi-fi world and connect with the nature to experience peace of mind and a good sense of well-being. Even a short hike can bring you lots of fun and entertainment if planned well. You can check out the below mentioned 23 ways of hiking which benefit your health. Find more detailed benefits of hiking from riderstrail.com. Going hiking anytime soon?  Make sure you've got all the gear you need: Backpack, waterbottle, tarp, flask, head scarf... 
ACROSS WESTERN CHINA | PHOTOGRAPHY

News

ACROSS WESTERN CHINA | PHOTOGRAPHY

by info onetigris on Feb 01, 2018
Initiation: Guilin, GuangxiA friend of mine who plays with fire for crowds to see. Her dream is to travel around the world. First stop: Dali, YunanMy hometown turned tourist spot. It used to be all beauty and sunshine, now it’s polluted with human activity. I’m posting old pictures instead as this is how Dali should be. Second stop: Lijiang, YunanNakhi people were the first settlers here all the way back in Sung Dynasty (960-1279AD). It’s an ancient city drenched with history, culture, and amazing landscape. Third stop: Shangri-La, YunanFrom 2000 meters above sea level to 3200. The road to Shangri-La is steep, narrow and winding, and is a 320 kilometer drive. After much motion sickness and unavoidable retching, we finally reach Napa Sea and camp aside it, as there are no hostels in sight. In this majestic land, you feel the “wild” of the Tibetan land, its rugged men and strong women everywhere you go. Fourth stop: Deqin, TibetA world surrounded by holy mountains. If you ever travel to Tibet, see if you can visit the 4 holy mountains of Tibetan Buddhism - Kawagarbo, Kailash, Amne Machin, and Gaduojuewu Snow. The weather and road conditions here can be monstrous so inexperienced travelers, beware. Fifth stop: Yanjing, Tibet100 kilometers that took 4 hours of driving to complete. Only one checkpoint every 100 kilometers. It’s cold and alien and I took zero pictures here. Sixth stop: Dongda Mountain, Tibet5130 meters above sea level. My companions threw up a nightmare and used up more than half of our oxygen supply. The breathtaking sights make up for it though. Seventh stop: Bome, TibetTook a weekly shower and took a break from driving while we stopped in Bome, also known as little Switzerland. The Tibetans love to dance in a wild and reckless way, bursting with life and love for rhythm. I danced too. Eighth stop: NyingchiBack to 2500 above sea level where one could finally manage to breathe without feeling like dying. My companions say they feel like they are in a lounge bar, being served oxygen. Ninth stop: LhasaWe pay our respects to the Potala Palace, Qokang Monastery, the White Monastery… Religions aside, I see calmness in the Buddha. There is an absence of joy, fear, anger, sadness. As the expression is as still as the calmest waters, you see your own reflection instead, and you see how troubled the world is on this side of the mirror. Tenth stop: Kashgar, XinjiangAlong the way you see miniature villages that shy away from public roads. The rivers are small and quiet, and the scattered family-owned restaurants are quaint and humble too. Eleventh stop: Tingri, TibetWe visited small villages that we couldn’t even find the names of on maps. For a moment, we also disappeared on all maps. Twelfth stop: Hor, TibetNo words can describe the beauty and images only capture the smallest portion of it. Indescribable. Thirteenth stop: Zanda, TibetThe ancient Guge Kingdom began and ended here but their ghosts still linger. What we see now are the skeletons of the land with no traces of its vanished past. Fourteenth stop: Sengge River, TibetMy head hurts like hell. I can faintly see India on the other side of Pangong Lake through the headaches. No Man’s Land, KashgarThere are wolves on either side of the roads and not a human soul in sight. It is even more haunting with the 5 mountains to go around in pitch darkness. Final stop: Dahong LiutanI make it through no man’s land and arrive at Dahong Liutan at 4am to fuel up the car. Less worried about gas. The red flickering dots behind barbed wires in the nighttime are those of wolves’ hungry eyes. It is physically and emotionally exhausting. An abrupt stop in my journal but I will continue on the road again soon. This is only half of my trip but it’s been 30 days and I need to lay down my dusty body on clean linens and let all the images run through my mind again. Bye for now, folks. If you see me on the road, come say hi over coffee.
NEWBIES GO CAMPING

News

NEWBIES GO CAMPING

by info onetigris on Nov 17, 2017
BEST OUTDOOR EXPERIENCES FOR ADVENTUROUS MINDS

News

BEST OUTDOOR EXPERIENCES FOR ADVENTUROUS MINDS

by info onetigris on Oct 30, 2017
Joel Buhia is a simple and passionate outdoor adventurer. Since the age of 4, he's been bonding with natue and educating himself about Bushcraft and Survival. Here is a brief Q&A between OneTigris and this adventurer: Credit@Joel Bohia THINGS YOU SHOULD CARRY ON YOU WHILE CAMPING "The ultimate gear required in the great outdoors is a KNIFE". A knife can help a person survive the wild outdoors. But for the modern outdoor men and women, what you need is simply to put together a survive kit... Some ideas: - Haversack or Backpack - Knife - Shelter (Tarp is best!) - Cooking Kit & Stainless Water Bottle) - Fire Kit - Navigation Kit - First Aid Kit - Signaling Kit (S.O.S. Kit) - Cordage (Bank lines or Paracord) - Bandana - Proper Outdoor Clothings Ultimate Requirements: - Knowledge & Experience. WE NEED CAMPING, NO MORE EXCUSES! For Joel camping is a state of mind. It's a great opportunity for the busy and weary to sit back, relax and enjoy the peaceful moment in the wild outdoors. A simple way of switching off all walks of life in the modern world and get back to basics. Listening to the sound of nature calms you down from within and the benefits of being outside and living life to the fullest is seriously unmatched. We all need to find time to go into the wild. No more excuses. BASIC ADVICES  FOR ANY ADVENTUROUS MINDS 1. Locate the ideal campsite, safe campsite, basic resources around the campsite (ex. Fresh water source and wild edibles). 2. Study the campsite that you are going to be in by simply doing some research or by simply asking the country park management centre and the people who have been there. 3. Know your capabilities, limits and also your personal gear. 4. Awareness on personal hygiene. 5. Basic knowledge of Wildlife and safety. For example: Basic camp setups, rules in your country parks and the season, how to use navigation equipments, etc. 6. Be prepared for the unexpected and know how to get out of the situation in a calm and systematic way. 7. Beginners should never venture the wild solo. Having a companion with good orientation skills is necessary.   Many thanks to Joel! Now, are YOU ready to go into the wild?
SHTF PREPARATIONS

News

SHTF PREPARATIONS

by info onetigris on Oct 30, 2017
SHTF preparations User Golgo13 From survivalistboards forum shared his experience when SHTF hit his country. He said everything was falling apart. He escaped his hometown, travelled city to city with his father because of the massive chaos that happened to his country. When they got to their new destination, trying to start a new life, the situation wasn’t what they expected. War was still coming their way. Once more they needed to run away as far as possible. They finally end up as refugees in another country. After living this SHTF this is what he said ”This is only a small piece of what I've experienced, and it's still difficult till today to talk about other things I've seen. I hope it gives people a glimpse of what might happen and get inspired to take some precautions.” SHTF – Stuff hits the Fan. It means that some kind of catastrophic event has happened. (Natural disaster, financial collapse, terrorist attack etc) They all can have a major disruptive affect on our lives. Being prepared for any of these events will help you and your family to face this issues and come out on the other end safely and able to handle post disaster situations. Few reminders for your SHTF preparations - Put together a 72-Hour Grab-and-Run Every family should have at least one Grab-and-Run kit that can be thrown in the car on a moment’s notice, or carried on your back, if the need should arise. - Formulate a disaster plan whether you will bag in our bug out. When a disaster happen you need to ask yourself are you going to leave your home or not? What are you going to do? Do you know where you’re gonna go and how you’re gonna get there? The fact is that something could happen someday that could cause you to have to leave your home. Plan for it, come out with a plan because you need to assess the situation ,grab your equipment and gather your thoughts before you do anything. Your plan should also include your contacts (relatives, family friends, etc.) and a central meeting place where your family should meet if separated and local communications are cut. In case you decided to bug in,make sure you have all the necessities supply to keep you and your family safe. Preparations list Remember the whole key to survive a disaster is a prior planning and practice. Make sure that everyone in your family needs to not only know what to do when a disaster happen but they need to know also under what circumstances they should do what they need to do in order to survive.