News

What Do I Need for Weekend Camping?

News

What Do I Need for Weekend Camping?

by Camping OneTigris on Jul 30, 2026
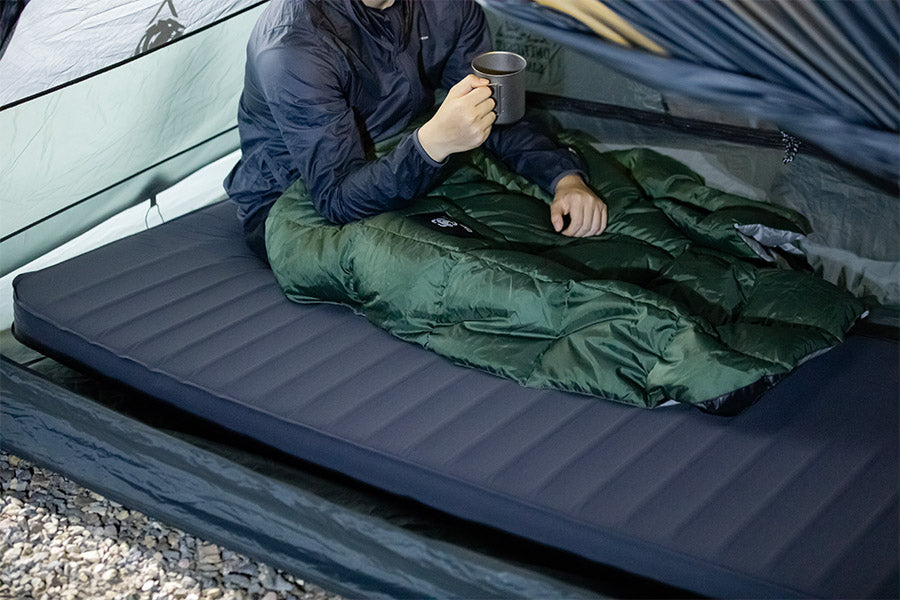
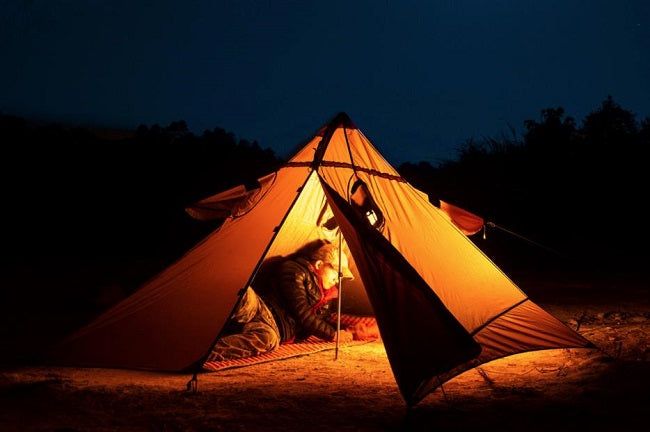
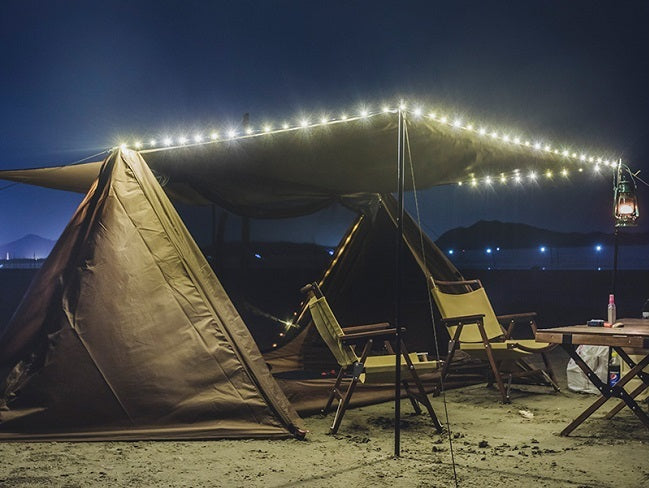
Planning a weekend camping trip? A comfortable camping setup doesn't need to be complicated. The essential gear includes: A reliable camping tent for shelter A comfortable sleeping system for better rest Camp furniture for relaxing outdoors Cooking equipment for preparing meals Lighting and safety gear for nighttime use With these essentials, you can create a practical and comfortable campsite for a one- or two-night outdoor adventure. Why a Good Camping Setup Matters ? A successful weekend camping trip isn't about packing more—it's about packing smarter.Many first-time campers either overpack unnecessary gear or forget essential equipment that affects comfort and safety. Building your camping setup around a few key categories makes packing easier, campsite setup faster, and your outdoor experience much more enjoyable.Whether you're camping at a national park, a campground, or beside a lake, the right setup lets you spend less time organizing gear and more time enjoying nature. What Makes a Good Weekend Camping Setup? A balanced camping setup should help you: Stay dry in changing weather. Sleep comfortably through the night. Prepare simple meals. Relax around the campsite. Stay organized without carrying unnecessary gear. Think of your setup as creating a small outdoor living space rather than simply bringing equipment. 1. Shelter: Your Outdoor Home Your tent is the centerpiece of any weekend camping setup.Choose a shelter that matches the number of campers while leaving extra room for gear. Good ventilation, waterproof materials, and quick setup can make a significant difference, especially if the weather changes unexpectedly. Recommended gear: Camping Tent Footprint Tarp  2. Build a Comfortable Sleeping System After a day of hiking or exploring, quality sleep is essential.Instead of relying only on a sleeping bag, combine several pieces of gear for maximum comfort: Camping Cot Sleeping Pad Sleeping Bag Camping Pillow Tips: Elevating yourself off the ground with a cot improves airflow in summer and keeps you away from uneven terrain 3. Create a Functional Camp Living Area One of the biggest differences between beginner and experienced campers is having a comfortable place to relax. A practical camp living area usually includes: Camping Chairs Folding Table Lantern Storage Box This creates a central space for meals, games, and conversations after sunset. 4. Bring a Simple Cooking Setup For a weekend trip, keep meals easy. Your cooking kit should include: Portable stove Fuel Cookware Water bottle Cooler Basic utensils Simple meals mean less cleanup and more time enjoying your surroundings 5. Lighting and Power Essentials When daylight fades, reliable lighting becomes essential. Bring: LED Lantern Headlamp Power Bank Charging Cable Spare Batteries These items improve both safety and convenience around camp. 6. Clothing for Changing Weather Weather conditions can change quickly, even during summer. Pack clothing that works as a layering system instead of bringing multiple heavy outfits. Don't forget: Waterproof jacket Warm fleece Hiking shoes Extra socks Hat Final Thoughts The best weekend camping setup isn't the one with the most gear—it's the one that helps you relax, stay organized, and enjoy the outdoors with minimal effort. Start with the essentials, build a setup that matches your camping style, and upgrade your gear over time. Whether you're planning your first weekend getaway or refining your existing kit, a thoughtful setup will make every camping trip more comfortable and memorable.
High-back chair vs. low chair: Which camping chair is right for you?

News

High-back chair vs. low chair: Which camping chair is right for you?

by Camping OneTigris on Jan 01, 2026
When it comes to camping, choosing the right chair can significantly enhance your comfort and overall outdoor experience. The debate over the pros and cons of high-back camping chairs versus low-back chairs has been ongoing, especially for campers who must balance comfort with portability. Some campers prefer the supportive design of high-back chairs, while others favor the flexibility of low-back chairs. This article will provide a detailed analysis of the features of both types and their optimal use cases, helping you choose the one that best suits your needs. What is a high-back camping chair? High-back camping chairs offer extended back support, making them ideal for prolonged relaxation. High-back chairs with headrests and ergonomic designs are more like outdoor lounge chairs. Those who enjoy reading, stargazing, or leaning back for extended periods will find them an ideal choice. There are also many portable high-back camping chairs available on the market today, which are not only comfortable but also easy to fold and store, with adjustable seat heights. The advantage of this is that when camping or vacationing by the beach, adjusting the height allows you to sit closer to the sand. If you are road-tripping or primarily staying at a fixed campsite, a high-back chair will undoubtedly provide you with a more comfortable experience. What is a low chair? By contrast, a low camping chair sits closer to the ground, offering excellent stability and a cozy vibe. Many campers love using a low camping chair for campfire nights since it keeps you closer to the warmth and creates a relaxed seating position. Low chairs are typically lighter and more compact, often folding down small enough to fit into a backpack. This makes them ideal for backpackers, solo campers, or when space is limited inside a tent.  That said, getting up from a low chair can be less convenient, especially after long periods of sitting. They’re often better suited for younger campers or shorter breaks during outdoor trips. How to Choose the Best Camping Chair for Your Adventure? If you prioritize comfort and extended relaxation, a high-back chair is the better choice; if you prefer portability, easy storage, and relaxing by a campfire or at the beach, low chairs and beach camping chairs are more suitable. When selecting a chair, consider the following key factors:- Weight and portability: Will you be carrying it on your back or transporting it by car?- Material and durability: Aluminum alloy and high-quality fabrics offer longer lifespan.- Usage scenarios: Family camping, campfire chairs, beach camping gear, or long-distance travel? Whether you pick a portable high back camping chair or a compact low camping chair, the right choice depends on your adventure style. Conclusion There is no standard answer when it comes to high-back chairs vs. low chairs. If you're looking for long-term comfort, go for a high-back chair; if you want something lightweight and versatile, especially for the beach, a low chair is the best choice. Either way, choosing the right camping furniture will make every outdoor trip more comfortable and enjoyable. 👉 Looking for the perfect camping chair for you? Explore OneTigris' camping chair collection, where you'll find the right option whether you're looking for a high-back chair, low chair, or portable model.
Hot Tent vs 4-Season Backpacking Tent: Which Is Better for Winter Camping?

News

Hot Tent vs 4-Season Backpacking Tent: Which Is Better for Winter Camping?

by Camping OneTigris on Nov 24, 2025
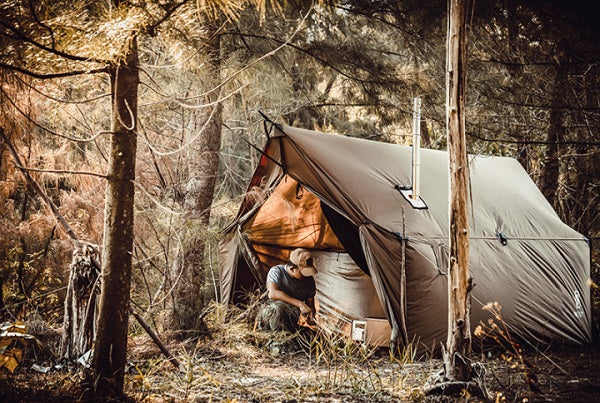
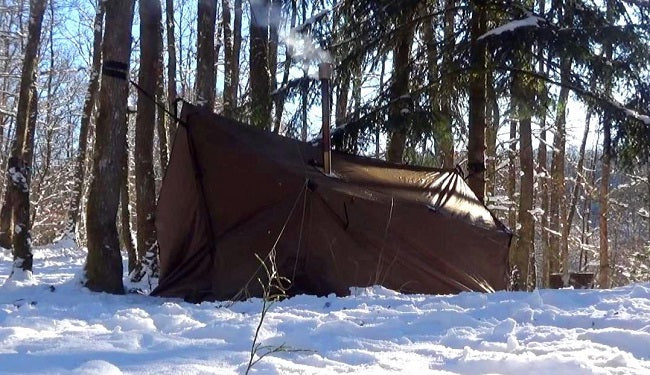
Winter camping brings a completely different outdoor experience—silent forests, crisp snow, and the peacefulness you can’t find in summer. But before you head out, choosing the right winter camping tent is the most important step. Two shelters dominate cold-weather camping today: The hot tent (a tent with a stove jack for heating) The 4-season backpacking tent (built for snow, wind, and alpine conditions) Both tents work for winter, but they serve very different purposes. This guide compares hot tent vs 4-season backpacking tent to help you choose the best shelter for your winter trips. What Is a Hot Tent? A hot tent is designed with a stove jack, allowing campers to set up a tent stove—often a lightweight titanium tent stove—inside the shelter. This creates a warm, cabin-like interior, turning winter camping into a comfortable and enjoyable experience. ⭐ Advantages of Hot Tents 1. Real heat inside the tentWith a stove, a hot tent can reach comfortable temperatures even in sub-zero environments. This makes it one of the best options for winter camping if warmth is your priority. 2. Multi-functional living spaceYou can cook, boil water, heat food, or dry wet gear inside. A properly ventilated winter hot tent setup becomes your entire living space. 3. Great for winter basecampsBecause hot tents are roomy and stable, they’re ideal as a winter basecamp tent for hunting, bushcraft, or multi-day camping. 4. Excellent condensation controlHeat from the stove reduces frost and moisture—one of the biggest problems in cold-weather camping. Drawbacks Heavier than backpacking tents Takes more time to set up Requires stove safety knowledge and ventilation Best for car camping, bushcraft, or short-distance hikes Best For Bushcraft & survival camping Multi-day winter basecamps Comfort-focused winter campers Car camping, overlanding, snow camping with a sled What Is a 4-Season Backpacking Tent? A 4-season backpacking tent is built to withstand snow load, strong winds, and freezing temperatures while staying light enough for long-distance hiking. ⭐ Advantages of 4-Season Backpacking Tents 1. Lightweight and packablePerfect for backpackers who need a backpacking tent for snow or alpine trails. 2. Built for harsh winter weatherSturdy poles, snow flaps, and low-profile designs keep the tent stable in storms. 3. Quick and easy setupIdeal for mountaineering, fast winter missions, and solo hikers. 4. Reliable shelter for mobility-based winter tripsIf you move camp daily, a hot tent becomes too heavy—this is where a 4-season tent shines. Drawbacks No internal heat source More prone to condensation Smaller interior area Fewer comfort features than hot tents Best For Solo backpackers Mountaineering & alpine winter routes Lightweight winter campers Anyone prioritizing speed & mobility Which Tent Should You Choose? Choose a Hot Tent If… You want maximum warmth You enjoy bushcraft, winter survival, or long stays You want to cook or heat inside your tent You travel by car, sled, or short-distance hiking You need a winter hot tent setup with a stove 👉 Pair with a titanium tent stove for best results(It’s lightweight, durable, and heats quickly.) Choose a 4-Season Backpacking Tent If… You hike long distances You camp in windy alpine environments You need a backpacking tent for snow You only need a place to sleep, not cook You don’t want to carry a stove Final Recommendation If your winter camping style is comfort-focused, enjoy cooking inside, or want a cozy heated shelter, a hot tent for winter camping is unbeatable. If your trips involve hiking, alpine routes, or lightweight movement, then a 4-season backpacking tent is the better option. Ultimately, both shelters are excellent—but the right choice depends on how you camp. Click to quickly jump to view Hot Tent → Learn more Backpacking Tent →Learn more
What is the Best R Value for a Sleeping Pad?

News

What is the Best R Value for a Sleeping Pad?

by Camping OneTigris on Apr 28, 2025
Every outdoor enthusiast knows that the biggest challenge of camping is not the wind and rain, but the freezing cold overnight. Many people think that a warm sleeping bag is enough, but they wake up shivering with cold. In fact, the real secret is hidden under your body - your sleeping pad, especially its r value insulation sleeping pads. To ensure that you will feel warm while sleeping (especially when the ground is cold), it is important to understand your sleeping pad's ability to resist heat loss to the ground. This resistance is called the R-value. The lab-tested R-value is a measure of resistance to heat loss. Generally speaking, the higher the R value, the better the warmth retention, which is crucial for cold weather camping. Conversely, the lower the R value, the lighter the sleeping pad, which is more suitable for summer or warm climates. 🔵 Quick Reference: R-Value 1.0–2.5 Summer Travel R-Value 2.5–4.0  Spring and Fall R-Value 4.0+ Winter, Snow, and Alpine Camping   When choosing a sleeping pad for your outdoor adventures, verifying its true R-value (thermal resistance) with ASTM F3340 certification is essential to ensure reliable performance – this globally recognized standard is trusted by top brands to cut through the misleading hype by providing lab-tested, comparable insulation data from -30°C to 20°C (-22°F to 68°F), ensuring your pad will keep you warm whether you’re camping, backpacking or mountaineering in the winter. Always prioritize independently verified R-values over unverified ratings to ensure optimal warmth in extreme conditions. Staying warm outdoors starts with smart gear choices and strategic setups. Layering sleeping pads—like placing a closed-cell foam pad beneath your inflatable sleeping pad—boosts insulation by trapping heat. Pair it with a properly rated sleeping bag for optimal thermal efficiency. Always pitch camp wisely, avoiding damp, low-lying areas and wind-exposed spots to reduce heat loss. For reliable cold-weather performance, the DREAMSTAR Sleeping Pad by OneTigris delivers advanced warmth with its 3-inch foam-filled core, reinforced sidewalls, and an impressive R-value of 6.3—effectively blocking ground chill while ensuring all-night comfort for backpacking, winter camping, or alpine adventures. Upgrade your sleep system with tested insulation and engineered durability for warmer, more restful nights under the stars. 🔗 View Full Details: DREAMSTAR Sleeping Pad by OneTigris When it comes to outdoor adventures, a good sleeping pad is an indispensable part of your survival equipment.Choosing the right R-value ensures you stay warm, safe, and energized—ready to enjoy every mile of your journey. If you’re looking for a reliable, 4 season sleeping pad that combines comfort, durability, compact size, and sophisticated design, the OneTigris DREAMSTAR Sleeping Pad is definitely one of the best choices on the market today. Are you ready to upgrade your sleep system?👉 Shop the DREAMSTAR Sleeping Pad Now  
50 SURVIVAL ITEMS YOU FORGOT TO PREPARE

News

50 SURVIVAL ITEMS YOU FORGOT TO PREPARE

by Cmaping OneTigris on Dec 14, 2024
If you’re reading this, you probably already know the basics: water, food storage, first aid, etc. But even hardcore survivalists can overlook things. In this post I want to mention 50 survival items you might have forgotten to buy. Hopefully it’ll remind you of a few things you still need to get. For everything on this list that you already have, give yourself a pat on the back. 1. Acoustic Instruments – For entertainment and morale. 2. Aluminum Foil – Great for all sorts of things like cooking food, boiling water, enhancing antennas, keeping sunlight out, etc. 3. Axes – How else will you chop firewood? 4. Baby Wipes – Really easy way to keep clean. 5. Baseballs, basketballs, footballs, etc. – Playing ball is a great way to stave off boredom and keep morale up during hard times. 6. Bicycle Gear – If gasoline is in short supply, you might need your bike to get around. That means you’ll need a bike pump, extra tubes, etc. 7. Book lights – It’s difficult to read by candlelight and you don’t want to waste your flashlight’s batteries. Book lights are cheap and last a long time. 8. Books – You might be surprised how much free time you have after the SHTF. Now’s your chance to read those books you always meant to read (like Atlas Shrugged). 9. Bug Spray – There is usually a major lack of proper sanitation after a disaster, especially if there isn’t running water. That means there will be more roaches and other critters. There might also be a lot more mosquitoes. 10. Bullion Cubes – These make boring meals much more delicious. 11. Calendars – You’ll need a way to track the day and date if the power is out for a long time. 12. Candy – Huge morale booster during difficult times. Just don’t overdo it. 13. Cast Iron Cookware – If you’re cooking over a fire, your regular pots and skillets won’t cut it. 14. Cloth Diapers – Other than the obvious usage, these are also great for cleanups because they’re so absorbent. 15. Clothes Lines and Pins – Because your dryer will be a waste of space. 16. Condiments – Imagine eating a typical meal without mustard, ketchup, soy sauce, hot sauce, etc. You’ll get bored fast. 17. Condoms – TEOTWAWKI is not a great time to get pregnant, but people still have needs. Use protection. 18. Cotton Balls – Great for first aid, cleaning, kindling, and many other things. 19. Duct Tape – A must have for any prepper. 20. Ear Plugs – It’s important to use these when hunting with firearms, but they’ll also help you sleep at night. Why? Because after the SHTF every little bump will wake you up. Just make sure someone is standing guard while you sleep. 21. Floss – It’s even more important than your tooth brush. If you’re not flossing now, get started. 22. Games – Board games, cards, crossword puzzles, jigsaw puzzles, and any other type of game that doesn’t require power. This is especially important if you have children. 23. Glasses and Repair Kits – If you wear glasses, make sure you have a backup pair and a way to fix them. 24. Glow Sticks – A great way to find your way around in a dark house. 25. Goggles – This includes safety goggles and swim goggles. You never know. 26. Hand Sanitizer – As I mentioned above, there might be a lack of proper sanitation after a major disaster. Stay germ-free. 27. Instant Coffee – If you’re hooked on coffee (like I am), then you’re liable to go crazy when your coffee pot won’t turn on. 28. Map of Your Town – Most of us have gotten used to relying on Google Maps and GPS, but those could become things of the past. Paper maps never stop working. 29. Paper Plates – So you won’t have to waste water cleaning dishes. 30. Pencil and Paper – These are historic times so keep a journal. Also important for games and making lists. 31. Pet Supplies. Don’t forget about your pets! There’s a detailed list of pet supplies in this post. 32. Plant pots – Plants are often easier to grow in pots than in the ground. 33. Plastic Sheeting – For repairing leaks, collecting water, keeping out contaminants, and much more. 34. Powdered Butter and Eggs – It’s amazing how many recipes require butter and/or eggs. These are hard to store long-term, so try some of the powdered variety. 35. Powdered Juice Mix – Because you’re going to get sick of drinking room-temperature water. 36. Saw – Axes are good for chopping firewood, but you’ll need a saw for everything else. 37. Sewing Kit – If your clothes tear, you might not be able to afford or even get access to new ones. Learn how to sew. 38. Shoe Laces – Again, you might not be able to get new ones. Plus, shoe laces have several uses. 39. Shut-off Wrench – Very important if you have gas power. A broken gas line is extremely dangerous. 40. Slingshots – Another way to kill small animals for food. 41. Snow Shoes – You’ll be trapped in a snowstorm without them. 42. Song Books – As with acoustic instruments (mentioned above), these are good for entertainment and morale boosting. 43. Survival Books – You’ll need this as a reference. Check out my post, The 10 Best Books On Survival. 44. Tampons – You really don’t want to be without these. 45. Tarps – Use them to keep stuff dry, provide shade, carry things, and so forth. 46. Umbrellas – Do you have one? If so, does it work well? And do you have extras for your family members? 47. Whistles – These can be a lifesaver if someone is under attack or lost. 48. Wind-up Clocks – So you don’t have to waste batteries. 49. Yard Bags – Heavy duty bags will be useful for all the trash and debris that accumulates. 50. Ziploc Bags – Great for keeping things dry and organized.   Source: urbansurvival
DOES HIKING MAKE YOU SMARTER? - THE WILDERNESS SOCIETY

News

DOES HIKING MAKE YOU SMARTER? - THE WILDERNESS SOCIETY

by Cmaping OneTigris on Oct 21, 2024
You may already know that your adventures in wilderness leave you feeling refreshed, less stressed and happier. It’s also possible they make you smarter.Preliminary results of a new study suggest that prolonged time in nature can boost mental abilities significantly. In an article published in Backpacker magazine, writer Elizabeth Kwak-Hefferan witnesses the phenomenon first hand as she serves as a test subject in neuroscientist Dr. David Strayer's study. Strayer wants to know what happens to the brain after a multiday wilderness hike. Past studies have shown mental benefits do occur after short periods in nature, but no one has looked at the effects of an extended trip into the wild. To get to his answer, Strayer, took a small group of backpackers for a multiday hiking trip in southeast Utah’s Grand Gulch Primitive Area. The hikers, including Kwak-Hefferan, took a cognitive test before heading out on the trail, then again after several days of backpacking. Results showed a 45 percent increase in mental abilities once the hikers had been out on the trail for three days.The theory, according to Backpacker, is that time in wilderness may inspire physiological changes, such as the release of certain hormones, or the use of different brain regions, allowing the overtaxed higher-thinking region of the brain to destress and restore clear thinking abilities. After initial tests in Utah, Strayer did another study on a larger group of Outward Bound hikers. This time, results, showed up to 50 percent increases in creative abilities. Of course, the author notes that some might say the vigorous exercise or unplugging from distracting electronics may have something to do with the results. But Strayer is just at the beginning of his research and hopes to have more answers in the future. Strayer’s studies may help explain why people commonly feel so great after hiking. This “caught up in the moment,” feeling, as described by Kwak-Hefferan, may increase our ability to focus. This is especially important as a kind of cure for the distracted thinking, typical of modern life. Daily routines are often rife with interruptions from numerous technological devices, constant advertisements and over-booked schedules. Nowadays, only by getting outdoors can you reap the rewards of living without constant distraction. The study suggests three days of wilderness exposure will net you the greatest benefits, but making brief but frequent backpacking trips could recharge your mental capacities as well, according to Backpacker. So if you are getting ready for exams or other mental challenges, the best preparation may be to take a break by hitting the trails. Weekend outings could provide the charge needed to perform at your best through the rest of your workweek. The implications of these studies extend well beyond your individual experiences. This research could provide greater support for employer flexibility, outdoor education and of course increased wilderness protection. Until then, you can begin reaping the benefits now by giving your brain the gift of wilderness.   Source: TheWildernessSociety
TIPS FOR THE BEST OUTDOOR EXPERIENCES FOR ADVENTUROUS COUPLES

News

TIPS FOR THE BEST OUTDOOR EXPERIENCES FOR ADVENTUROUS COUPLES

by Cmaping OneTigris on Oct 21, 2024
Many people say that traveling together can make or break a relationship, and the same can be said for camping.Camping is probably the best way to spend time with your loved onesHere are some tips to make you and your partner happy this camping trip. Communication: It's important to discuss what experience you both want out of the trip. If you don’t talk about it beforehand, you could end up being left behind in the tent with nothing but your beef jerky to keep you company. Camp Setup: Have one person take care of the inside of the tent and one person set up the outside. This avoids unnecessary critique of how the other does things.make sure both of you are contributing when setting up camp. The person stuck doing all the work will resent their partner, leaving room for bad feelings later on, so tasks should be divided before you start.Tips’’ Leave the headlamps, bug spray and toiletries right by the door so that you can get to everything you need when the time comes and there's no rummaging around in the dark.’’ Cooking: Just because you are out in the wilderness doesn’t mean that you can’t have a gourmet meal. Plan your meals before you leave and don’t forget all the spices and oils needed. Go through a checklist together and break down meals as well as snacks.Trail mix and fruit are great snack options, pancakes are quick and easy for breakfast and sandwiches are a snap to make for lunch Campfire: Nothing causes more heated discussions when camping (with anyone) than when people try to give advice about how to light a campfire. For the sake of your relationship, it's best to let one person take care of making the fire while the other waits patiently—and quietly—no matter how much they want to give their two cents. Clean Up: Teamwork is needed to make clean up easy so while one of you boils water to use for dishwashing, the other can go and fetch some water in your collapsible water jug for rinsing. Nobody likes cleaning, but we make sure to have a fresh glass of wine or an icy cold beer to sip on while we work. While one person washes, the other dries and within minutes we're free and ready to sit by the fire and reconnect with one another after a long week at work. Important Tip: Employ the rules you have at home for duties such as clean up. Camping is no time to be switching roles.
10 TIPS FOR CAMPING WITH KIDS

News

10 TIPS FOR CAMPING WITH KIDS

by Cmaping OneTigris on Oct 21, 2024
Going camping as a kid was the best thing ever. It was fun. It was easy. It filled my heart with joy. Going camping with kids can be magical too but it takes planning, patience, and a willingness to roll with whatever happens. Here are a few tips to make your next family camping adventure just a little more successful: 1. Put them to work – When you first get to your campsite, there’s a ton of work to do. It’s easy for kids to get bored while they wait for the tent to go up. But, even tiny kids can help with something, unloading the car, handing you tent pegs, or setting up camp chairs. It gives them something to do and gives them ownership over their own adventure. Chores that are torturous at home suddenly become fun when you’re camping. You know the phrase, “A spoon full of sugar helps the medicine go down?” A spoon full of dirt and campfire smoke helps turn everything into a game. 2. Put the screens away – My tent has an electrical outlet flap, a flap through which I can pass cords and cables to power all of my electronic devices. WHAT?! This is camping! With the allure of cell phones, tablets and gaming devices, it’s easy for “just one game” or “one last text message” to turn into a weekend you could have just as easily spent on your couch at home. If you’re in the woods to get away from it all, stay away from it all. Enjoy the wilderness, the family, the friends. Enjoy what’s real. 3. Marshmallows and hot chocolate – Some of the best things about camping are the treats. The memories associated with s’mores and trail mix are emotional. They are sugar-filled. They are magically delicious. Your kids will love planning, shopping for, and helping pack treats that they only get when you’re off the grid. 4. Tell stories – The screens are off. The fire is burning. You have a captive audience. Tell them about when you were little, about how you met their dad, about the greatest vacation of your life. They love these stories and the stories give them a sense of family identity. I recently heard renowned storyteller Donald Davis plead with parents to tell family stories to their kids. He said that kids will grow up whether we help them or not. They will get jobs, find spouses, obtain computers, get educations, whether we help them or not. However, if we don’t tell them our stories, they can never know them. We are the only ones who can tell them their history and the stories that made us who we are. He says there is only one rule to family storytelling – It doesn’t matter if they want to hear it or not. 5. Plastic Storage Containers – Organize the heck out of your camping gear. My favorite organization tip is to arrange all of your gear into kits that you keep at the ready. Keep the kits in plastic storage containers with a checklist of contents on the side. When you want to take a trip, just make sure each one is fully stocked and toss them in the back of the car. For example, the cooking kit contains matches, propane canisters, paper towels, hand sanitizer, sandwich baggies, trash bags, dishes and utensils, dish soap, peeler, knives, cutting board, towels, sponge, and a dish pan. 6. Cook food ahead of time – Whether you’re eating sandwiches, foil dinners, or scrambled eggs with potatoes and ham, prep and cook as much as you can in advance. Cook the meat most of the way and steam the rice or potatoes in your foil dinner. Cook your entire egg breakfast, put it in a Ziploc bag, and reheat it in a pan over your camp stove. Chop all your veggies in advance and slice the cheese for sandwiches. The more you prep ahead, the fewer dishes you’ll have to wash in the wilderness. 7. Let them carry their own hiking stuff – as you go for age-appropriate hikes, let the kids each carry their own backpacks with food, water and other supplies. This lightens your load and makes them feel like real campers. They love having the freedom to grab snacks when they feel like it and you will hear far fewer chants of “Mom. Mom. Mom. Can I have some beef jerky?” 8. Frisbees and balls and card games, oh my! – Stuff the gaps in between your duffles and sleeping bags with games and activities to do outside. Be creative. Late night Uno by the light of a Coleman lamp is an awesome outdoor activity. 9. Let there be light – Every person in the family should have their own flashlight. This seems obvious, but nearly every trip we get to the campground and realize we don’t have appropriate lights for each person, lights with working batteries, lights bright enough to light our way but dim enough that the 4-year-old won’t use hers to burn her siblings’ eyes out of their sockets. 10. Potty time – My best piece of advice for camping with kids is to save the nighttime potty break until the last possible second. I have had trips in which my kids used the restroom no fewer than five times in the night. This was unusual and aggravated by the fact that we were camped about seven inches from a very loudly bubbling stream. And it was uber lame. I’ve had the fewest nighttime biffy runs when I did the entire bedtime routine and then took them in their pajamas to the bathroom, walked them directly back to the tent, and dumped them into their sleeping bags. There is no such thing as a perfect camping trip, but every camping trip can be perfectly memorable and hopefully memorable for all the right reasons.
BEST WAY TO START A FIRE

News

BEST WAY TO START A FIRE

by Cmaping OneTigris on Oct 21, 2024
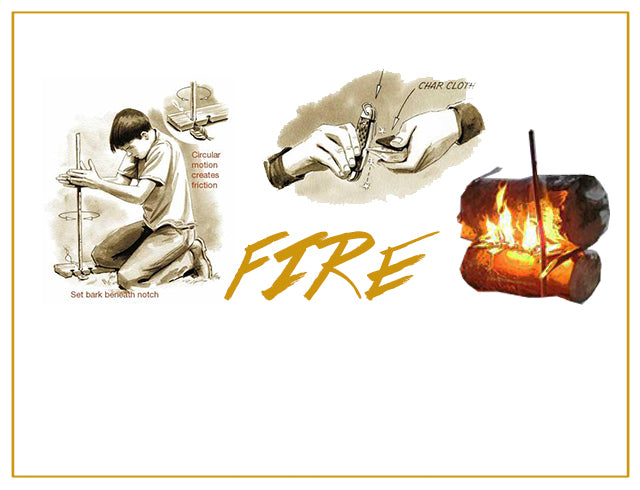
Friction-Based Fire MakingRubbing two sticks together is likely the oldest of all -fire-starting techniques, and also the most difficult. Besides proper technique, you have to choose the right wood for the fireboard and spindle. Sets made from dry softwoods, including aspen, willow, cottonwood, and juniper, are preferred, although a spindle made from a slightly harder wood, combined with a softer fireboard, can also work. The friction of the spindle against an indentation in the fireboard grinds particles from both surfaces, which must heat to 800 degrees before a glowing coal forms. This must then be transferred to tinder and gently blown to life. Hand DrillUsing a hand drill is one of the simplest friction methods, but high speed can be difficult to maintain because only the hands are used to rotate the spindle. It works best in dry climates.Step One Cut a V-shaped notch in the fireboard, then start a small depression adjacent to it with a rock or knife tip. Set a piece of bark underneath the notch to catch the ember.Step Two Place the spindle, which should be 2 feet long, in the depression and, maintaining pressure, roll it between the palms of your hands, running them quickly down the spindle in a burst of speed. Repeat until the spindle tip glows red and an ember is formed.Step Three Tap the fireboard to deposit the ember onto the bark, then transfer it to a tinder bundle and blow it to flame. Two-Man Friction DrillTwo people can do a better job of maintaining the speed and pressure needed to create an ember using this string variation of a friction drill.Step One Have one person apply downward pressure to the drill while the other uses a thong or shoelace to rapidly rotate the spindle.     Fire PloughThis produces its own tinder by pushing out particles of wood ahead of the friction.Step One Cut a groove in the softwood fireboard, then plough or rub the tip of a slightly harder shaft up and down the groove. The friction will push out dusty particles of the fireboard, which will ignite as the temperature increases.     Pump Fire DrillThe Iroquois invented this ingenious pump drill, which uses a flywheel to generate friction. The crossbar and flywheel are made of hardwood; the spindle and fireboard are made from softwoods (as in the hand drill).Step One Bore a hole in the center of a rounded piece of hardwood and force the spindle in so that it fits tightly. Select wood for the crossbar and bore a larger hole that will slide freely on the spindle.Step Two Attach the crossbar to the top of the spindle with a leather thong or sturdy shoelace.Step Three Wind up the flywheel so that the thong twists around the spindle, then press down. The momentum will rewind the crossbar in the opposite direction. Repeat until friction creates a glowing ember.   Bow DrillOf all the friction -fire-starting methods, the bow drill is the most efficient at maintaining the speed and pressure needed to produce a coal, and the easiest to master. The combination of the right fireboard and spindle is the key to success, so experiment with different dry softwoods until you find a set that produces. Remember that the drill must be as hard or slightly harder than the fireboard. Step One Cut a notch at the edge of a round impression bored into the fireboard, as you would for a hand drill. Loosely affix the string to a stick bow, which can be any stout wood. Step Two Place the end of a wood drill the diameter of your thumb into the round impression, bear down on it with a socket (a wood block or stone with a hollow ground into it), catch the drill in a loop of the bowstring, then vigorously saw back and forth until the friction of the spinning drill produces a coal. Step Three Drop the glowing coal into a bird's nest of fine tinder, lift the nest in your cupped hands, and lightly blow until it catches fire.   Via fieldandstream
WHEN SHTF…TIPS FOR SHTF-PART 1 STARTING FIRE

News

WHEN SHTF…TIPS FOR SHTF-PART 1 STARTING FIRE

by info onetigris on Aug 28, 2024
When SHTF, sometimes we need to get creative. While you may not have all of these items on hand, I just wanted to show you what you can do with items you may be able to scavenge and a little ingenuity (MacGyver anyone?). Ok, so after watching this video, you may not be running to the store to stock up on lemons, but I thought it was an interesting one. But I thought this was a pretty clever, although not terribly practical idea. While you may not have these types of items lying around (zinc nails anyone? :)), it just goes to show you what might be possible if SHTF. HOW TO MAKE FIRE WITH A LEMON – FACT OR FICTION? HOW TO MAKE AND START A FIRE WITH FLINT & STEEL   Source: shtfpreparedness 
"COSMITTO" BACKPACKING TENT

News

"COSMITTO" BACKPACKING TENT

by info onetigris on Mar 15, 2024
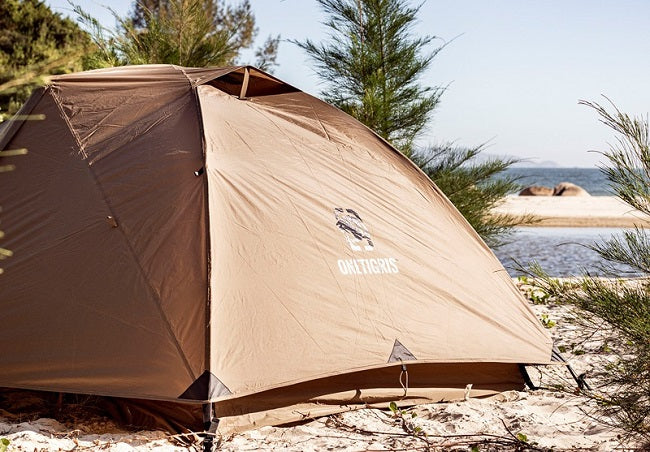
We don’t know about you, but we are all absolutely more than ready for a good “weekender”, a full weekend of airsoft where we can reconnect with many of our friends in the playing community and just have some good old-fashioned BB fun! If course being at a weekender means that you need somewhere to rest your weary head after all day running and gunning, and we have a credo that we live by at Airsoft Action, that of “any fool can be uncomfortable”! So if you’re looking for a new companion for those post-game nights we’d suggest that you check out the new OneTigris COSMITTO tent, as their gear is first-rate! Featuring the most straightforward setup method via flexible poles that cross at the top of the dome and are securely anchored to the floor on all 4 corners, the 3-season COSMITTO comfortably fits 2 adults and can be used from early spring to late fall, with 1500mm waterproof rating and a nylon mesh bug net, and it is highly recommended for those that need a quick and easy setup. In aerial view after setup the tent looks like a perfect 6-sided diamond, offering solid wind resistance and a balanced, symmetrical shape. Inside the COSMITTO you’ll find two large organizer pockets for storing your gear, and a handy outdoor nightlight attachment point at the top.  OneTigris COSMITTO Backpacking Tent - 20D Plaid Ripstop-polyester construction with 75D nylon tent bottom offering rugged durability - Waterproof coating with 1500mm waterproof rating and rip resistance with quality YKK®snag-free zippers - Two #7001 aluminum alloy frame poles and one center pole that can be easily assembled for a quick and steadily anchored setup - 3-Season design with a nylon mesh inner tent to keep the breeze in and the bugs out - 2ft by 4.3ft by 3.6ft space for 2 people with front and rear zippered entrances - Two large gear organizer pockets and one tent light attachment point inside the tent - Hexagon shaped outer tent for solid wind resistance and stability in shelter structure - Protective tent corners to prevent sideway winds from disturbing campers’sleep - Suitable for backpackers, everyday campers and families looking for easy setup tents Specifications Material: 20D Plaid Ripstop Polyester Outer Tent, 70D Nylon Tent Bottom, 40D Nylon Mesh Inner Tent, YKK® Zippers, #7001 Aluminum Alloy Tent Poles Waterproof Rating: 1500mm Dimensions: Setup 7.2ft*4.3ft*3.6ft/2.2m*1.3m*1.1m; Folded 23.6”*6.3”/50cm*16cm Weight: 5.4lb/2450g Although shipment delays are possible during the coronavirus (COVID-19) pandemic, OneTigris works with multiple shipping companies to speed up the process and to fulfill worldwide shipments, and thus far anything that we’ve ordered from them has arrived in a timely fashion; the COSMITTO benefits from FREE SHIPPING, so if you’re in need of a new weekender tent, or even one for your non-airsoft adventures, then this new model is most certainly worth a look! Credit: Airsoft Action 
SHORT GUIDE TO WINTER CAMPING GEAR

News

SHORT GUIDE TO WINTER CAMPING GEAR

by info onetigris on Sep 28, 2023
In our opinion, autumn and winter are the best camping seasons, and the gear you need varies with each different trip. How do you prepare for camping in the snow/cold? Roc from Team 1TG is here with solid winter camping gear tips. Grab a seat and lend us your ears... #1 Woodland Trekking Trips When trekking to your camp spot, consider the tarp + camping hammock + under-quilt setup, which should only weigh around 6.6lb (3kg). Trekking trips in summer or autumn mean milder weather, and an outdoor tarp with portable hammock combo is the ideal way to go. Trekking in colder weather? Throw in an under-quilt to the sleep system and you're good.   In addition to using an under-quilt with your hammock setup, add the 4th item of a sleeping bag for when temperatures go as low as 41°F/5°C. The benefits of hammock camping is that you can still do it on uneven campgrounds, and the tarp will shelter you from rain while you cook and continue to enjoy the outdoors. When the time comes to depart, you don’t have to fret over wet gear, and can take your time as you pack up your hammock and under-quilt in the comfort of a tarp shelter. Photo Credit: @iReviewGear #2 Cold-Weather Camping Trips When out snow camping, pyramid tents are ideal, such as the 4.2lb IRON WALL Winter Tent - lighter if used without the inner tent - because its shape has better wind resistance to others and can retain heat in freezing temperatures. #3 Camping Trips by Car When going camping to a wooded area by car, Roc recommends hot tent camping with a wood burning stove. Portable camping stoves help heat up your winter tent in cold weather and the walls of the tent retain heat to keep you cozy. Hot tents offer bigger space and may fit up to 2 camp cots, or simply use a ground sheet and you're in for an extra toasty night. The OneTigris Camping Cot has utility loops and side pockets for holding tools, phones and other personal items. Different kinds of trips require different setups, but with the right setup, all trips will be equally enjoyable.  ©OneTigris All Rights Reserved
"TEGIMEN" HOT TENT/HAMMOCK AWNING USER REVIEW (VIDEO)

News

"TEGIMEN" HOT TENT/HAMMOCK AWNING USER REVIEW (VIDEO)

by info onetigris on Feb 18, 2023
Excuse my English!  Two days ago I received the Tegimen tent. On the same day as the post brought the new tent, I had to go into the forest to test it. Regardless of -18°C I went up to the plateau. The expectations for the tent were exceeded, the cold night was a positive experience, although the Poshenhonka tent stove in the large room had trouble heating above 10°C. The tent was very comfortable. Very good workmanship, easy to set up: high praise! I have uploaded a short clip on YouTube: (Can't see video? Click here to watch it on YouTube.) Have fun watching it! 
"TENTSFORMER" PONCHO SHELTER USER REVIEW (VIDEO)

News

"TENTSFORMER" PONCHO SHELTER USER REVIEW (VIDEO)

by info onetigris on Jan 04, 2021
Santa brought me the Tentsformer as I had my eye off and on it for a while. I'm not the best at editing but here it is in sub zero temperatures. I absolutely love it though! I did order a cheap mesh net to drape over it in the summer when the Scottish midge comes back.
BACKWOODS BIKER MAGAZINE ON 1TG SHELTERS

News

BACKWOODS BIKER MAGAZINE ON 1TG SHELTERS

by info onetigris on Dec 31, 2020
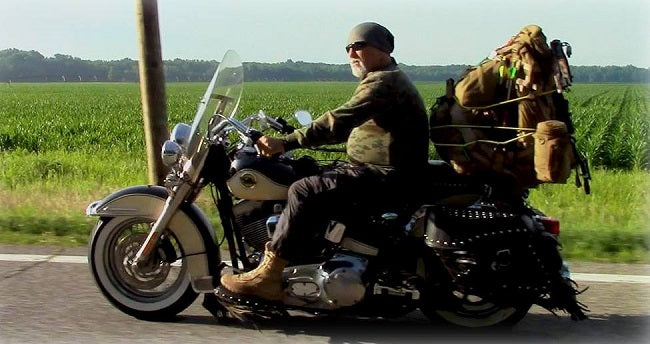
It is with great honor we are sharing the December Special Edition of the Backwoods Biker Magazine, featuring the IRON WALL Chimney Tent on the front cover. Backwoods Biker is dedicated to the men and women of the world who love to ride motorcycles and enjoy the outdoors. Don't SURVIVE when you ride out into the wilderness or bush...THRIVE! The way you do that is to be PREPARED. Subscribe to their channel and learn the necessary techniques, tactics, tips and gear that the pros all use. Don't get caught without what you need! Special thanks to Tony Suits and the entire crew of the magazine.  Backwoods Biker's video reviews on the IRON WALL Chimney Tent and BACKWOODS BUNGALOW UL Super Shelter 2.0: (Can't see video? Click here to watch it on YouTube.) (Can't see video? Click here to watch it on YouTube.) All Credits to Backwoods Biker. Learn more on their website, Facebook page, and YouTube channel.
EVIL EYED ROCUBOID SPLICING STOVE USER REVIEWS

News

EVIL EYED ROCUBOID SPLICING STOVE USER REVIEWS

by info onetigris on Dec 07, 2020
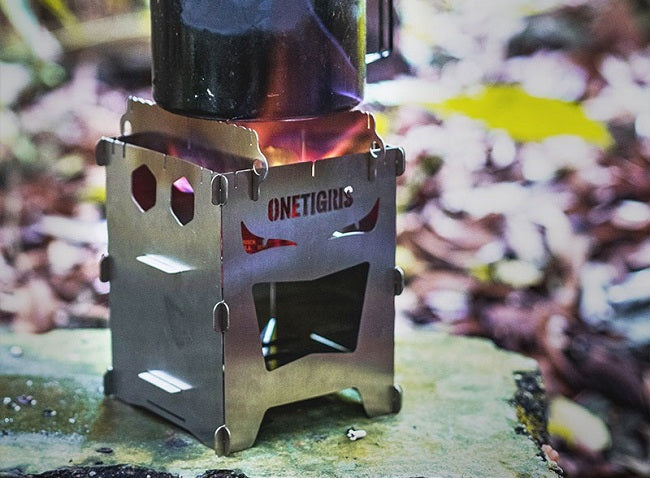
Wild camping Scotland. Out in the forest in the rain to do a review and comparison of the two OneTigris Rubicoid wood stoves, the original and the new evil eyes. Cooking up some bushcraft breakfast. Credit: @Colin Russell Scottish wild camper I was selected to test the Rocuboid Evil Eyes stove which I have now had the pleasure of doing. I already own the original Rocuboid so used this for comparison. Firstly, the case. The material is of a great quality and the Velcro is certainly strong enough. It does everything it should to house the stove and keep it ready for the next use. I love the colour but, cant help but think a darker tone or even black would be better just due to the fact that your putting a fire blackened and sooty stove away. Now, the stove. The size of the evil eyes stove is much more usable than the original due to the larger feeding hole and the bigger top surface area. The material gets a thumbs up for me, would take this over titanium any day. Just feels more substantial and like it is made to last. The stove does what it should. Its great for making a brew or cooking on with a pan or grilling rack. Gives a great effect when glowing from those evil eyes. The only thing I was let down by (not massively) was the smaller corner joints if you will. Once the stove has been heated and warped (as to be expected) the corners do not want to stay pushed together so well or, keep springing apart. I believe that the larger square ones like on the original smaller Rocuboid would be much better and would hopefully eradicate this small problem. Other than that, may if not on this model, the offering of a small grill that's made to fit the top so you don't have to take an extra piece out would be a nice touch. Other than that, I love the look, feel and style of the stove and look forward to many more uses. Credit: @Tatt282, 1TG
"ROCUBOID" SPLICING STOVE REVIEW

News

"ROCUBOID" SPLICING STOVE REVIEW

by info onetigris on Sep 24, 2020
Just the Facts: Why Choose OneTigris ROCUBOID Splicing Stove? Once again a highly versatile piece of kit from ROC for bush crafters and fellow outdoorsmen to get dirty with. Constructed from premium quality #304 stainless steel, laser cut into perfection, this stove can be set up in multiple ways depending on your creativity and preference, and dismantled for easy carry like a folded treasure map. Note that it’s superior to ones seen on the market that are small, cheap, and rust easily, and this one has a nylon case to keep it protected when not in use. Use the ROCUBOID as a wood, alcohol or fuel tablet stove, windshield, Finnish/Swedish torch, or pair it up with a hanging camping pot turned to an outdoor oven. It’s a simple yet solid design that only takes a minute to set up. Get the ROCUBOID and get creative.   Premium #304 stainless steel construction of durability and high resistance to corrosion and rust 72mm laser-cut pieces, 8 pieces per unit, quality and precision guaranteed for outdoor configurations A plethora of ways to use for setting up as a wood/alcohol/fuel tablet stove, windshield, Swedish torch and so on Can be used with a hanging camping pot as outdoor oven kit for baking bread and other delicacies Weighs merely 18oz (511g) and packs up small (6”*6.5”*0.5”) Folded – 6.1”(L)*6.5”(W)*0.4”(D)/15.5cm*16.5cm*1cm (Encased) Setup – 4.7”(L)*4.7”(W)*6.7”(H)/12cm*12cm*17cm Can be dismantled into separate pieces and stacked up for easy storage and efficient carry Comes with coyote brown nylon casing My Story:   If you are looking for another neat piece of gear to add to your collection that is highly versatile, compact, and tough check out the ROCUBOID Splicing Stove from OneTigris. This stove is something that came be thrown under the seat of your truck or in a storage compartment on your boat that can easily be used in most environments. If you need to heat up a meal, a hot cup of coffee or your hands the ROCUBOID is ready for your adventures.   The ROCUBOID showed up at my house and like any new piece of gear I immediately tore into the box and put it together to check it out. Like most people I didn’t look at any directions or visit OneTigris web site see the best way to put it together. I figured I was up for the challenge. It’s a small collapsible stove it can’t be that difficult to set up right?! I’ll be completely honest it took some work to figure out the best way to put it together the first time. I could figure out how the pieces fit together and where they all went easy enough but trying to get the “shelves” inside the stove and get the outer pieces locked into place was a bit of a struggle. After a few minutes and another set of hands helping to hold stuff in place I was able to get the stove together and sit back and admire it. There are many options for how to put the stove together. My plan from the beginning with this stove was to figure out how it would fit into my outdoor gear. I think the overall versatility in configurations and usages of the stove is great. This stove can be used in so many different ways that I knew it would be a valuable addition to my gear, the question was just in what way would I like it best. I threw the stove in my truck ready for the next adventure that might come my way. It was not long until I found myself heading up to the mountains with a buddy for a scouting day trip. I grabbed the ROCUBOID splicing stove, a titanium cup and some tea and through it in my pack to be used on a break during the days hike. The morning wore on and the miles begin to stack up. We found ourselves next to a spring that had been built up to create a water hole for cattle and wild animals. We sat down to rest a few minutes, so I pulled out the ROCUBOID Splicing stove and went to work putting together the puzzle. Within a few minutes I had the stove put together in the configuration desired to heat some water for tea. I scavenged around the immediate area collecting up some twigs, small sticks, and dried grass for fuel. I wanted to use the base plate with air vent holes near the top of the stove to try to choke back the flames a little to keep ash and soot from getting in my cup of water. The only issue with this is to initially load the stove with fuel I had to take off one of the outer walls, pack the inside of the stove with the fuel, and then put it back together. Not the most convenient way to do things, but it worked and served its purpose. Within a little bit I had a piping hot cup of tea to enjoy while taking in the mountain scenery. The next chance I had to use the stove was during a bass fishing trip on my boat. I threw the stove and a couple dehydrated meals in the boat in case we wanted to stop for a bite to eat. As the sun got higher in the sky and the bite slowed down, we went exploring up the shoreline of the river in search of new fishing spots that showed some promise. During our exploration we stopped in a deep cove to cool off for a bit. I pulled out the ROCUBOID Splicing stove, gave my friend a few instructions on how to set it up, while I went about looking for some wood fuel to burn. After a few minutes I had a pile of wood that was more than adequate for our needs. I brought the wood back to the stove to find that although close, it wasn’t quite together yet. With a little help we finished getting the stove together and the fire lit. With the water heating over the flames we jumped in the river for a quick dip while waiting for the water to boil. With this type of stove, you do have to be a little more patient when cooking. The open flames from wood does not tend to heat things as quickly as a pocket gas fuel stove. Not being in much of a hurry this was no matter to us. We reloaded the stove with a few more sticks and went back to the water. After a bit, the water was at a nice rolling boil, so we prepped our meals and dried off and filled our bellies.   The ROCUBOID Splicing stove 8 pieces, 4 outer structure pieces and 4 inner/top pieces. The inner pieces can be put together in many varying configurations depending on what your desires are for the stove. It can easily be set up to have direct flame on the cookware, or have the flames chocked back a bit for indirect heat. The top pieces can be used, or not and can be set close or wide depending on the width of your cookware. You can leave the top wide open and use the stove a small contained warming fire. The uses and possibilities of this product are numerous. With so many uses and a few small setbacks it took me a bit to figure out exactly where the stove fit into my world. I can tell you I found a few spots where this stove fits very well. The flat compact broken down stove packs nicely into small spaces and takes up very little room. There are a few things that came into consideration on just how and when I planned to use this stove more. Coming in at 18 oz, this stove is not heavy, but it does weight more than comparable products by other companies made of titanium or aluminum. The stainless steal material does make this stove tough, and keeps the cost relatively low, but if you are an ultralight backpacker this stove is probably not what you are going to be taking deep into the back country. Cooking with wood tends to be a bit slower than using a gas stove. To get water boiling you will be at it a little bit longer than with other products. Another thing to consider is the smell. Cooking with an open wood fire definitely keeps the scent strong on the product for a few days after use. After my first use of the stove I through it back under the seat of my truck only to come back the next morning and have to throw it in the bed as my whole truck smelled strongly of campfire. These factors are not the end of the world as there are still so many versatile uses for the stove. The niche where the ROCUBOID fits best in my life is on my boat. I have a hunting/fishing boat that I get out on the water very frequently year-round to enjoy. Having the ROCUBOID splicing stove is perfect for boat life. It is very compact and easy to store in one of the compartments on board. The smell of campfire on an open-air boat is not an issue at all. If you are out fishing and want to cook up some chow or your fresh catch you need only gather a few sticks and in minutes you are on your way to cooking. If you are out during the colder winter months the ROCUBOID is perfect for holding a small warming fire while you are in the blind or out and about. The ROCUBOID splicing stove has found a permanent home on my boat. I am excited for the weather to cool off to use this product more.     Find It Here: https://www.onetigris.com/rocuboid-splicing-stove.html     What Could Be Done Better:   This stove is a bit cumbersome to put together with on person. A second set of hands is beneficial to hold pieces in place while setting it up. (It does get a little easier to put together the more you do it.) I would like to see it made of titanium or other lighter weight material. It is heavier than other comparable products, and heavier than a gas pocket stove making it not as ideal for taking into the back country.   Credit: ireviewgear.com     About Johnny LeMaster   Johnny is a life long enthusiast of the outdoors. His passion and background have lead him to experience the outdoors from a multitude of adventures. You will typically find him hunting, fishing, backpacking, or hiking somewhere in the world unspoiled.  
"OUTBACK RETREAT" AND "SMOKEY HUT" REVIEW (VIDEOS)

News

"OUTBACK RETREAT" AND "SMOKEY HUT" REVIEW (VIDEOS)

by info onetigris on Sep 24, 2020
(Can't see videos? Watch them here.) Product Link: www.onetigris.com/outback-retreat-camping-tent.html Credit: @Mechelle, 1TG (Can't see video? Watch it here on YouTube.) Product Link: www.onetigris.com/shelters/smokey-hut-chimney-tent.html Credit: @Mechelle, 1TG
ROC PONCHO SLEEPING BAG

News

ROC PONCHO SLEEPING BAG

by magease magease on Jun 24, 2020
  Just the Facts:   Why Choose OneTigris ROC Poncho Sleeping Bag?   A cloak sleeping bag can be one of the most versatile piece of kit on your gear shelf. This one functions primarily as an insulated winter cloak for the day and windproof sleeping bag for the night, with extra large pockets for toasting your hands and keeping your belongings secure, and a cordstopped hood for extra windy weather. It’s made from the same material as our camping quilts with SEE® polyester filling and can be spread out as a camping blanket or configured into a hammock under-quilt. For campers slightly above average height, it measures at 6.8ft by 5.2ft when spread out, and it’s small and compact when rolled up into its own stuff sack for easy carry.   l 210T plaid dacron shell, 210T polyester pongee lining, and layered SEE® Polyester Filling for extra warmth l Multiple uses as an insulated cloak, sleeping bag, camping blanket and hammock under-quilt l Large utility pockets to keep your phone, hat and other items secure when worn as a cloak l Hood can be fastened via bungee paracord to keep the cold and wind out l Snag-free YKK® zippers with dual zipper pulls for heightened convenience and quality use l Extra wide 31.5” width when used as a sleeping bag with configurable footbox via bungee paracords l Measures at 6.8ft by 5.2ft when spread out as an outdoor quilt l Suitable for 59°F -68°F (15-20°C) temperatures       My Story:   I love a piece of gear that serves more than one use. Especially one that is lightweight and compact that can be used in a variety of situations and in a wide range of weather conditions. This is the kind of thing that finds its way to the front of my closet, and the top of my gear pile whenever I venture out. The ROC Poncho Sleeping bag by OneTigris fits this bill. It has so many uses designed into it that you can’t help but take it with you because you will use it. If you look for gear that you will use no matter what the season or situation you need to check out the ROC Poncho Sleeping Bag.   When I first heard about the ROC I was intrigued. Here was a poncho that could also be used as a sleeping bag. I will be honest the first thing that came to my mind was the woobie from my days in the infantry. To this day it is one of my favorite things every created. I got on OneTigris’ website and started reading about the ROC. Not only did it serve as a poncho for cold weather, a sleeping bag in warmer weather, but it is also set up to be used a sleeping quilt, and my personal favorite usage, as an under quilt for a hammock. Hammock camping happens to be one of my guilty pleasures, so now I was hooked. The versatility of the ROC had me really excited to get my hands on one and check it out.   My first trip out with the ROC was an elk shed hunting trip up into the mountains in early spring. I headed out of town with a buddy and our dogs to spend a weekend hiking the hills and enjoying social distancing the best way, in the great outdoors. It just so happened that this trip also happened to involve another incredible piece of gear from OneTigris, the Iron Wall Tent. When we were packing for the trip in early April I wasn’t sure exactly how to pack so I brought stuff for just about every weather situation. The weather all week was approaching 70°F, but the weekend was looking to be a bit cooler with some cloud coverage. As it turned out the weather did not disappoint, the night before our trip it snowed about 3-4 inches in the higher elevations we were planning to camp. We got to our spot Friday after work. I set up the Iron Wall Tent with a wood stove, collected up some dry wood I could find, laid out my ground cloth, sleeping pad and ROC. I have used a tipi with a wood stove a number of times on past trips and fully expected to be more than comfortable with the warmth no matter how much snow was on the ground around me. The ROC would be perfect to sleep with the additional wood heat. With camp set up we headed out for a couple hours of hiking and glassing before dark.   With no luck that evening we headed back to camp to sit around the campfire, cook some food and settle in for the night. It did not take long sitting by the fire in the cold wind waiting for our food to cook and I was grabbing the ROC poncho. I unzipped it, slipped my head through the hole and tried to figure out exactly how the straps were supposed to be used to give you a sleeve and keep the ROC near your body. This is where I failed. I could not find a comfortable way to use the side straps no matter how I tried. If I put them the way it looked like the pictures showed it being used, they restricted my movement and made it hard to reach forward. If I ran them around the front, now it opened up the sides to make them more substile to the wind. After a few minutes of fumbling without success I gave up, let the straps dangle at my sides and just let the poncho do its thing. Happy to have my upper body and legs covered and protected from the wind while watching my friend inch closer to the fire for warmth I knew this was going to become a favorite of mine.   After dinner we sat around for a little bit discussing the plan for the next day before calling it a night. I wandered back to the Iron Wall tipi, lit the stove and worked on getting it adjusted right before getting my dog set up with her bed and zipping the ROC back up and pulling the synch cords at the bottom to turn it back into a sleeping bag. I was right this bag was the perfect rating to be sleeping in a tent with wood heat. I didn’t want a 0°F bag, although I brought one with me, in a tipi that was somewhere between 70°F and 90°F ambient temperature at any given time. I dozed off into dream land and slept comfortably for the first half the night waking up every hour or two to add more wood to the stove. Somewhere around 2 am the fire in the stove completely went out before I woke to restock it. The temperature in the tent had tipped to around freezing which is what woke me. I was getting a bit of a chill, although I wasn’t freezing myself it was just bordering between being cold and being ok. I was over the convenience of the wood stove and having to keep loading it every so often. So I must admit at this point I took the ROC unzipped it and made it into a quilt, draped it over my dog to give her some warmth and climbed into the 0° sleeping bag I had brought to get through the rest of the night.   When I sleep in the outdoors, I cannot sleep in. I never can understand people that can. I am up with the sun. I wake to the light coming through the tent and the birds chirping every time. I actually enjoy it. It usually means I get an hour or two to myself to just enjoy the peace and beauty of my surroundings uninterrupted by another human. Well this morning I woke as usual but was unwilling to crawl out of my sleeping bag into the cold. I started the fire in my wood stove and lay there for a while just enjoying the heat before I decided to crawl out, put on my clothes and go start a fire in the fire pit so my friend could enjoy some warmth when he had to crawl out of his cold tent. Putting the ROC poncho back on I chopped up some kindling, started a fire and heated some water for coffee. Soon enough my friend joined me woken by the crunching of snow under my feet as I wandered around looking for dry wood. Although he appreciated the fire, he was a bit jealous of the ROC and the extra insulation it provided on this crisp morning. After downing some liquid energy, and food I put the ROC back in the Iron Wall grabbed my pack and headed out for a fun day’s hike hoping to find some elusive sheds.     This was the first experience out with the ROC and it did not disappoint. It was the perfect piece of gear to take on this trip. It kept me comfortable during the nights and provided the extra warmth to take the edge off the crisp weather when up and around camp. The ROC has found its way on a few trips since. One trip hammock camping, where as a reviewer I completely failed and didn’t get a single picture of the ROC being used as an under quilt. And it has also been of a few trips with a good friend and her son.   As soon as I pulled the ROC while camping with the two of them, they immediately starting laying claims to it. Every trip with them has gone the same. I bring the ROC and then get to sit by and watch as one of the two of them always has it in use during the most opportune times. Its usually a pretty comical battle as the two of them “fight” over who gets to use it with the 8-year-old typically winning. At this rate I am going to need to get at least one more so that I may get the opportunity to use one when camping with them.   The ROC is a great piece of gear that will be loved by everyone and will have a place on any and all camping trips that you find yourself on. OneTigris has one of the most versatile items that you never knew you needed, but once you discover it you will be thankful you made the best decision to own.           Find it here: https://www.onetigris.com/roc-poncho-sleeping-bag.html     What Could Be Done Better:   The only thing I would like to see different would be the side straps when used as a poncho. It may just be complete user error, but I would almost prefer some simple snaps or straps another configuration of the straps that still provided for full mobility. Other than that, I have nothing I would want to see any different with the ROC.     Credit: ireviewgear.com         About Johnny LeMaster   Johnny is a life long enthusiast of the outdoors. His passion and background have lead him to experience the outdoors from a multitude of adventures. You will typically find him hunting, fishing, backpacking, or hiking somewhere in the world unspoiled.
"ROCUBOID" SPLICING STOVE

News

"ROCUBOID" SPLICING STOVE

by magease magease on Jun 11, 2020
(Video Credit: Colin Russell Scottish wild camper)   Once again a highly versatile piece of kit from ROC for bushcrafters and fellow outdoorsmen to get dirty with. Constructed from premium quality #304 stainless steel, laser cut into perfection, this stove can be set up in multiple ways depending on your creativity and preference, and dismantled for easy carry like a folded treasure map. Note that it’s superior to ones seen on the market that are small, cheap, and rust easily, and this one has a nylon case to keep it protected when not in use. Use the ROCUBOID as a wood, alcohol or fuel tablet stove, windshield, Finnish/Swedish torch, or pair it up with a hanging camping pot turned to an outdoor oven. It’s a simple yet solid design that only takes a minute to set up. Get the ROCUBOID and get creative.     | Premium #304 stainless steel construction of durability and high resistance to corrosion and rust l A plethora of ways to use for setting up as a wood/alcohol/fuel tablet stove, windshield, Swedish torch and so on l Can be used with a hanging camping pot as outdoor oven kit for baking bread and other delicacies l Weighs merely 18oz (511g) and packs up small (6”*6.5”*0.5”) l Can be dismantled into separate pieces and stacked up for easy storage and efficient carry